Thursday, June 30, 2011

It's Sew Easy! Paper Crafting With The SewEasy Stitch Piercer

Posted by happayscrappay (Rachel):

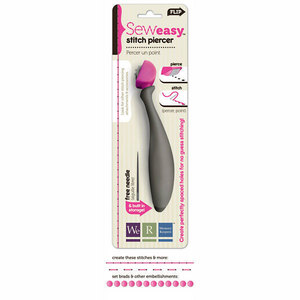
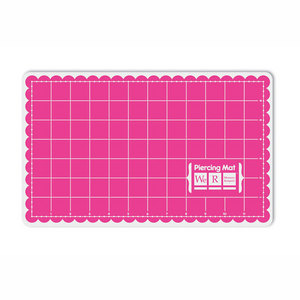
If you have thought about hand stitching on your pages or projects, then the Sew Easy by We R Memory Keepers is the tool for you. The tool is designed to perfectly fit in your hand and when rolled across paper placed on top of the piercing mat, places perfectly splaced holes in your paper.  

The rest is up to you - just fill in the holes with thread of your choosing or some of the wonderful WRMK floss.  Grab your needle and thread because you're going to want to try out some of these simple ways to use the Sew Easy on your next project. 

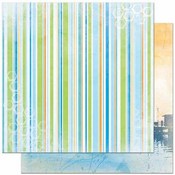
A Boy's Life - example of a simple border

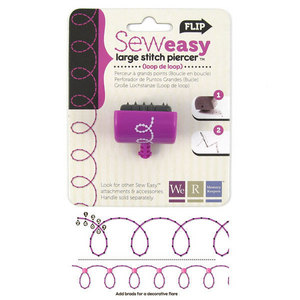
There are a variety of stitch heads available for the Sew Easy tool.  Any one of them will provide a nice border for your photos.  You can run it across the entire page or just a portion of it as I have done with this layout about my boys. 


I simply ran the large stitch piercer (loop de loop) across the patterned paper, sprayed it with a little glimmer mist and then chose some floss to match the colors on my page.  

A little tip: to go straight across a piece of paper, use the edge of a ruler as your guide.  The pattern printed on the stitch head matches the location of the piercing part of the tool underneath. 

Cherries - example of enhancing an embellishment

Many paper lines now come with journaling cards or cardstock shapes.  Using the straight stitch head that comes with the Sew Easy tool, you can add a little bit of stitching to spice the shape up. 


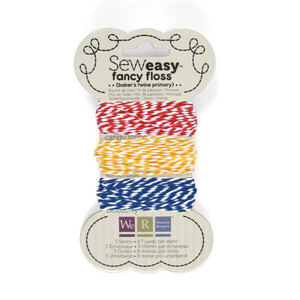
On this page featuring myself and the fantastic Chrissy, I've used the straight stitch head and the fancy floss (baker's twine primary) to spice up a Maya Road Kraft Doily.


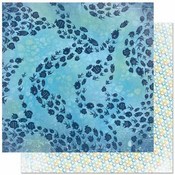
Phin - an example of following a pattern and mix it up

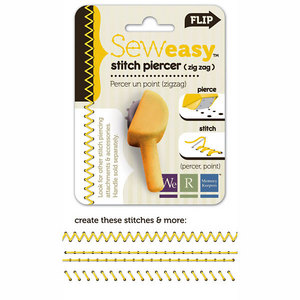
Many patterned papers have spaces that will look perfect with a little stitching. On my next page, I've done just that and added some borders using the basic stitch head and the zig zag head.  This page just goes to show that two heads are better than one!


To really accent the detail of the patterned paper, I stitched part of the swirls with the straight stitch and part of them with the zig zag but I only stitched half of the stitches in the zig zag portion.  I also used the zig zag head to create a border for my picture.  The stitches angle down toward the photo to emphasize that portion of the page.  

I added in a network of free-handed stitches to hang all of the fun Echo Park stickers from.  I also used two different colors of thread on this page, changing the color depending on the location of the stitches.  I do think a white on white effect would have been cool for the stitches in the swirl but they would not have stood out as much.


A Big Deal - an example of masking

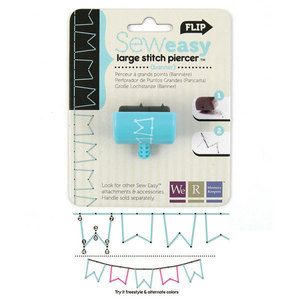
Not only can the Sew Easy provide the location for where to place stitches, but it can also work as a template on where to cut to create a mask.  For A Big Deal, I knew I wanted blue flags to come off the train photo.  But, I wanted the flags outlined in red stitches to go with the rest of the paper.  

Using a scrap piece of paper, I ran the large stitch piercer (banner) across the paper and then cut out between the pierced spots with my exacto knife.  I then used this as a mask for Perfect Pearls mists.  After I sprayed the paper, I stitched around the banners.


I then also discovered a use for the pieces I cut out of the scrap paper to make the mask - they are located at the top of the picture in a third banner!  Their shape and size perfectly matches the misted and stitched banners. 


Wet & Wild - an example of adding texture

I love having dimension and texture on my pages.  Using the Sew Easy, I was able to add additional texture and emphasis to the Tim Holtz embossing folder that I used on my page.


I texturized the cardstock with the embossing folder and then used the Sew Easy zig zag head (this might be my favorite) to privide a stitching location on the lower parts of the embossed cardstock.  I used the fancy floss bakers twine primary color yellow to create the rays of the sun.  I have a few more ideas how I could do this with other embossing folders.  I love them and the dimension they add to a page, but I often forget to pull them out and use them! 


I hope you have found inspiration in the ways I've used the Sew Easy for this reveal.  It's now time for you to pull that Sew Easy out or head to the store so you can get to work creating pages. 

Next month I'll be back with part 2 containing some more complex ideas for using the Sew Easy!

Sew Easy items used in this reveal:


Wednesday, June 29, 2011

Scrapbooking With Bo Bunny's Barefoot And Bliss

Posted by carrie123 (Carrie):

Well, summer is finally here in Chicago.  Not sure how long it will last though, so I figured I would do some pages of summertime fun. The Bo Bunny Barefoot and Bliss line was perfect! It was actually perfect in more ways than one. 

Bo Bunny has this wonderful abillity to make lines that practically do the layouts for you. Everything in the line comes together so perfectly and effortlessly, and this line was no exception. The colors and prints in this line really have a light breezy summertime feel.

Another thing I like about the Bo Bunny lines is the alphabet 12 x 12 sheet. I love that they include letters, borders, mini title stickers, and something that I love- journal strips. I love to use these when I need to fill in some empty space or to just add that little extra touch. 

So, if you are looking for something that can give you a layout in very little time that really looks like you spent hours on, then this line is for you!

Making a Splash!

 
Mom and Me...

 
Popsicle Kisses

 
Barefoot and Bliss!


Products used in these layouts:


Tuesday, June 28, 2011

Paper Crafting With A Fair Day By SEI

Posted by 4peasinourpod (Pam):

The fair.  As children (and some of us adults!) those words strike joy and anticipation into our hearts.  I LOVE the fair.  The highlight of the summer with my kids is a day at our Wisconsin State Fair.  We have a standing tradition of dropping EVERYTHING for a day at the fair.  

It is intoxicating.  The food, the animals, the smells, the atmosphere.  Add in the rides for the kids, and the experience is a total treat!  When I saw the SEI A Fair Day line, I couldn’t wait to get started!  

I am not a theme scrapbooker, but I loved all the papers and the embellishments, and as usual - SEI didn’t disappoint.  The papers are thick and gorgeous.  Some are shimmery, in the typical SEI style, and others are double sided and versatile.

I did 4 layouts - three which are fair oriented, and one to show the versatility of the line.  I will do about 20 more layouts with this line, trust me!

First, is a layout of my oldest three children on a ride at our fair.  I was dying watching them, and soooo glad I was behind the camera!  I captured this shot as they were upside down…

 
The next layout is about a Bennett family favorite.  FOOD.  It was fun experimenting and trying new things.  The food papers are incredible!

 
We have a family tradition; on our way out of the fair, we ALWAYS get a blue raspberry snow cone.  The borders and papers were perfect for this!

I also did a layout to show that non-traditional layouts work well with this line.  Here is a layout (non-fair) of Delaney right after her 8th birthday. These papers are versatile and amazing!

My FAVORITE paper of the line is the perforated ticket paper.  There is no cutting involved, and the variety of tickets is wonderful. 

I totally love this line, and can't wait to scrap the hundred more fair pictures that I have!

Products Used:


Monday, June 27, 2011

Paper Crafting With Sweet Summertime By LYB

Posted by Kimandasmo (Cindy):

Just one step outside your front door and I am sure you can tell that SummerTime is here! The sun is shining, the skies are blue, the grills are grilling and the grass is green. This is the perfect time of year to get out and use your camera. 

There are so many opportunities to capture great shots, either planned or spontaneous.  Once you finish capturing all those fabulous moments, you need a great line of papers to scrap them with and I am here to show you the perfect SummerTime line. 

Little Yellow Bicycle has released their new line called Sweet SummerTime and it is just perfect. It combines the hot color scheme of the season, red, blue, and yellow. It has fireflies, pinwheels and fruits... all signs of the season. As with many of the LYB lines, this line has journaling cards, transparent shapes, a great book of tickets, fabulous canvas borders, fresh verse stickers, flower buttons and much much more. 

If you have ever scrapped with any of these products from their previous lines, you already know how wonderful they are.

For my first layout I chose to capture one of my daughters favorite things to do once the weather warms up. As she walks home from school each day she collects as many dandelions as she can. After she finishes her homework/chores she finds a quiet place to make her wishes and give them a blow. On this day I was able to sneak up on her and grab a shot, I love it even though the dandelion kind of blends into the grass.


Beach time. What else would you do with summer days in Florida?? This layout is of my daughter and her friends as they were walking along the shore.


Kayaking... another wonderful way to spend a summer day. These photos really mean a lot to me because my daughters do not get along well. On this day they chose to go together in a double kayak instead of each going by themselves. They even worked hard together and managed to keep their strokes in sync.


This layout is one of reflections on summers past. My dad loves lemonade and this pitcher was always on the top shelf of my parents fridge. Till this day I cannot make anything in it but lemonade.


Close your eyes, give it a spin, and see what favorite summertime activity it lands on. I love this little spinner. I thought it worked great on this happy summer card. I'm not sure who the lucky person will be that gets it in the mail, but I am sure they will love it.


Thanks to ACOT for allowing me to play with this great SummerTime Line: