Tuesday, May 31, 2011

Paper Crafting With My Mind's Eye Happy Go Lucky

Posted by SarahA (Sarah):

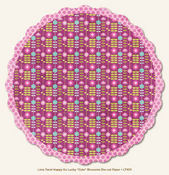
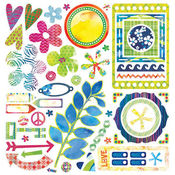
I loved the new Happy Go Lucky line from My Mind's Eye, but was a little hesitant about all of the purple. Most scrappers I know say that purple is hard to work with or a color they use the least and I'm the same way. Another concern I had was having photos to coordinate. I ordered anyway and I'm so happy I did! 
 
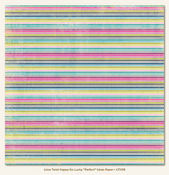
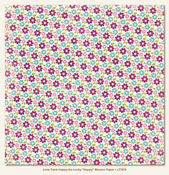
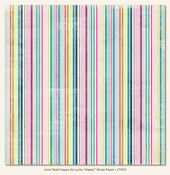
There are also a lot of blues and greens in this line, and even the purple papers were easy to work with. It's such a perfect spring/summer/girly line and I ended up loving each layout more than the one before it!  A lot of the designs I used were the "B" sides of the papers, which you can't see here in the shoppe, but you can see on the MME website right here.
 
Just Dandy
 
For this layout, I used a sketch from Stuck?! because it was different than something I would normally design. I started by cutting several circles from the cute polka dot die cut paper and stitching them down. I used the A and B sides of a few patterened papers for the strips and then added my photos. 

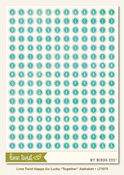
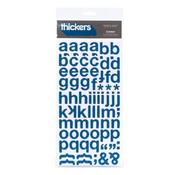
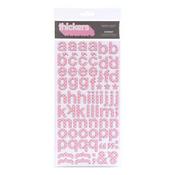
I then stitched my title down, did some handwritten journaling and added some of the super cute little alphas from this line by the bottom photos. I used those alphas on every layout and card I made, and still have a lot of them left!


Spring Has Sprung

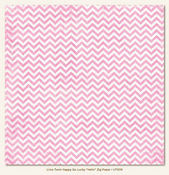
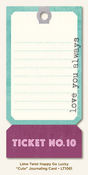
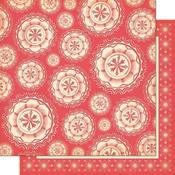
What could be better with this line than some spring time lilac photos? I really loved the purple B side of the Hello Zig paper, so I used that as my main sheet. I cut a large banner strip about 3 inches wide, folded it like ribbon and adhered it, then used foam dots to adhere my photo. Instead of using the Cute Journaling Card for journaling, I tucked it under a few of the polka dot strips and let the words peek out. 

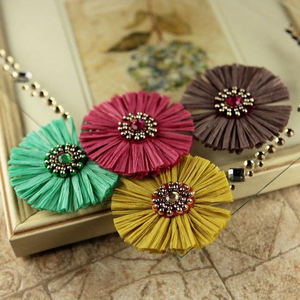
I made flowers like these before out of felt, but never paper. It turns out they worked out just as easily and looked just as nice! To make these flowers, I cut a strip of paper an inch wide, then folded it in half length-wise and made cuts about 3/4 of the way down to the edge, then rolled it up and adhered the ends. I used a little bit of hot glue to adhere them to my layout.


Quotes

When I saw the word bubble paper in this line, I knew it was designed for a layout I had been thinking of making. Quinn used to be quiet and shy when I was at the doctor's office for baby appointments, but one day that all changed and she started talking. A lot. Saying things that were funny, and of course as all 4 year olds do, things her mother wished she would keep to herself. 

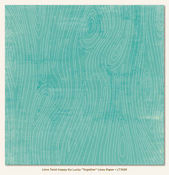
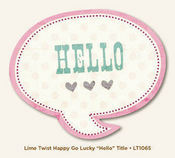
I decided I had to capture some of these random quotes on a layout. I chose 2 pictures I had of her being silly and lined them up with 3 of the small Cute Quote Bubble Die Cuts vertically on the page. I used the bigger Hello Title Die Cut for the title and cut the middle out of it to make it work for my own title. I typed up the quotes on to strips and placed them on the small quote bubbles. I used more of the awesome little alphas and also a sheet of the woodgrain paper, which is a really popular pattern right now.


Thank You Cards

I always have use for thank you cards, and my supply was getting low, so I whipped up a few with my left overs from this line. I really liked the big paper ribbon on my Spring layout, so I made a version of that to be the focal point of my first card. Quinn was punching with my punches while I worked on this and wanted me to use what she made, so I lined some of the starburst circles up and added my title above and below those.
 
The second one I did was very simple, but still pretty. I sprayed the white card base with Silver Plated Maya Mist, then punched starbursts and butterflies with my Martha punches, inked the edges and layered them in a row near the bottom. You'll see even after 3 layouts and 2 cards, I still had lots of those great alphas left!


Products used in this reveal:


Friday, May 27, 2011

Digital Designing With Danielle Young

Posted by Mommybruno :
   
I'm a long-time fan of designer Danielle Young, and my EHD has a folder full of her kits. She's not afraid to use bold colors, and her elements are so versatile and fun to use. 


I find myself returning to her kits time and time again when I make my layouts, and whenever I see a new Danielle Young kit in the digi shop I know it's going to be worthwhile picking it up.

 
Let's see what the Digi Creative Team came up with, using Danielle Young's kits!

Advice:  Be Who You Are
 
Advice: Be Who You Are, by FairyMouseMom (Egle): "On this layout I only used four of Danielle's kits and mixed and matched items. And, yet, using four kits....I only used a couple of items from each kit at most for this non-cluttered page."

 
Curious, by Sarahwhithers (Jen): "For the Digi CT reveal this week we are featuring the talented Danielle Young. Her kits are always in fantastic colours, and the elements are versatile!"

 
Nappy Time? by Writerlady (Sandy): "Love this photo of my son being kind of tired and kind of bored. Enjoyed working with the Half Pipe by danielle young designs. I raised 4 boys - and the youngest is now 26. This kit is so perfect for scrapping teen and adult male kits. Great colors and masculine embellishments. Half Pipe is one of my very favorite kits!"

 
Big Time Fun!, by MamaK321 (Kristianne): "for the Digital CT reveal featuring products by Danielle Young Designs, one of my all time favorite designers! :D I really like the colors and elements in this kit [Three Ring Circus], it is perfect for so much more than just the circus!"


Special Moments, by Mommybruno (Cassandra): "I primarily used Danielle's newest kit, Swing Away. This kit has a baseball theme, but as you can see you don't need to use it for a baseball layout. The colors and patterns are very versatile, and it was easy to coordinate with elements from Danielle's other kits. I love working with Danielle's designs - they're fresh, fun and full of great papers and elements."

 
Robotmarks, by milmomma (Britteny): "I have two little readers in my house and love to encourage their friends to read. What better way than some fun bookmarks. I made them using some "i-clips" book marks with robots cut out and glued on. I made the envelope and add some matching pp inside of it."

 
Advice: Patience, by FairyMouseMom (Egle): "On this layout I only used a few of Danielle's kits and mixed and matched items. I love how easy it is to do so among her digital kits."

 
Peek-A-Boo, by Sarahwhithers (Jen): "For the digi CT reveal we are featuring the wonderful designer Danielle Young. You'll find she has a great mix of mini kits, collab kits and full kits. So whatever your heart desires, you'll find it in her shoppe!"

 
Goof, by Mommybruno (Cassandra): "I love Danielle's kits - these are papers, elements and alphabets that I turn to time and time again. One of her newest kits, Blessed Blooms, was so much fun to work with. Love the colors and elements! And the elements I used from her other kits coordinated perfectly. There's never a kit of Danielle's that I say no to!"

 
Kitty Sleeps, by MamaK321 (Kristianne)

View more digital and hybrid projects at ACherryOnTop.com -

Thursday, May 26, 2011

Scrapbooking With Simple Stories

Posted by Kimandasmo (Cindy):

When I first saw these papers and kits called Simple Stories by Memory Works, I thought they were cute but was not sure how to use them. 

They come with "journaling cards" already formed to 4x6, which are perfect for use in album pages. Just simply slide them right into you photo spot between pictures and you are ready to go.

Use as an embellishment or journal away. I am showing you a few examples of how they fit into your albums, but these are just so you can see them and not how I actually used them. Though I am thinking these would look terrific in a mini album for my girls to document their summer.


They also have some pieces that are 12X6 , these would make a fantastic mini album. Just add pictures , a few embellies and you are done.  These are perfect if you are feeling overwhelmed, feel like you are behind, or just in a little bit of a mojo dojo. 

They can help you get caught up or help bring back that mojo.  They are also a great time saver if you need to put something together in a hurry.

But wait!  What if you do not want to just do pages in a photo album or a mini album?  These papers and the coordinating stickers work fabulously to create full pages as well. You can cut and paste away as I have done in the following examples.

I used the Simple Stories Kit called 100 Days of Summer for the following layouts.  Be sure to check out their other kits and papers like Destinations (perfect for a vacation album) , Elementary ( I just bought 2 of these to do school albums for my girls) and Life Documented for those everyday albums.
 
Summer Days

For this page I used one of the "strips" as part of my title. I also cut one of the 4x6 cards in half to use as a journaling spot.


Saturday Practice

For this page, I incorporated 2 of the 4x6 cards, one of the "strips", which I cut in half to use only the pieces I wanted. I also cut the banner out of another of the strips and used it on top and bottom of my page. Each of these pieces I glazed in Glossy Accents to help them stand out a little more.

 
Happy Place

For this layout, I used one of the 12x6 pieces and layered it over kraft cardstock and one of the pattern papers included in this kit. I placed one of the 4x6 overlays over my photo, and accented the page with Liquid Pearls. I also used one of the border stickers( the tickets). 

I cut it into pieces and only used the pieces I wanted. You should never be afraid to cut and piece together elements on a page. Even if it looks like it should be a whole border, if you only want a portion...cut, trim and shape away. 

 
Sand and Surf

For this page, I used another  one of the 4x6 cards for my title, but I changed the wording but cutting small pieces of a coordinating paper and using the alpha stickers included in the kit to change the words to one that matched my page.
 
 
Summer is coming

For this page I used on of the 12x6 pieces on top of one of the coordinating pattern papers included in the kit. I added some stickers, a trimmed 4x6 card and a Prima flower to top it off. The just a few Liquid Pearls accents.

 
I found all of the pieces in this kit to be amazing. I had a hard time choosing which side of the cards and papers I was going to use. I can't wait to see the new kits from this great company as they come out. They are sure to top your favorites list as soon as you give them a try.

Thank you to A CHERRY ON TOP for allowing me the pleasure of playing with these great products:


Wednesday, May 25, 2011

Scrapbooking With Thickers By American Crafts

Posted by 4peasinourpod (Pam):

There are few things in the scrapbooking world that are necessities.
Really. 

One thing, though, that almost EVERYONE will admit to having an addiction to is American Craft Thickers.

I stalk them.  I wait for new fonts, new colors.  I beg for them in NAVY BLUE.  I got a *little* of my dream...but will work on it again in July :)

Thickers are amazing.  They add dimension and color - that GO TO detail when you need something to ...GO to :)

Here are my Thickers layouts....

Navy Blue.....I begged for it.  Ask Sus, Jules, Janet, Juliana and Jess.  They were walking away, as I begged.  I want them glitterless, next time.  (Beware Janet) - but these are a compromise.  It is all about the compromise.  (Until July)....


There are times when glitter is good.

It makes an impact.


one*of*my*favorite*layouts*

EVER. 

This is my friend Sallies dog that we watched for 2 weeks prior to a tragedy in their family.  I smile when I see it.

Lastly is a simple layout about Kendall and her first day of school.  She will journal later.


Thickers are a STAPLE.  The new fonts, the glitter, and the polka dots make them a necessity in scrapbooking!

Products Used: