Tuesday, January 25, 2011

The ACOT Creative Team Places The Spotlight On YOU!!!

Whether it's traditional paper, high tech digital or a perfect blend of the two, we've got the latest and greatest from our gallery spotlighted right here. Enjoy!

Mad for Books by lorigentile
was chosen by Kimandasmo. Cindy adores this layout by lorigentile. The mix of colors and layered circles is perfect. Very eye-catching. She also loves the touch of polka dots peeking in from behind and the stitching.

Dear Friend by lori hairston
was chosen by JulesinParadise. Jules loves this beautifully soft card by Hairston called, "Dear Friend". The stamping work is exquisite and the colors so lovely.

Buried by Bethie
was chosen by Smiley-Scrap8. Ronny says "this layout caught my eye right away, first the beautiful blue and then amazing design with circles. The page flows so well with the combo of circle frames, snowflakes and the snowman to top it off. Well done!"

You can view all of the beautiful projects hand picked by our Creative Team right from our ACherryOnTop.com Gallery by reading the 'January Creative Team Spotlight'.  

Thanks to everyone for making the gallery here at ACOT the inspiring place it is. Keep showing off that beautiful work and Happy New Year!!

Tuesday, January 18, 2011

How To Make Artist Trading Cards - ATC's with Art-C

Submitted by JulesInParadise:


Artist Trading Cards (ATCs), which have grown immensely in popularity since the credited date of 1969, are a fun way to play with paints, inks, stamps, papers, embellishments, pen and ink, markers and even cloth.  These small works of art give the artist open ended opportunities to experiment and create.

The only "rule" is that each must be 2.5 x 3.5 or about the size of a baseball trading card.  As a matter of fact, artists who swap their creations with others and also those who create these only for themselves often use a baseball trading card album in which to display the ATCs. .  Other than this one "rule", the sky is the limit.

Until recently, those who create ATCs have had to cut their own mats and search for tiny elements to incorporate into each piece.  Art-C has brought new and exciting products to the artists who make, keep or swap ATCs.

Art-C has three different mats for use:  canvas, kraft and white.  These come in tiny, easily stored pads and the mats tear off evenly.  This ATC was created with the canvas mat.  I painted Glimmer Mist onto the canvas and blotted it with a patterned paper towel to add texture and interest.  I had found a darling garter and created a "hose" out of black lace.    I added the pretty butterfly to increase the feminine look of the ATC .


This next ATC was created using the kraft mat.  I stamped a back ground and added the lady inside the bottle.  Art-C also has color coordinated beads, floss, ribbons and fibers and I added the beads to the top of the bottle for additional depth.

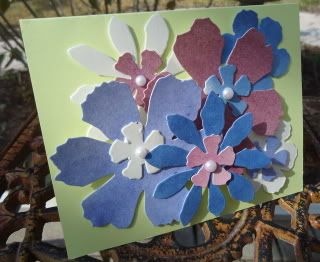
Art-C also has coordinated paper collections and flowers that are the perfect backgrounds and embellishments for the ATCs as can be seen in this example.


This ATC is stamped on the kraft mat and the stamped pens were stamped on.another mat, cut out and overlaid on the numbers.


I recently joined an ATC swap group.  Each month, in rotation, a member chooses a theme and we each create cards to exchange.  This month's theme is TIME.  Swap groups vary on how they are run.  Some ask that the members create all the same cards and other groups only ask that cards be created to fit the theme so all can be different.  When the same card is to be created numerous times, the artist numbers the cards on the back in the order they are created.  For example, the card pictures here is 3/6.  In other words, this was the 3rd. card I created exactly alike with three more to go.  In almost all swaps I have knowledge of, it is customary to sign one's name on the back along with the date and series numbers if all are identical.  I use a specimen stamp and fill in the information on the lines provided.  I love the way Art-C has supplied a whole tiny pad of borders such as this one and images that are perfectly proportioned for the cards.
Because there are few restrictions on the designs of ATCs, I had a lot of fun with this next collage.


ATCs can also be used as an embellishment on a layout or provide an interesting cover on a card.  I find creating ATCs inspires me to try different techniques and designs.  Hope that you will give an ATC a shot as I'd love to see your "miniature works of art".
----------------------------------------------------------


Jules is a retired English teacher who resides in Florida with the love of her life, Gene, and two furry friends.  She enjoys traveling with her friends and family, kayaking, biking and scrapbooking.

Friday, January 14, 2011

Working With Whitespace

Submitted by the ACherryOnTop.com Creative Team - 

Incorporating Whitespace into your digital or traditional scrapbooking layout:

So you ever wondered what that term" WHITE SPACE" means when people talk about it in the digi world? Well this is what the real definition is:

Definition: 

Whitespace is the empty spaces in a design. Whitespace is used to separate disparate design elements and group similar ones. Whitespace is the lack of graphics or text in the layout.

Whitespace is not always "white" - it is the empty parts of the page, but if the page has a different background color that will be the color of the whitespace.

So the digi CT this week would like to show you our interpretation of White Space Layouts


Janell says "White space layouts don't just have to be one picture and lot of space...I wanted to show that they can be done with multiple pictures, 6 in this one! Just remember to keep the pictures small and there will be plenty of (white) space left!"


Ronny says "Another challenge with "white space" pages is how to include more than one photo. My solution is to a make a grid, for this page I could have included 9 photos in a clean, neat design. Instead I used 6 photos and added the title and journaling inside the grid. With a few embellishments, my page is complete and I was able to tell the story. "


Ronny also says: "My biggest challenge with white space layouts is where to put the title and journaling. I always want to include them but usually either forget to leave room or forget to plan them into my design. For this page I solved this problem by wrapping my title and journaling around the photos and elements."


Ronny says:" White space can be done hybrid too. I decided to go opposite of the center grid design in this layout. Instead I spread my photos and colored paper around the outer edge. This gives the layout the funky effect that works so well with these photos of my dd."


Brittney says:"This week the Digi CT is focusing on white space. I love playing with white space and couldn't resist another classic christmas layout. Keeping most of it clustered left plenty of white space... I started with dividing my layout into forth and keeping my design in one fourth of the page mostly."


Cass says: "I love this pic of DH on vacation, and thought it would be good paired with a lot of white space to "drift" into. In this case, the white space helps lend a calm feeling to the layout."


Jennifer did a fabulous job with her LO by placing everything in the upper left corner and leaving everything else "space" -


Angie says: "normally I like to add lots and lots of "stuff" but sometimes it is so nice to have a simple LO by adding a great picture and just the right amount of elements!" {you can see this in her 3 examples below!}


Janell used two opposing kits {one with boy colors and one with girl colors} to creative these fabulous LO's~

Janell says " I like to mix up my white space layouts. Sometimes they are with clean lines and simple designs, other times I love to cluster near the pictures and then add some elements in a corner to draw your eye around the layout. "


The ACherryOnTop.com Creative Team offers inspirational ideas weekly.  Be sure to visit our Resources Page for more crafty ideas!

l

Wednesday, January 12, 2011

Scrapbooking With LYB's Cupcake Love

Submitted by Dianedi

Ready or not, the month of February which celebrates love will soon be here! In the shop, you'll find gorgeous shades of pink, red, blue, and green with themes of hearts, cupcakes, and flowers.  Whether you are scrapping about a family member, things you love, or Valentine's Day, there is a beautiful line waiting for you!

This month, I chose to work with the scrumptious Little Yellow Bicycle Cupcake Love line to create a layout and a series of cards!


How fun is this lollipop paper? For the base of this card, I used the Lollipops Glitter Paper and then added a journaling card from the Journal Tablet. Be My Valentine stickers are from the Cardstock sticker sheet.  For the center of the card, the lollipop was cut from the Heart Cut-out paper and the Sweet sticker is from the Dimensional Sticker sheet. 


A babies first photos are such a precious collectible. In late December, my husband and kids went to the doctors with me to see our new baby ultrasound photos and to find out what we were having! It was a fabulous belated Christmas gift and the excitement on my kids faces was something that I'll never forget. As you can tell by all of the pink, we are having a girl!

For the background of the layout, I used the Cupcake Love Mini Plaid paper. I adhered the ultrasound photo to one of the 6"x6" Decorative Edge Cardstock papers which I matted onto black cardstock. I layered the Tonal Polkahearts paper, added the thick canvas borders , a die-cut from the Journaling Tablet, epoxy heart chipboard buttons, and the Cupcake Love paper lace stickers. 


For this card, I've used the green and pink side of the Mini Plaid Paper for the base. I wanted to use the last 6"x6" Decorative Edge Cardstock piece in the set. In order to use it on this card, I had to cut off the top of the die-cut. I added it about an inch below the top of the card and added the Be My Valentine sticker across the top. By adhering it with foam tape, I've added a little dimension to the top of the card. The scalloped piece at the top of the card is a small section I had left over from one of the last 6"x6" Edge papers that I had to cut off in order to make the die-cut fit the card. Finally, I layered several hearts using foam tape to the bottom of the card.
 

View Diane's complete article at ACherryOnTop.com.
--------------------------------------------------------------------------


Diane DiTullio lives in Massachusetts with her husband Dave and two children, Lauren age 7 and Colin age 5.  Diane has been featured in Simple Scrapbooks, Scrapbook Trends, Paper Trends, Paper Crafts, Cards, GiftMaker, CardMaker, Paper Art Magazine, idea books, catalogs and various trade shows.

Monday, January 10, 2011

Scrapbooking With October Afternoon's Modern Homemaker

Submitted by JanetM

I first got a look at the October Afternoon Modern Homemaker line this last summer at the CHA show and I knew it was one that I had to have. I was lucky enough to get to create with it this month and I still have more creating to do with it. I love doing heritage pictures and since I'm also starting a album for my daughters and son about their grandparents this line was  a perfect one to use to get started with.

My first layout and probably my favorite one this month is this one with the three generations in it. It's one that my mom looks pretty happy to be getting her picture taken. 


3 Generations  
College graduation for her youngest granddaughter was such a good day for my mom, the best part of the day for her was not only seeing her graduate but having her dad hand her the diploma from being on the board at the college, it really made it all so special.
 
It wouldn't be complete to have a book on my mother for my daughter without having her famous look in it.
 
I wonder if the happy  homemakers at this time were all really that happy. This paper line is the perfect match for the picture of my mother and her sisters.
 
My grandmother looks so peaceful out sitting in her lawn chair this day, she wasn't one that really liked to get her picture taken but she looks like she was a natural in this photo.
 
Progress on our house that is getting built- I can just see my husband sitting in there soon reading , that's if I can get him to sit still long enough.


My last entry for this month is a card I made for my aunt- I made the butterflies with the Martha Stewart punch and decorated them with various things.

 
The October Afternoon line of Modern  Homemaker has so many great uses and works good with so many pictures, I loved creating with it.
----------------------------------------------------------------------


We are proud to have JanetM on our scrapbooking Creative Team!  You can view Janet's Gallery at ACherryOnTop.com.

Thursday, January 6, 2011

Meet The First Guest Paper CT of 2011!

kim kittymomma
Kim (aka: kittymomma on the ACOT Message Board)

Here's an excerpt from her interview:

Favorite (NSR) store to shop? The Book Barn—it is an amazing used bookstore in CT that spans several buildings and now has two locations. Add in the little rambling paths, the garden of cats and the snacks and it is a place to spend the day!

Name 3 of your favorite embellishments to work with. I love buttons, flowers and ribbon/twine.

What would you like the ACOT members to know about you? I have been married to my HS sweetheart for 15 years. (we didn’t get married right after school) I started scrapbooking about three years ago—though was an avid collector for a couple years before that! LOL My other interests include: reading, running, quilting and other needlework.

Kim showed us what she could do with Echo Park's brand new 'Little Boy' collection:

go 
'GO' by kittymomma using Echo Park's - Little Boy 

View the complete interview at ACherryOnTop.com.

Monday, January 3, 2011

January Scrapbooking & Paper Crafting Challenges -

Posted by ScrapGoo 

Happy 2011!  What are your New Year's resolutions this year?  We here at ACOT hope they include lots of scrapping and chatting with your fellow Cherries! As we celebrate another year passing it's nice to reflect on why we do this hobby: at least in part because we want to preserve our memories.  So sit back with your flute of bubbly and reminisce about the last 365 days... and then scrap them!

Remember:

- only one LO per challenge will enter you into the points drawing
LOs cannot be entered into more than one challenge category
- *please* only enter LOs that meet the specific challenge instructions

Altered Object Challenge - By JulesinParadise (Jules)
Paper or Hybrid Scrapbooking

This month's altered object challenge is paper plates. Use a paper plate or more to create an embellishment for a card, a layout or on another altered object.


Hint: most paper plates have a coating on one side that resists things like inks, paints and mists. I turned the plates over and love how the colors are absorbed into the plates.

Color Challenge - by Art_Teacher (Laura)
Paper or Digital Scrapbooking

January in Ohio is gray, gray, gray. Often the color is considered drab or boring, but it is a very versatile neutral, from soft, blue-gray to dove gray to cozy brown-gray. It pairs well with a variety of colors, so your challenge this month is to use any shade of gray paired with another color. The layout must be at least 50% gray.


Journaling Challenge - By Jenn Kellams (Jenn)
Paper or Digital Scrapbooking

Journal about something you remember.


Grab more scrapbooking inspiration by viewing this month's complete Challenge List!  

Happy New Year!