

Posted by ChrissyTina (Christina):
Hi everyone!
This tutorial is going to focus on a cool paper crafting technique I saw on a blog. I can’t remember the site, but as soon as I find it, I’ll share it with you. Now this technique uses simple household items and is a really cool trick to use, especially if you have trouble stamping.
Supply List:
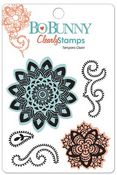
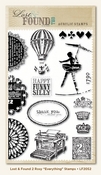
Stamps
SOLVENT ink*
Clear packing tape
White cardstock (non-textured)
Luke warm water
Soft gel medium
Paint brush

Now, the reason why solvent ink is starred is because this is very important. Any ink that is water soluble or water based will NOT work with this technique.
Since we have our supplies, let’s get started. The first step is to stamp your image onto the white cardstock. Try and get as bold of an image as you can. If you are not a perfect stamper, that’s ok! The key here is to get as much color onto the cardstock as possible.

Next step is to apply the packing tape. When you apply the tape, make sure there aren’t any bubbles. After you’ve applied the tape, go back over it and REALLY REALLY press the tape onto the paper. You want to ensure maximum contact between the paper and the tape. Once you’ve done that, trim off the excess tape.

Once the tape is applied, trim your image. This is fussy cutting to an extent. But don’t be scared! Trim off as much of the paper as you want. This is completely customizable!

Now the fun begins! Once your image is all trimmed and pretty, submerge it in water. If it curls, it’s ok. See? Mine curled a little bit. Leave your image in the water for about 5 minutes. If it goes a little over, no biggie. While it’s soaking in its own little spa, go prep your project that you are going to adhere this little gem onto.

Here’s where the magic becomes visible. Take your image out of the water and pat it dry. Flip it over so that the tape is facing down onto the table. Now gently rub your finger back and forth on the wet paper. If it doesn’t start peeling off right away, then use your nail to gently peel off the top layer.
Once you have an “edge” lifted, start rubbing the paper off with your finger. This will take a few minutes. It’s important to be gentle so that you don’t rub the image off of the tape. Keep rubbing until there aren’t any more little pill balls. I like to leave some thin paper in spots because I like the funky look it has.

Now you can understand why water soluble and water based inks will not work. Once the ink makes contact with the moisture, the image runs and eventually rubs off. Another little tidbit for you, this doesn’t work well with Copics either. I tried coloring an image with them and when I rubbed the wet paper off, some of the ink from the Copics would rub off as well.
Now let’s look at our completed images!

It’s time to put our images to use! Break out the gel medium and the paint brush. You can really funky it up like I did on the “Funky Tag”. I used a more course paint brush so that you can see the brush strokes. Or you can go softer like I did on the “Fall” card. I used a soft brush so as to leave no visible brush strokes. Apply the gel medium onto the surface of your project.

Brush the gel medium onto the back of the image.

Adhere the image onto your gel’d surface. Make sure to press all the of the air bubbles out.

Finally, brush gel over the entire surface of the image and the project surface to ensure a nice adhesion.

Once the gel dries and you finish your project, the last step is to ADMIRE!

This technique is very handy. It works well for all levels of experience. You can be a pro stamper or a novice. If you make a mistake, no biggy! It adds character!
You’ve seen the “Funky Tag” already.

Here’s the same technique used on a layout and a card. In these two projects, it’s a more subtle detail. However, it’s subtly speaks volumes if you could see these in real life.


Now that you’ve got a really handy technique in your arsenal, whip something out let me see how YOU put it use!
Products Used:


This tutorial is going to focus on a cool paper crafting technique I saw on a blog. I can’t remember the site, but as soon as I find it, I’ll share it with you. Now this technique uses simple household items and is a really cool trick to use, especially if you have trouble stamping.
Supply List:
Stamps
SOLVENT ink*
Clear packing tape
White cardstock (non-textured)
Luke warm water
Soft gel medium
Paint brush
Now, the reason why solvent ink is starred is because this is very important. Any ink that is water soluble or water based will NOT work with this technique.
Since we have our supplies, let’s get started. The first step is to stamp your image onto the white cardstock. Try and get as bold of an image as you can. If you are not a perfect stamper, that’s ok! The key here is to get as much color onto the cardstock as possible.
Next step is to apply the packing tape. When you apply the tape, make sure there aren’t any bubbles. After you’ve applied the tape, go back over it and REALLY REALLY press the tape onto the paper. You want to ensure maximum contact between the paper and the tape. Once you’ve done that, trim off the excess tape.
Once the tape is applied, trim your image. This is fussy cutting to an extent. But don’t be scared! Trim off as much of the paper as you want. This is completely customizable!
Now the fun begins! Once your image is all trimmed and pretty, submerge it in water. If it curls, it’s ok. See? Mine curled a little bit. Leave your image in the water for about 5 minutes. If it goes a little over, no biggie. While it’s soaking in its own little spa, go prep your project that you are going to adhere this little gem onto.
Here’s where the magic becomes visible. Take your image out of the water and pat it dry. Flip it over so that the tape is facing down onto the table. Now gently rub your finger back and forth on the wet paper. If it doesn’t start peeling off right away, then use your nail to gently peel off the top layer.
Once you have an “edge” lifted, start rubbing the paper off with your finger. This will take a few minutes. It’s important to be gentle so that you don’t rub the image off of the tape. Keep rubbing until there aren’t any more little pill balls. I like to leave some thin paper in spots because I like the funky look it has.
Now you can understand why water soluble and water based inks will not work. Once the ink makes contact with the moisture, the image runs and eventually rubs off. Another little tidbit for you, this doesn’t work well with Copics either. I tried coloring an image with them and when I rubbed the wet paper off, some of the ink from the Copics would rub off as well.
Now let’s look at our completed images!
It’s time to put our images to use! Break out the gel medium and the paint brush. You can really funky it up like I did on the “Funky Tag”. I used a more course paint brush so that you can see the brush strokes. Or you can go softer like I did on the “Fall” card. I used a soft brush so as to leave no visible brush strokes. Apply the gel medium onto the surface of your project.
Brush the gel medium onto the back of the image.
Adhere the image onto your gel’d surface. Make sure to press all the of the air bubbles out.
Finally, brush gel over the entire surface of the image and the project surface to ensure a nice adhesion.
Once the gel dries and you finish your project, the last step is to ADMIRE!
This technique is very handy. It works well for all levels of experience. You can be a pro stamper or a novice. If you make a mistake, no biggy! It adds character!
You’ve seen the “Funky Tag” already.
Here’s the same technique used on a layout and a card. In these two projects, it’s a more subtle detail. However, it’s subtly speaks volumes if you could see these in real life.
Now that you’ve got a really handy technique in your arsenal, whip something out let me see how YOU put it use!
Products Used:
3 comments:
Have you tried this with photographs printed onto card stock? Printed in reverse, so the image would right itself after the final step?
That sounds REALLY interesting and SUPER cool! I have not tried that technique. I use a rather simple photo editing program. I've never tried printing photos backwards. Do you have any suggestions? I would love to try it out!
What a cool idea. Something I most definitely will have to try! :-)
Post a Comment