Posted by ScrapGoo
This tutorial will show you how I created this shadow box frame from the Pink Paislee Mistables frame and the Farmhouse collection from Crate Paper.

You will need:
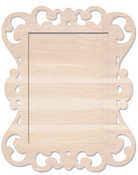
- The Pink Paislee Wood Shadow Box frame
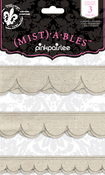
- Pink Paislee Mistables scallop trim
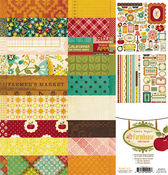
- A piece of each "Sunday Dinner" and "Cupboard" papers from the Crate Paper Farmhouse collection
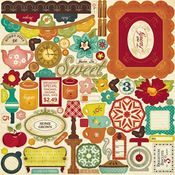
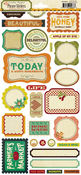
- Farmhouse chipboard stickers
- Farmhouse border stickers
- Farmhouse phrase stickers
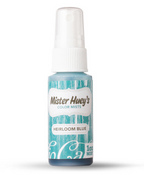
- A coordinating mist or paint (I used Heirloom Blue Mister Huey from Studio Calico)
- White acrylic paint
- Foam tape or pop dots
- buttons and twine
To begin you need to mist or paint your frame. I misted mine but I wanted the inside to stay light so I used a piece of scrap paper as a mask along the inner edge. After you've misted a side use a paper towel to blot up the excess and rub the color in.


I wanted my frame to have some added depth so I watered down some white acrylic paint and brushed it along the edges. Again I used a paper towel to soften the look after painting it on.

Cut a piece of the orange paper slightly smaller than 7" x 9". Stich a white border. Adhere it to the bottom of the frame.

Cut a 1.5" strip of the green leaf paper. Stitch a white border. Adhere it to the right edge. Then add a strip of the teal border sticker and then a strip of the red border sticker.

Cut two strip of wide scallop Mistables trim and layer them so they are offset to show off the scallops like so:

Cut a 4.75" x 5.5" piece of the teal dot paper and adhere as shown:

Print and cut a photo to 3.75" x 4.5". Add the chipboard frame on top and add three photo corners as shown:

Use 2-3 layers of foam tape or pop dots to elevate the photo frame on top of the teal photo mat. You want the photo to be raised enough to give the frame nice layered depth and for there to be enough space to tuck embellishments under.
Next we are going to add those embellishments. To the right side add: the rectangular scalloped sticker, the "thankful" sticker, the clock chipboard, and the "3" chipboard. If you do not have three people in your photo you can choose a different piece of the chipboard or you can cover the number with a button. Use foam tape to raise the edges of elements where needed to support the added depth and layering. Finally, add the teal chipboard flower on top of the photo frame.


To the top add: another flower, the "delightful" sticker, and a small round piece of chipboard.

Form a flower with the small scallop Mistables trim and an adhesive circle. I used a Gluber but you can use whatever adhesive you have as long as it is strong. Start at the outside edge and ruffle the trim around towards the center until you have filled the circle.

Add two chipboard buttons tied with twine.

Adhere this flower to the lower left corner of the frame with the large red chipboard flower layered under it. Add the "Sweet" chipboard title to the right of the trim flower.

Cut a 6" x 1.25" strip of the green leaf paper and accordion fold it. Use a very strong adhesive such as Zip Dry to create a half circle tucked behind the trim flower. You will need to hold the edges down until they are dry to make sure they remain stuck! Add a small piece of chipboard in front of the half circle.


Tie two small bows to the ends of the chipboard banner. Add a small coordinating button to each scallop on the banner. Adhere the banner to the upper right corner of the frame.

And that's it! This project has tons of fun details but really takes very little time to complete. I hope you've enjoyed it!
I used the following products on this project:
You will need:
- The Pink Paislee Wood Shadow Box frame
- Pink Paislee Mistables scallop trim
- A piece of each "Sunday Dinner" and "Cupboard" papers from the Crate Paper Farmhouse collection
- Farmhouse chipboard stickers
- Farmhouse border stickers
- Farmhouse phrase stickers
- A coordinating mist or paint (I used Heirloom Blue Mister Huey from Studio Calico)
- White acrylic paint
- Foam tape or pop dots
- buttons and twine
To begin you need to mist or paint your frame. I misted mine but I wanted the inside to stay light so I used a piece of scrap paper as a mask along the inner edge. After you've misted a side use a paper towel to blot up the excess and rub the color in.
I wanted my frame to have some added depth so I watered down some white acrylic paint and brushed it along the edges. Again I used a paper towel to soften the look after painting it on.
Cut a piece of the orange paper slightly smaller than 7" x 9". Stich a white border. Adhere it to the bottom of the frame.
Cut a 1.5" strip of the green leaf paper. Stitch a white border. Adhere it to the right edge. Then add a strip of the teal border sticker and then a strip of the red border sticker.
Cut two strip of wide scallop Mistables trim and layer them so they are offset to show off the scallops like so:
Cut a 4.75" x 5.5" piece of the teal dot paper and adhere as shown:
Print and cut a photo to 3.75" x 4.5". Add the chipboard frame on top and add three photo corners as shown:
Use 2-3 layers of foam tape or pop dots to elevate the photo frame on top of the teal photo mat. You want the photo to be raised enough to give the frame nice layered depth and for there to be enough space to tuck embellishments under.
Next we are going to add those embellishments. To the right side add: the rectangular scalloped sticker, the "thankful" sticker, the clock chipboard, and the "3" chipboard. If you do not have three people in your photo you can choose a different piece of the chipboard or you can cover the number with a button. Use foam tape to raise the edges of elements where needed to support the added depth and layering. Finally, add the teal chipboard flower on top of the photo frame.
To the top add: another flower, the "delightful" sticker, and a small round piece of chipboard.
Form a flower with the small scallop Mistables trim and an adhesive circle. I used a Gluber but you can use whatever adhesive you have as long as it is strong. Start at the outside edge and ruffle the trim around towards the center until you have filled the circle.
Add two chipboard buttons tied with twine.
Adhere this flower to the lower left corner of the frame with the large red chipboard flower layered under it. Add the "Sweet" chipboard title to the right of the trim flower.
Cut a 6" x 1.25" strip of the green leaf paper and accordion fold it. Use a very strong adhesive such as Zip Dry to create a half circle tucked behind the trim flower. You will need to hold the edges down until they are dry to make sure they remain stuck! Add a small piece of chipboard in front of the half circle.
Tie two small bows to the ends of the chipboard banner. Add a small coordinating button to each scallop on the banner. Adhere the banner to the upper right corner of the frame.
And that's it! This project has tons of fun details but really takes very little time to complete. I hope you've enjoyed it!
I used the following products on this project: