Showing posts with label how to. Show all posts

Friday, May 10, 2013

It's Been Too Long!

We've truly had a busy past 2-3 weeks!  Our online NSD Crop event was a complete blast!  We'd like to thank (AGAIN) our wonderful volunteers that made it one of the best crops ever!

There were Fast Scraps, Challenges and crazy fun games.  Projects were completed and tons of inspiration gained.  We can't wait until our next NSD Event!


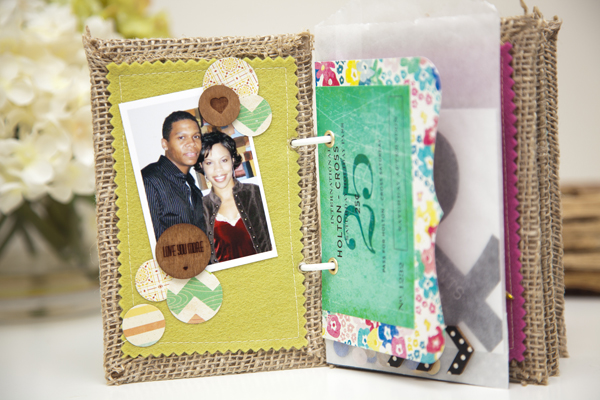
Burlap Mini Album Class: by A.C. Newell
burlap mini album


If you missed anything from the NSD 2013 Online Crop - click HERE 

We've also been busy adding thousands of items into the ACherryOnTop.com Shop.  New items from Simple Stories, Bo Bunny, Crate Paper, Studio Calico, Carta Bella, Authentique and Echo Park are just a few manufacturers offering gorgeous and versatile new products for the Spring/Summer!  Be sure to visit our 'NEW' product section.  

We also introduced our very own A Cherry On Top Cinch Bag!  Now, you can show your ACOT pride by grabbing one of these cute, drawstring bags. 

a cherry on top bag 

Hurry - supplies for these are extremely limited and are going fast!  

We always love this time of year.  There's so much going on and plenty more just over the horizon with CHA Summer 2013!  We can't believe it's a bit over two months away!  Where does the time go?  It'll be great to see all of the newest must-haves as well as catch up with some great friends in the industry.

Thanks for being there with us every step of the way.  We could never do what we do without you.  We love serving our family of customers and appreciate each and every one of you!

Saturday, December 15, 2012

How To Make Quick & Easy Matchbook Gift Card Holders


Posted by lauralooloo

Some people think gift cards are a cop-out during the gift-giving season . . .but I for one LOVE to receive a gift card! Come on, free money for guilt-free shopping expeditions!? It's the gift that keeps on giving! Jazzing up a gift card in fun packaging can give the gift card some added zip and personality. It's the perfect finishing touch.

matchbook gift card holder by laura williams, for www.acherryontop.com

These matchbook gift card holders can be whipped up in just a few minutes, using whatever supplies you have on hand.  

In addition to my everyday tools and supplies, here's what else I used:

Bo Bunny Snow Day collection: patterned papers - Pajamas, and Journal, plus Bo Bunny Snow Day cardstock stickers
Cappuchino Brown Bakers Twine 
Canvas Corp Mini Flat Bags
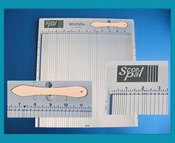
Scor-Pal (The Scor-Pal makes quick work of the scored lines on this project, but a ruler and folding by hand will get the job done as well.)
 
First, we'll construct the matchbook base.  
matchbook gift card tutorial by laura williams, for www.acherryontop.com

Trim patterned paper (or cardstock) strip to 9.25x3 inches.  Score strip at 4, 4.25, and 8.5.


matchbook gift card holder by laura williams, for www.acherryontop.com

Fold in and sand edges.


matchbook gift card holder by laura williams, for www.acherryontop.com

Staple the small flap near the very bottom.  This will keep the large flap secure when you tuck it in. 

(Before you staple, fold the large flap in, so you know how low to add the staple.)  


matchbook gift card holder tutorial, by laura williams, for www.acherryontop.com

To prepare the pocket, use a small flat bag (like Canvas Corp's Mini Bag) and punch a half circle from the top front.  

matchbook gift card holder by laura williams, for www.acherryontop.com

Adhere pocket to inside of matchbook.  Now comes the fun part. . .decorating!

I created two different coordinating gift card holders, simply playing around with the Bo Bunny Snow Day cardstock stickers, and journaling paper.  I added some twine to finish off the projects and then all that's left is to add the gift card of your choice.  
matchbook gift card tutorial by laura williams, for www.acherryontop.com  matchbook gift card holder by laura williams, for www.acherryontop.com

I decorated the front of each, plus the inside flap, using a journaling tag to add a "to/from" and a little note. 

matchbook gift card holder by laura williams, for www.acherryontop.com

Easy-peasy! AND it will definitely bump up that gift card present to the top of the favorites list in a hurry!

Remember that the matchbook gift card holder can be easily transitioned from a winter theme to any holiday or celebration you can think of.  Follow the same instructions and substitute any themed product you'd like!

Check out the rest of my article at A Cherry On Top by clicking HERE.  I'll share card ideas made from the left over parts and pieces of this project and more links to product suggestions.

guest designer call
Click here to find out how to submit


Friday, November 16, 2012

How To Use Washi Sheets: ACherryOnTop.com


We love all things Washi!  Today, we're featuring WeR Memory Keeper's 12"x12" Washi Adhesive Sheets.  That's right - 12"x12" Washi!


In this video tutorial, you will learn how to use these Washi Adhesive Sheets to alter a glass jar. You can fill this jar with candy to make a wonderful Holiday gift for anyone on your list!

What you'll need:


Suggested Products:
washi paper   washi paper a cherry on top  washi paper a cherry on top
carta bella merry and bright  circle punchribbon

guest designer call
Click here to find out how to submit

Wednesday, June 6, 2012

Crafting With Kids - Create A Pillow Box Owl Treat Holder


I'm always looking for creative ways to share little RAK's or thank-you surprises for friends, co-workers or my kid's teachers.  Kerry shows us how to create an owl shaped treat holder in this step-by-step tutorial:


Grab your kids and get to punching and gluing!  Tuck a special treat (candy, gift cards, money for grads) into the pouch and your gift will be sure to be an automatic favorite!


Suggested Products:
1" Circle Punch by Martha StewartBaby Girl Border Paper By Bella BlvdHeart Punch by Martha Stewart
acherryontop.com

Wednesday, May 23, 2012

Happy Trails To YOU - Tube -a- licious Gift Ideas

I'm always looking for creative ways to brighten someone's day or share a little surprise!  Mini gift ideas are perfect for this time of year.  There seems to be an abundance of reasons to celebrate: weddings, graduations, showers, birthdays, end of the school year...  


Today, we're sharing quick and easy gift ideas from Laura and Ashley featuring clear Craft Trendy Tubes!


Make this trail-mix tube for the scout or camper in your life.  All it takes is a circle cutter, kraft cardstock (or Canvas Corp's Kraft Round Tags & Ties), your fave die-cut, a bandana (or ribbon) and some hot glue!  Oh yeah - don't forget your favorite trail or granola mix:


trendy craft tube

Looking for a great party or shower favor idea?  Select fun, bite sized snacks to fill the craft tube and a coordinating ribbon.  You can even personalize them with a tag to include the recipient's name or a special thank you message!

trendy craft tube

I really LOVE Ashley's idea to adhere craft tubes to a greeting card:

trendy craft tube

I think I just may use some of these ideas for my son's graduation party!  Do you think he'll like a greeting card with a tube stuffed with money? :)

As always, we love hearing what you think about the project ideas we post! Comments are welcome!

Friday, April 13, 2012

Easy Table Setting How-To For Your Next Party!

Laura shares this quick and easy way to make your table POP in this step-by-step tutorial!  


Make one setting for the Queen (of King) of the day or make 6 or 8 for a special dinner.  This project idea can be modified to fit absolutely any occasion!


Set includes: card, placemat, napkin ring and place card

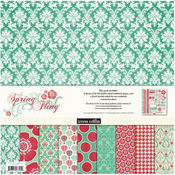
Laura used Teresa Collins' Spring Fling products, but of course you can use your favorite patterned paper collection and matching Bazzill cardstock.

Napkin holder w/ die-cut detail
Using Scor-Tape makes adhering the napkin holder a breeze.  You can also use the same idea to personalize things like water bottles or glass candle holders. Home decorating doesn't have to be expensive or permanent for that matter!

personalized place cards 
Place cards make dinner time fun and they let your guests know they were thought about long before they arrived. What a nice way to warm up the atmosphere!

For Laura's complete 'how-to', click HERE.  Laura even included one of her favorite brunch recipes!  

We love hearing from you - let us know what you think about this project idea and how you think you could use it!
---------------------------------------------------
Suggested Products:


Wednesday, March 28, 2012

Fun Trendy Craft Tube Easter Project How To!

Kerry took a handful of our Trendy Craft Tubes and made them scream SPRINGTIME!  Check out the video tutorial below on how you can make these eye catching treat tubes!

Easter craft tubes

This project is perfect to make ahead of time for any special event.  Change up the stickers for birthday party thank you gifts, or add coffee beans and give to your bff along with a coffee date invite!


We always love seeing your projects!  Be sure to submit them to our acherryontop.com Gallery or post them to our facebook page

Thanks for stopping by!

Tuesday, August 9, 2011

How To Make A Paper Bag Purse Gift Bag

Great idea for that perfect goodie holder or little girl gift!


Special thanks to Kristin from Lil Sweet Pea's Place for the great video.

Wednesday, July 27, 2011

How To Make An Altered Birdhouse


Posted by ChrissyTina (Christina):


The latest trend in altered items has caught me by surprise!  Birdhouses!  I remember when I first saw these, I honestly wasn't that interested in them.  And then I gave them a second look.  All of the sudden I just had to do one!  And then one turned into two and two into three until I had four of them done- one for each of my kids.


Now when it comes to altering objects, I tend to use a lot of paints, stains, and other such items because I have THE HARDEST time covering things in paper.  The paper always ends up too big or to small or crooked.  Absolute madness!  


It's enough to drive anyone wonky!  And then the idea occurred to me.  STAIN!  I love wood grain and how with stains you can see the beautiful patterns in the wood.  Why not just use that as an embellishment in itself?  So I did.


This first house is my "Steampunk'd" house.  I used Tattered Angels Glimmer Glaze in "Cowboy" and "Chianti".  The main body of the house is done using "Cowboy".  The trims and between the slats of the roof is stained with "Chianti".


I chose these two stains knowing that I had planned on using Graphic 45's "Steampunk Debutante".  The deep rich Chianti and the rustic Cowboy complimented these papers perfectly without being too harsh. 


I wanted to soften the typical steampunk look so I chose embellishments that were feminine and full of detail.  I used gears as more of a background theme.


The easiest way to tackle one of these types of projects is to work in layers.  Knowing what you want your end result to be is also very helpful.  My first layer was the stain.  While that was drying, I picked out the images from the papers that I wanted to use and fussy cut them.  I usually always pop dot things from the surface because it breathes a kind of life and interest into the piece.


So my second layer were the border strips I punched for the trim of the roof, the ball chains, and any images that were not being pop dotted up.  On the third layer were my final touches- things that were pop dotted. 
If you look closely at some of the images and the trim on the front of the house, you will see crackling.  I used Ranger's Crackle Accents to age these pieces and give them a more industrial yet vintage look.


In keeping with the soften steampunked theme, I added a Tim Holtz game spinner to the butterfly.  As a final touch, I lightly sprayed the whole house with Tattered Angels Glimmer Mist in "Iridescent Gold".  Nothing beats a subtle sparkle!


Anyone who knows me knows that I tend to be a bit detail oriented.  So naturally, I did the back of the house too.  Because it is the back, I kept it pretty simple and not very indepth.  I cut out an image that just captivated me and stuck on there...with pop dots of course!


If you keep in mind to take things one layer at a time and apply this approach, then any altered item will be easy to do.  In each of the following pieces, I worked in layers and the end result is always kept in focus.


On my second birdhouse, I used Graphic 45's "Once Upon A Springtime" and embellishments from Tim Holtz and Bo Bunny.  The paint is just white gesso and Adirondack's "Lettuce Green" paint dabber.


Click for more views
 
 
The next birdhouse is made using Graphic 45's "Magic of Oz".  This one used A LOT more fussy cutting and more layers.  I wanted to convey the scene where Dorothy and friends are crossing the poppy field to the Emerald City.  Each side of the house shows a particular scene.  I used Making Memories acrylic paint in "Pine" and Glitter Paint in "Seafoam".  Embellishments are Tim Holtz


Click for detailed view


The final birdhouse uses Graphic 45's "Le Cirque" collection.  I wanted this house to feel and look like the Big Top!


I hope you enjoyed looking at these birdhouses and feel inspired to do some of your own.  Just remember-  think in terms of layers and keep your end result in focus.  You won't believe me when I tell you that it took me about 2 to 2.5 hours to do each house.  That's it!  Have fun!  Get messy!  And stay creative!
 
Thanks to ACOT for letting play with these products!