Showing posts with label back to school ideas. Show all posts

Monday, October 1, 2012

How To Make A Halloween Treat Holder


In this video tutorial, you will learn how to assemble these M&M Treat Holders using the "Monster Mash" die cut pack from Imaginisce. These are perfect treats to hand out on Halloween, and can be altered to fit other types of fun sized candy as well!


Watch the video

 
What You'll Need:

Create your own project with the Monster Mash collection from Imaginisce
monster mash imaginisce a cherry on top


guest designer call
Click here to find out how to submit
 

Wednesday, May 23, 2012

Happy Trails To YOU - Tube -a- licious Gift Ideas

I'm always looking for creative ways to brighten someone's day or share a little surprise!  Mini gift ideas are perfect for this time of year.  There seems to be an abundance of reasons to celebrate: weddings, graduations, showers, birthdays, end of the school year...  


Today, we're sharing quick and easy gift ideas from Laura and Ashley featuring clear Craft Trendy Tubes!


Make this trail-mix tube for the scout or camper in your life.  All it takes is a circle cutter, kraft cardstock (or Canvas Corp's Kraft Round Tags & Ties), your fave die-cut, a bandana (or ribbon) and some hot glue!  Oh yeah - don't forget your favorite trail or granola mix:


trendy craft tube

Looking for a great party or shower favor idea?  Select fun, bite sized snacks to fill the craft tube and a coordinating ribbon.  You can even personalize them with a tag to include the recipient's name or a special thank you message!

trendy craft tube

I really LOVE Ashley's idea to adhere craft tubes to a greeting card:

trendy craft tube

I think I just may use some of these ideas for my son's graduation party!  Do you think he'll like a greeting card with a tube stuffed with money? :)

As always, we love hearing what you think about the project ideas we post! Comments are welcome!

Monday, October 3, 2011

Paper Crafting With We R Memory Keepers' Autumn Splendor Collection


Posted by carrie123 (Carrie):


I am sure many of you are feeling the same way that I am...sad to see summer come to an end.  Although I am sad, I am happy to see fall arrive.  Fall is my favorite time of the year.  Not too cold, not too hot.  I love the crisp air and that certain smell that fall brings, not to mention how beautiful the trees look with all the leaves changing colors. 


Fall brings me back to my childhood and all the fun times I had.  My mom would almost every weekend take my sister and I driving around just to see the beautiful artwork that nature produced.  Along those rides we would look for the forest preserve that had the most leaves on the ground so we could stop and collect them all into a huge pile and jump right in them!  When I saw We R Memory Keepers Autumn Splendor line, all of these memories came flooding back to me. 


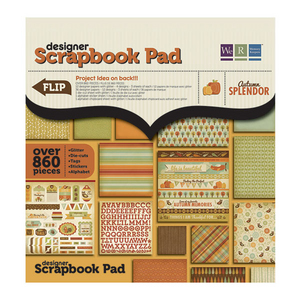
It is full of those rich wonderful colors that I would see on our nature adventures.  The patterns were so fun to work with so I wanted to create some fun layouts to show them off.  For all of these layouts I used the Autumn Splendor 12x12 Scrapbook Pad.  


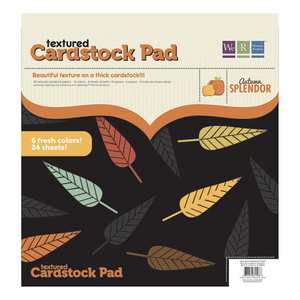
This pad has everything you need...heavy duty patterned cardstock, die cuts, alphabets and chipboard.  Tie this in with the Autumn Splendor 12x12 Cardstock Pad and you have the makings of some awesome layouts.  I love that We R Memory Keepers makes these cardstock pads with pretty much all of their lines - really takes the guess work out of picking the right cardstock!


For my second layout I wanted to show that this line is just not for fall layouts.  In sticking with the fun memories, I chose to do a layout of me and my sister.  I don't think we have many good photos of the two of us...but we sure do have a bunch of fun trying to get them!


My third layout is an older group of photos.  I have such vivid memories of the fun I had with my mom going on these adventures, I decided to carry on that fun and wonderful tradition with my kids.


Products used:

Thursday, September 15, 2011

Paper Crafting With Off To School By Fancy Pants Designs


Posted by SarahA (Sarah):


When I saw the sneak peek of the Off To School line from Fancy Pants during CHA, I knew I HAD to have it. With a little one starting kindergarten this year, a school line was a must have for me! 


I love the new chipboard shapes in this line and all of the fun Design Embellishments. There are so many fun options with this line, you can scrap all of your school photos or use them for other projects like I did!


Kindergarten Supplies
I love school supplies. After all, they're like the distant cousin of scrappy supplies, right?! I had to spread it all out and take a photo of our supplies for this year. The pencil paper fit this page perfectly! I also used a few pieces from the strips sheet. I cut and layered 3 of the cards from the cards sheet and used that to list the supplies. I used a lot of the chipboard pieces and layered them in a sort of frame around the journaling cards.


First Day of School
On this layout, I layered a few strips from the Stripes sheet on the left hand side, then used my machine to stitch around the edge of the paper a few times. I needed a little something extra in the left corner, so I layered one of the cards from the cards sheet under the photo.  I used a little of everything for embellishments on this page- the Design Elements, buttons, chipboard and Chalk Stickers. I also used the Smash Stamp on this page a few times for the date.


Altered Box Top Container
A few weeks ago on the message board, there was a discussion on the Box Tops for Education. Grace posted a link of a cute altered container, and I decided to make one, too. 


I raided my recycling bin and found this parmesan cheese container and set to work altering it. I used a border punch for the edges, a few scrapbooking patterned papers and some cardstock to cover the outside. I then wrapped the middle of the jar in twine and made a tag using one of the Chalk Stickers and some Jenni Bowlin alphas. 


The pencil sticker is also from the Chalk Stickers sheet. This is a much cuter alternative to the old envelope I was keeping them in!


Flashcard Box
My daughter was sent home with flashcards for the sight words she'll be learning through the year. I decided to make a box to hold them all and set out to look for a template. Turns out a Crayola box of 24 crayons was just the right size! 


I first traced the template on a  piece of patterned paper, then scored the fold lines and assembled the box. I used Tombow liquid glue to adhere the side. When that was completely dry, I used a flash card from the Design Embellishments pack  to decorate the front. On top of that, 


I used a small piece from that pack, punched holes in the sides and tied it on with baker's twine. I also used foam adhesive on the back for a little dimension. My Jenni Bowlin chalkboard alphas made an appearance on this project, too!
 

Products used in this reveal:


No. 2 Pencils Paper - Off To School By Fancy Pants DesignsFlashcards Paper - Off To School By Fancy Pants DesignsLearning Paper - Off To School By Fancy Pants Designs Favorite Teacher Paper - Off To School By Fancy Pants DesignsCards Paper - Off To School By Fancy Pants DesignsStripes Paper - Off To School By Fancy Pants Designs  Measure Up Paper - Off To School By Fancy Pants DesignsOff To School Buttons By Fancy Pants DesignsOff To School Chalk Stickers By Fancy Pants DesignsDate SMASH StampMini Chalkboard Alpha-Multi - Jenni Bowlin StudiosMini Chalkboard Alpha-Black - Jenni Bowlin Studios

Friday, May 20, 2011

Digital & Hybrid Scrapbooking With Marcie Reckinger Designs

Posted by Jenn Kellams:

This week the Digi CT has chosen to showcase the marvelous designs by Marcie Reckinger.  Marcie's designs are so unique and always her own.  She has some of the most lovely kits.
Marcie's kits and products are chock full of hand drawn elements and unique papers.  There is always an element of fun thrown in and the kits are so versatile.  Something I adore about Marcie, is that you can buy her kits, or just the papers or just the elements.

This allows you to be more selective and creative buying just the things you need the most.  Of course, I could never buy just the papers or elements....I ALWAYS have to have the whole kit!

Traditions by Jenn Kellams


I used the kit "Cozy Christmas" to scrap the pictures of our Christmas three this from this past year.  I thought the kits was fun and playful and just right for the "photo shoot" we gave our new knit ornaments which we purchased.  Every year my husband and I purchase new ornaments for the tree and these were the lucky ones this year!

Sleep Little One by Janell

Janell says: "Marcie's kits are always full of whimsy and cute elements. I loved the elephant in this baby kit so I had to go find some baby pictures to use for this reveal."
More Alike Than We Know by Smiley-Scrap8
The Dress by Janell

Wishing Stone Stacks & Cactus by Smiley-Scrap8
She Said "Yes!" by Art_Teacher
      
This layout is of my dear brother and his new fiancee!  For this reveal, we are featuring the talented Marcie Reckinger. I have been a long-time fan of her designs and she is still putting out beautiful things, like this "Boboli Gardens" kit. I love the colors and the elegant details!
Just Call Me "Hannah" by Art_Teacher

One of the things I love best about Marcie Reckinger's designs is how versatile they are. For this layout I combined 2 kits with different color schemes, yet they seem to go together perfectly!
Members Only by Smiley-Scrap8

Hybrid French Fry Box by nun69


Angie says: "I LOVE these little robots and I have been looking for a reason to make a cute French Fry box! Well I used's Marci's Robot Kit and made thgis cute French Fry box that now houses crayons for the kids! I printed the little robot seperate, cut him out and then pop dotted him the box :)"
Peyton Frame by nun69


Angie ROCKED these hybrid projects!!  This is what she had to say about this one....."so I loved the frame I did for Abby's room so I decided to make one for Peyton's room. This time I did it with digital products and paper products! It was sooo easy! Took me less than an hour from start to finish! 

I made a 8x8 LO in photoshop and then put 4 circles {one in each corner} and some embellishments and then printed! I then cut out 4 circle pictures of Peyton and placed them in the remaining spots. I printed some extra digital embellishments {2 gears and the robot} and pop dotted them on my LO :) Then I decided I wanted the center cut out, did that and backed it all with some really cute rocket paper!"
Grandpa's Boy by writerlady

Sandy used Little Ladybug Kit by Marcie Reckinger. Thank you for letting me play with this kit - it's wonderful!

Some products used in these layouts are...