Showing posts with label how to make party favors. Show all posts

Friday, April 13, 2012

Easy Table Setting How-To For Your Next Party!

Laura shares this quick and easy way to make your table POP in this step-by-step tutorial!  


Make one setting for the Queen (of King) of the day or make 6 or 8 for a special dinner.  This project idea can be modified to fit absolutely any occasion!


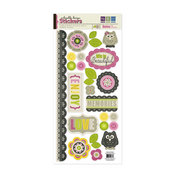
Set includes: card, placemat, napkin ring and place card

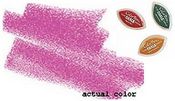
Laura used Teresa Collins' Spring Fling products, but of course you can use your favorite patterned paper collection and matching Bazzill cardstock.

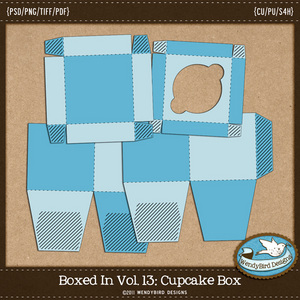
Napkin holder w/ die-cut detail
Using Scor-Tape makes adhering the napkin holder a breeze.  You can also use the same idea to personalize things like water bottles or glass candle holders. Home decorating doesn't have to be expensive or permanent for that matter!

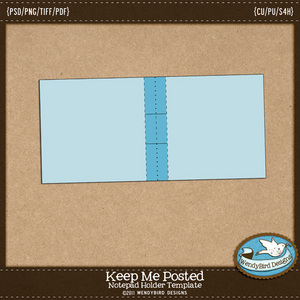
personalized place cards 
Place cards make dinner time fun and they let your guests know they were thought about long before they arrived. What a nice way to warm up the atmosphere!

For Laura's complete 'how-to', click HERE.  Laura even included one of her favorite brunch recipes!  

We love hearing from you - let us know what you think about this project idea and how you think you could use it!
---------------------------------------------------
Suggested Products:


Tuesday, November 15, 2011

How To Make An Accordion Card Holder Purse


Posted by carrie123

If you are like me, there comes times when I am in a bind for a quick gift.  This handy little project will be just the thing you need. It is quick and easy to make.

Once you get the hang of it, you can be whipping these out in about an hour. I actually have 3 of them I have made already for teacher's gifts for the holidays. So, if you are ready let's get started!

how to make an accordian purse

First, you are going to need the following supplies:


  • CARDSTOCK: One 6"x11" - One 6"x7" - Two 4"x10" - Four 4"x5 3/4" - One 1 1/2' x 11"
  • PATTERNED PAPER: Two 3 1/2" x 10" - One 5 1/2" x 9 1/2" - One 3 1/2" x 51/2" - One 1" x 11"
  • ROUND CORNER PUNCH
  • GLUE or DOUBLE STICK TAPE
  • VELCRO
  • SCORER
  • ADDITIONAL EMBELLISHMENTS

Alright, here is your first step...


Now, attatch the strip you just made to the non adhered part of the 5 1/2 x 9 1/2 paper to make the handle and then finish adhering the rest of the paper down:


Apply glue or  tape  to the left  and  right outer  panels of  the  folded  4 x 10”card stock.


Adhere one side of the 4 x 10 cardstock to back 4" panel of the main piece and do the same for the front of the main piece. Repeat for the second 4" panel.


 You can then decorate the fron any way you like.


I also made coordinating cards to fill the purse.  I now have a cute and quick little gift for someone!


Products used:

Saturday, October 29, 2011

Hybrid Paper Crafting Featuring Wendy Bird Designs


Posted by nun69


Well if you don't think you can hybrid, think again! All you need is a printer and some adhesive! You don't even need to be a digital scrapper to work with WendyBird Designs


Not only can you use them with your digital scrapping supplies, but she has them in PDF format so you can print them as a template and trace on your paper cardstock/pattern paper or even print the template right on to your paper from your printer! 


We, the Digi CT, made everything from Halloween Haunted Houses out of her Milk Carton Template to Notepad Holders for Xmas gifts to adorable Cupcake Holder Boxes!  


First, let's show off all those wonderful Cupcake Boxes using her Cupcake Box Template that some of the lovely ladies made for the crop contest!
Wendy Bird Designs Cupcake Box

created by Celticrose

created by nun69

Here is a project featuring Wendy Bird Designs' Notepad Holder Template:
 
Keep Me Posted Template

  note pad holder created by FairyMouseMom

  
Create unique goodie bags using the Treat Tent Template:
 
wendy bird treat tent template

created by janell
finished treat tents

Wendy Bird Designs offers a wide selection of specialized templates.  All of her designs come with easy to read instructions that include a visual counterpart so you can easily understand and follow them! So if you haven't checked out her shoppe, go now and see all the goodies that you can make! 

 ~Visit Wendy Bird Designs' Shoppe at ACherryOnTop.com~

Click here to view more ideas not displayed in this blog.

Thursday, August 25, 2011

Digi & Hybrid Scrapbooking With Designs by Sherri Tierney

This week the A Cherry On Top digi Creative Team decided to feature some of Sherri Tierney's fabulous kits & designs. She has some really fun and whimiscal kits that can meet any of your needs. If you happen to be new to digi scrapping, check out her fabulous quick pages where all you have to do is drop in your picture, add some journaling and VIOLA.... instant digi pages! So go check out Sherri's shoppe and grab some new goodies~


First off we have 3 adorable LO's featuring Janell's absolutely adorable kiddos... by Janell~


Next up we have these fab LO's highlighting Laura's recent trip to Germany~ Laura/Art-Teacher~


Here is a cute LO featuring Angie's son helping make cupcakes~by Angie/nun69~


~Along with some cute little hybrid milk cartons~


Jenn shows us a cute LO with her adorable nieces and nephews ~by jjenni08/Jenn Kellams


An adorable layout of her newest addition to the family from Ronny/Smiley-Scrap8~


And I have to leave you with these AMAZING hybrid luggage tags Ronny made for her kid's backpacks and sports bags:


And here are just a few of the products used for this week's reveal: you can check out Sherri's Shoppe right here :)