Laura shares five different projects focusing on specific how-to techniques and ideas which can be used using just about any stamp, paper pack and, or color scheme out there!

Stamps are an investment. We buy them because they seem like a
long-lasting, worthwhile, crafty purchase. We justify the expense,
promising ourselves that we will get tons of use from them and they'll
be super practical. And guess what? That is completely true.
Today, I challenge you to bust out one of those stamp sets (and hey, if you realllly want to... go buy a new one, I won't tell) and try some of these simple techniques and ideas to get some use out of those great stamps!
1. Layer Your Stamps:
Stamp a background over an outline image. To create the tag on this card, I stamped the polka-dot background, and then the tag outline and sentiment right over it. Polka-dots are my FAVORITE; they just make me HAPPY! Think about what stamped images you can add a pattern to. (a polka-dotted tree, teacup, or cloud? ADORABLE.)

2. Trim and overlap stamped images:
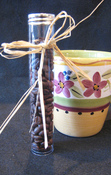
To create this candy tube, I stamped and trimmed the background square, and then stamped the flowers on patterned paper and cardstock. I trimmed them, and layered them on, using foam tape to add some dimension. (Remember how I love polka-dots? Well, I love foam tape almost as much!)

3. KISS! (Keep it simple, silly!)
Grab the one or two stamps you like the best and let them work their magic. Don't get bogged down in the details. On this card I used two stamps, added a bit of colored pencil, tied a piece of twine, and called it DONE. It took less than 5 minutes. YOU CAN DO THIS TOO!!!

4. Repeat, repeat, repeat:
Take a stamp. . .just about any stamp. . .and make a background. To really add some depth, try "second-generation stamping", where you stamp twice before reinking. Stamp, stamp, ink. Stamp, stamp, ink. Got it? ;) Make sure you stamp over the edges to make it look more like an actual piece of patterned paper. And on this card, I didn't even do the entire background of the card. A nice stripe at the bottom was enough. (Add "simple" to my list of favorite things, right after polka-dots and foam tape!)

5. Think Outside of the Box:
On this card, I wanted to use the square backgrond stamps in a new way. So I stamped them on cardstock a few times, and then after I trimmed the squares, I trimmed them each in half. It made a fun easy design that fills my card. (And lookie there. . .polka-dots, foam tape, simplicity! ahhhh!)

Remember, nothing I've shown you today is groundbreaking or complicated. But sometimes we all need a refresher, and an inspiration to look at our stamps in a new way. I hope you'll take one (or two, or five) of these ideas, and you'll dive in and CREATE with what you love!

Laura loves bright colors, graphic patterns, clean and simple everything,
polka dots (and chocolate!) She is a card-maker and stamper at heart, but also enjoys creating all kinds of paper-crafty goodness! Her work has been
published in Paper Crafts, CARDS, CardMaker, Simple Scrapbooks, and
Crafts 'n Things.