Showing posts with label card making. Show all posts

Wednesday, September 28, 2016

Watch This Video Preview: The Laser Square from WRMK

Video Preview: The Laser Square Tool by We R Memory Keepers makes creating with accuracy a cinch! 

Coming soon to A Cherry On Top Crafts: http://bit.ly/2cz56ku


Click to Watch Preview

The Laser Square will help with photo placement on scrapbook pages, stamping, home décor and so much more! This item is expected to arrive this Fall at A Cherry On Top, but you can pre-order TODAY!

Shop Now at http://bit.ly/2cz56ku

Friday, September 16, 2016

Watch This Video Preview: The Precision Press from WRMK

This amazing new stamping tool from We R Memory Keepers will make mass producing your greeting cards a BREEZE!

precision press stamping tool wrmk
Click to Watch Preview

Make creating gradient or ombre stamping a cinch with the Precision Press by We R Memory Keepers. This item is expected to arrive in our shop in the Fall of 2016. Pre-Order yours today!

Shop Now at http://bit.ly/precisionpress

Thursday, January 21, 2016

New Video Preview: Authentique Paper's Springtime Collection!


Today we wanted to give you a preview of a new paper crafting collection from Authentique Paper!  It features a Spring/Easter theme.  Be sure to let us know what you think about the new Springtime collection - available now at ACherryOnTop.com! 


 shop new authentique paper crafting items

Wednesday, March 4, 2015

Help Us Welcome This Month's Guest Craft Designer!

March is here which that means two things:

SPRING is almost here AND we have a new Guest Designer!  Please help us welcome Sara as our March 2015 Guest Designer of the month.


Screenname:  Sara M.

My crafty supply must have: I am a scrapbooking diva and must have 2- patterned papers and enamel dots


Guilty pleasures:  Cupcakes and podcasts


BIO:  Married for 16 years with 2 boys and 2 dogs.  In my life the primary hat I wear is that of caregiver.  My eldest son has high functioning autism.  My youngest also has some pretty rough health issues.  A number of years ago we opened our home to my grandparents, who are both in their 80's, and I am their primary caregiver. 


And my job?  I work in home healthcare and I am a caregiver there as well.  Caregiving is hard sometimes.  Scrapbooking and cardmaking  are my therapy - period.  It is what keeps a smile on my face when I've had one of "those" days.


Sara worked with products from KaiserCraft, Tim Holtz and Simple Stories.  Here are a some of her projects:

Layout: Wonderful You

 kaiser craft project ideas a cherry on top crafts

products used:


 kaiser craft shine bright projects a cherry on top crafts   kaiser craft shine bright projects a cherry on top crafts
 kaiser craft shine bright project ideas a cherry on top crafts


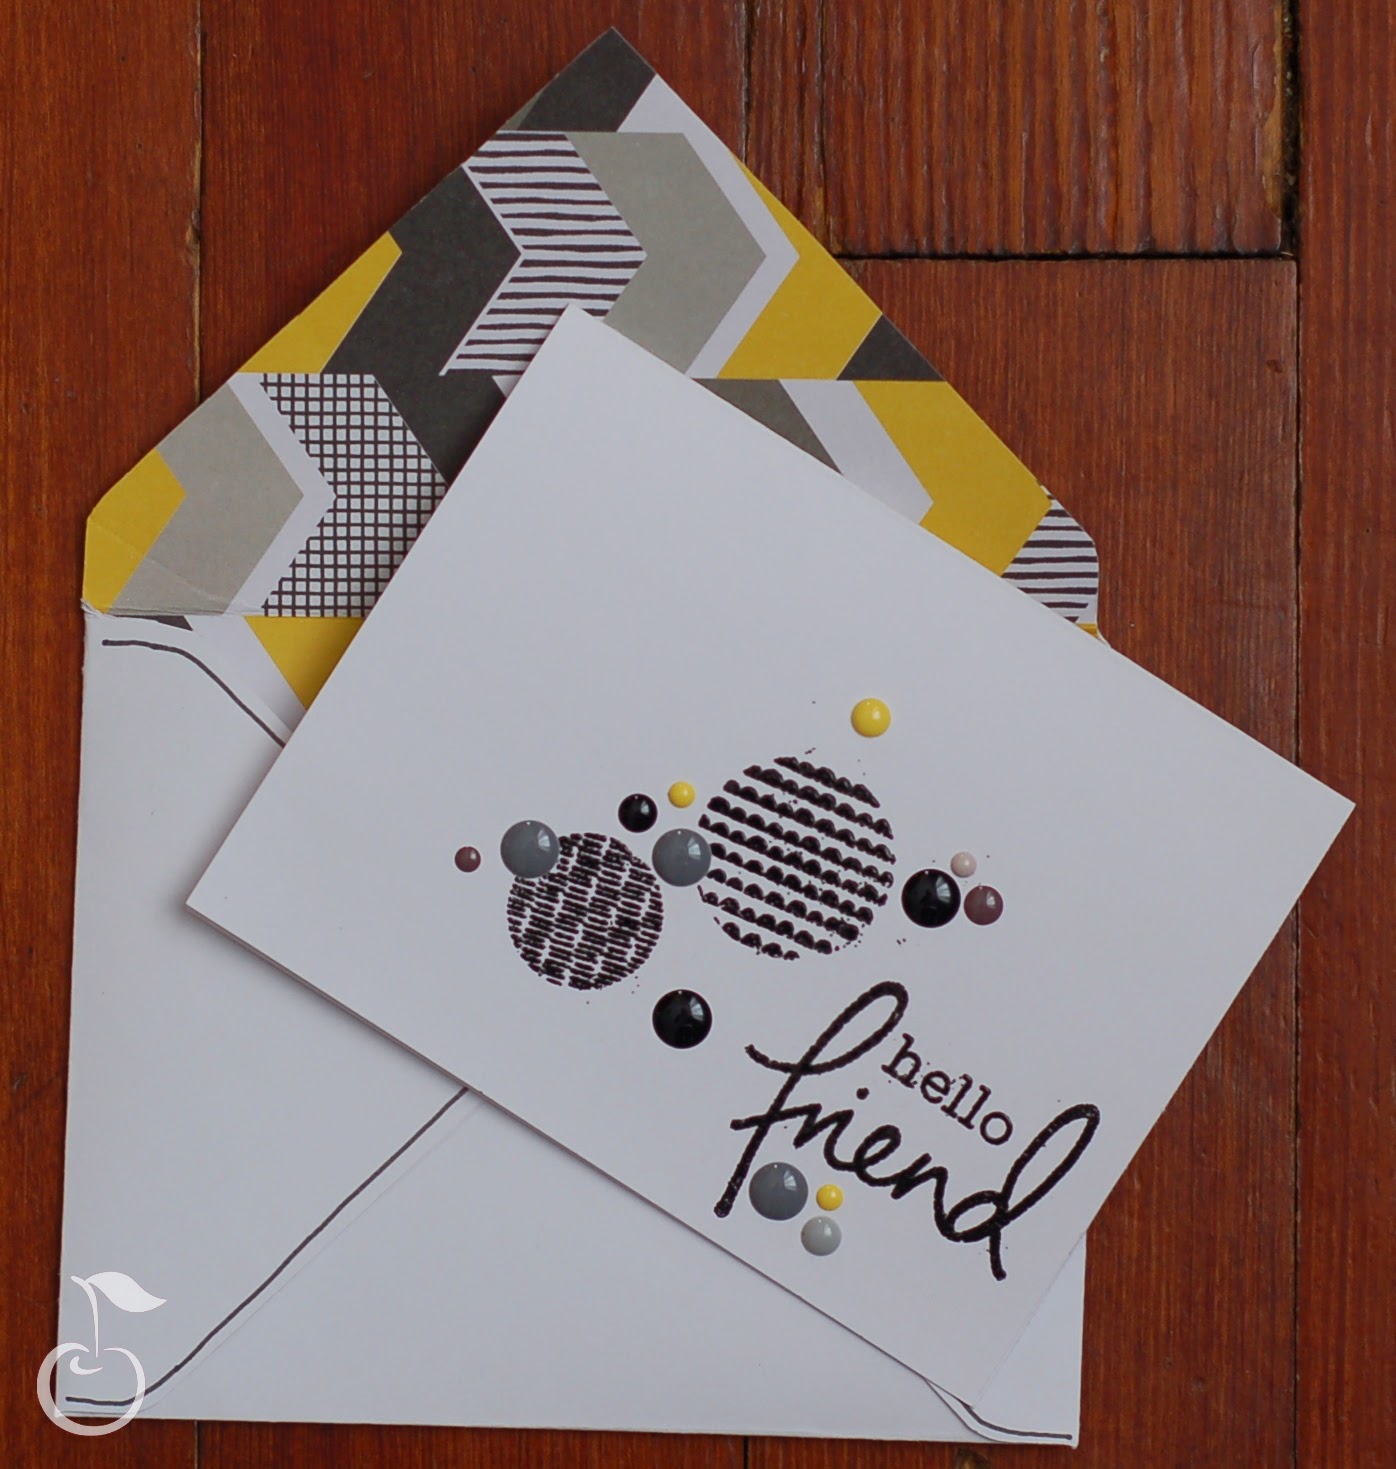
Card: Hello Friend

 kaisercraft project ideas a cherry on top crafts

products used:

 tim holtz embossing ink a cherry on top crafts  simple stories life documented a cherry on top crafts

 kaisercraft shine bright project ideas a cherry on top crafts

Click here to view more projects from Sara and be sure to visit our Message Board for her exciting CHALLENGES during the month of March at ACherryOnTop.com - 


Click here to find out how to submit

Friday, January 24, 2014

New Echo Park and Elle's Studio Videos On ACOT CraftTV

Believe it or not - Spring is actually on it's way!  We hope these product peeks help get you into the spirit!

Elle's Studio is quickly becoming one of our hottest companies!  This new line celebrates the little things in bright, cherry colors!  Check out her Everyday Moments collection.


We love all things Echo Park!  Their new St. Patrick's Day and Hippity Hoppity lines will have you thinking Spring - 


Don't miss a thing - be sure to subscribe to our YouTube channel to see product demos and giveaways!

YouTube homeYouTube homeSee us on YouTube

Tuesday, September 17, 2013

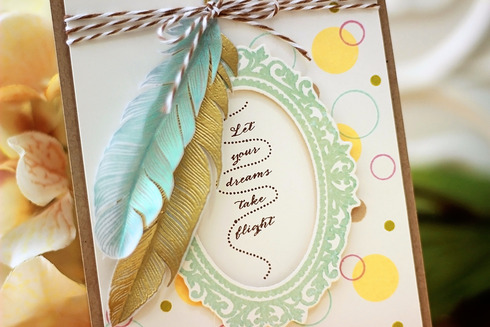
How To Use Perfect Pearls To Make Your Greeting Card Shine!

Posted by JeanMartin


Typically, you can find metallic embossing powders only in gold or silver.  Using Perfect Pearls with a darker back drop or on vellum can really make your project stand out!

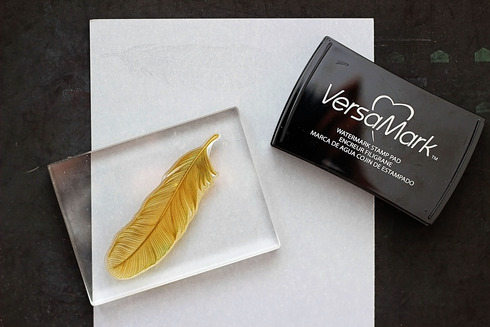
First - stamp the image onto vellum using a watermark ink like VersaMark:


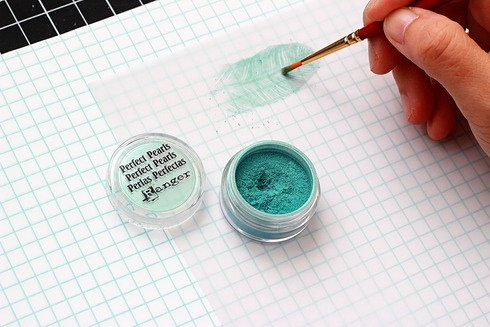
Next - select your favorite Perfect Pearls pigment and use a craft brush to apply the powder to the stamped image.  If you're using a dark cardstock, be sure to apply in small dots instead of just brushing it on.  Doing this will help you control where you place the pigment.  If you're applying to vellum, use a normal brush motion.


After you're done, lightly spray with a little water to avoid any warping to your vellum.  If you're unsure about this, just practice a few times. 


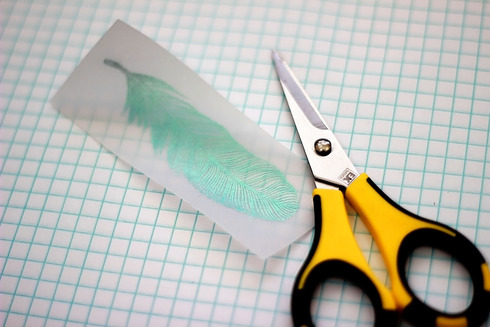
At this point you can fussy cut around your image to bring out the details:


There are so many ways you can incorporate Perfect Pearls into you project - including heat embossing!  If you want more ideas, please click here to view more of this how-to on the A Cherry On Top website.

Thanks so much for stopping by - Until next time!


Suggested Supplies:


bakers twine acherryontopframe die acherryontopfeather stamp acherryontopperfect pearls pigment ink acherryontopwatermark ink acherryontop


guest designer call
Click here to find out how to submit


Wednesday, August 21, 2013

Design Team Call - Bella Blvd

We know many of you love creating with Bella Blvd products!

What would be better than being a part of Bella's 2013 - 2014
DESIGN TEAM?!?!

Bella Blvd just announced an open call to all paper and fabric crafters:


Remember, we're just happy to spread the word!  

Please visit BellaBlvd.typepad.com for complete details.  Who knows, maybe your work will end up in one of our newsletters - showing your talent off to tons of people who also love Bella Blvd!  

Good luck!


Friday, August 9, 2013

Using Watercolor Resist


how to water color resist embossing
how to by Jean Martin

I love Distress Inks and Markers. They have so many applications and uses. One of my favorites is to use them as watercolor inks. They react to water so well that they're perfect for what I have for you today. Watercolor resist! Start by picking out stamps to use as background patterns.  You'll also be needing some watermark ink, embossing powder and a heat tool.

how to water color resist embossing

You're going to stamp the design using the watermark ink on a small strip of cardstock.  The size of the cardstock will vary depending on your project.  Using white embossing powder will allow the design to pop and stand out a bit more.  Remember, embossing pens are our friends!  If you miss anything with the stamp, you can always use an embossing pen to touch it up.

how to water color resist embossing

Grab a nice craft mat for this part

how to water color resist embossing

how to water color resist embossing

Using your heat gun to dry the ink between color layers is definitely recommended.  Doing this will ensure the colors do not run together.  You want the finished effect to be sharp.

how to water color resist embossing

That's it!  It's a simple technique that leaves impressive results.  Use the stamped image to add interest to your card, scrapbook layout page, place setting - or any creative project.  

I decided to make a card with varying layers using mine.  

how to water color resist embossing

water resist

There you go! Watercolor resist using Distress Inks and Markers. Why don't you give it a try? :) Thanks for stopping by today! I'll be back again soon with another tutorial for you!

Recommended Products:


guest designer call

Click here to find out how to submit

Friday, July 19, 2013

CHA - Create - N- Connect Is Next Week!

create n connect cha acherryontop sneak peeks


Kristin and I are so excited to be traveling to Hot Vegas to attend the Create-n-Connect Conference next week!  Honestly, I always love this part of my job. Meeting with the manufacturers, designers and long time crafty-enthusiasts has a way of stoking our creative mojo!  

Of course, getting to TOUCH and feel all of the new products is a definite bonus! We'll do our best to bring the show to you through videos and lots of pics.   Be sure to like our facebook page for Create-n-Connect highlights throughout next week!

Join us on Facebook

We've added brand new Peeks to our list of CHA Create - N - Connect Summer 2013 Sneaks!

Look for updates here on our web site!

Thursday, February 7, 2013

Making A Tri-Fold Card Is Easy!

Tami M
If you're the resident card maker in your group of crafties, it can be a little challenging when you're trying to come up with something new and creative.  

Tired of the traditional half-fold cards?  Why not give this tri-fold, panel card a try!  It's easier than it looks:


tri fold card

Here's What You'll Need:
  • 12"12" cardstock
  • scoring board (like the Scor-pal)
  • favorite patterned papers
  • coordinating embellishments
  • adhesive (of course)
Measure and cut a 12"x5½" piece of plain cardstock (color your choice).  Using the scoring board, put the 12" side at top guide and then score at two inches, four inches, eight inches and ten inches:


Then turn the cardstock and score at the one inch and four and a half inch lines (between the original top and bottom horizontal lines).  It should look like this:


Now it's time to cut!  Start at the top horizontal line and end at the bottom horizontal line:


And fold like this:


That's the hard part!  Now you can start decorating the sides (or panels) any way you'd like.  For this particular card, I cut out pieces of patterned paper to fit each folded section:
  • 2 pcs of ¾" x 3¾"
  • 2 pcs of 1 ¾" x 5¼"
  • 4 pcs of ¾ x 1¾"
Image of closed card:

Now that you have the basics, you can alter the original scoring measurements to create your desired look.  Just have fun with it!


Product suggestions:


guest designer call
Click here to find out how to submit