Showing posts with label scor-pal. Show all posts

Tuesday, March 12, 2013

How To Make A Cupcake Treat Box

Posted by lauralooloo

Laura W.

Here in Saginaw, Michigan - we have a lot of little specialty bake shops!  We love those little carry containers used to hold things like muffins or cupcakes! 

Laura shows us how we can make our own personalized take out boxes using the Scor-Pal and papers from My Mind's Eye.


Along with some basics like scissors and adhesives, you'll need the following to start this project:

Lime Twist patterned paper by My Mind's Eye
Stickers
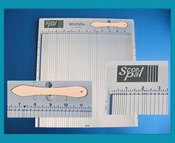
Scor-Pal
Baker's Twine


Laura used this cute elongated Chinese take-out 'type' box as inspiration and as a pattern:


Carefully take the box apart and trace the shape onto the back of your patterned paper.  You'll need to then cut out the shape and score and fold where necessary.  Using a scoring board like the Scor-Pal here is incredibly helpful to ensure your folds are crisp and your box ends up looking...well, like a box!

If you don't have a box in hand to use as a pattern, there are tons of free printable box templates available online.  Just use your browser to find the size and shape that's perfect for your project.

You'll end up with something that looks like this:


Laura used some baker's twine along with a punched out circle shape of Kraft Paper and added a cute sticker.  She created a matching card to complete the treat box project.  This is really perfect as a teacher gift, coworker's birthday or a housewarming gift!  You just have to decide how you're going to fill it!


Suggested Products:


my minds eye lime twist  baker's twine
scor pal

guest designer call
Click here to find out how to submit


Thursday, February 7, 2013

Making A Tri-Fold Card Is Easy!

Tami M
If you're the resident card maker in your group of crafties, it can be a little challenging when you're trying to come up with something new and creative.  

Tired of the traditional half-fold cards?  Why not give this tri-fold, panel card a try!  It's easier than it looks:


tri fold card

Here's What You'll Need:
  • 12"12" cardstock
  • scoring board (like the Scor-pal)
  • favorite patterned papers
  • coordinating embellishments
  • adhesive (of course)
Measure and cut a 12"x5½" piece of plain cardstock (color your choice).  Using the scoring board, put the 12" side at top guide and then score at two inches, four inches, eight inches and ten inches:


Then turn the cardstock and score at the one inch and four and a half inch lines (between the original top and bottom horizontal lines).  It should look like this:


Now it's time to cut!  Start at the top horizontal line and end at the bottom horizontal line:


And fold like this:


That's the hard part!  Now you can start decorating the sides (or panels) any way you'd like.  For this particular card, I cut out pieces of patterned paper to fit each folded section:
  • 2 pcs of ¾" x 3¾"
  • 2 pcs of 1 ¾" x 5¼"
  • 4 pcs of ¾ x 1¾"
Image of closed card:

Now that you have the basics, you can alter the original scoring measurements to create your desired look.  Just have fun with it!


Product suggestions:


guest designer call
Click here to find out how to submit


Saturday, December 15, 2012

How To Make Quick & Easy Matchbook Gift Card Holders


Posted by lauralooloo

Some people think gift cards are a cop-out during the gift-giving season . . .but I for one LOVE to receive a gift card! Come on, free money for guilt-free shopping expeditions!? It's the gift that keeps on giving! Jazzing up a gift card in fun packaging can give the gift card some added zip and personality. It's the perfect finishing touch.

matchbook gift card holder by laura williams, for www.acherryontop.com

These matchbook gift card holders can be whipped up in just a few minutes, using whatever supplies you have on hand.  

In addition to my everyday tools and supplies, here's what else I used:

Bo Bunny Snow Day collection: patterned papers - Pajamas, and Journal, plus Bo Bunny Snow Day cardstock stickers
Cappuchino Brown Bakers Twine 
Canvas Corp Mini Flat Bags
Scor-Pal (The Scor-Pal makes quick work of the scored lines on this project, but a ruler and folding by hand will get the job done as well.)
 
First, we'll construct the matchbook base.  
matchbook gift card tutorial by laura williams, for www.acherryontop.com

Trim patterned paper (or cardstock) strip to 9.25x3 inches.  Score strip at 4, 4.25, and 8.5.


matchbook gift card holder by laura williams, for www.acherryontop.com

Fold in and sand edges.


matchbook gift card holder by laura williams, for www.acherryontop.com

Staple the small flap near the very bottom.  This will keep the large flap secure when you tuck it in. 

(Before you staple, fold the large flap in, so you know how low to add the staple.)  


matchbook gift card holder tutorial, by laura williams, for www.acherryontop.com

To prepare the pocket, use a small flat bag (like Canvas Corp's Mini Bag) and punch a half circle from the top front.  

matchbook gift card holder by laura williams, for www.acherryontop.com

Adhere pocket to inside of matchbook.  Now comes the fun part. . .decorating!

I created two different coordinating gift card holders, simply playing around with the Bo Bunny Snow Day cardstock stickers, and journaling paper.  I added some twine to finish off the projects and then all that's left is to add the gift card of your choice.  
matchbook gift card tutorial by laura williams, for www.acherryontop.com  matchbook gift card holder by laura williams, for www.acherryontop.com

I decorated the front of each, plus the inside flap, using a journaling tag to add a "to/from" and a little note. 

matchbook gift card holder by laura williams, for www.acherryontop.com

Easy-peasy! AND it will definitely bump up that gift card present to the top of the favorites list in a hurry!

Remember that the matchbook gift card holder can be easily transitioned from a winter theme to any holiday or celebration you can think of.  Follow the same instructions and substitute any themed product you'd like!

Check out the rest of my article at A Cherry On Top by clicking HERE.  I'll share card ideas made from the left over parts and pieces of this project and more links to product suggestions.

guest designer call
Click here to find out how to submit


Friday, November 30, 2012

How To Make Gift Boxes Using The Scor Pal


Posted by T_Mayberry

Today I will be showing you how to easily make a gift box that can be used for giving special holiday treats and goodies.

Using the Scor-Pal scoring board you can easily make a box like this with your favorite patterned paper or card stock.  Easily change the patterned papers used to fit any holiday or occasion. 


Determining the size to cut your box's paper depends on how big you want the box.

You simply add the height of the sides with the base width to get the size to cut the paper. 


I wanted a 3" box with sides that were 2" high. Using the formula above that would be 2" + 3" +2" for a total of 7".  So, I cut a 7" square of patterned paper

I then scored 2" from the left and 2" from the right (6" mark).

Rotate 90 degrees and repeat.


Next snip the left and right vertical score lines from the outer edge to the horizontal scores.


Add adhesive to the outside edge flaps


Fold inwards and adhere to create the base of the box. 


You're now well on your way to creating your own personalized gift box.  Click HERE for instructions on completing the box lid and for a 'recipe' list of products you'll need.  

Adapt the dimensions to fit the gift.  Using various patterned papers will instantly add pizzazz and thoughtfulness to any present!


guest designer call


Click here to find out how to submit


Friday, April 13, 2012

Easy Table Setting How-To For Your Next Party!

Laura shares this quick and easy way to make your table POP in this step-by-step tutorial!  


Make one setting for the Queen (of King) of the day or make 6 or 8 for a special dinner.  This project idea can be modified to fit absolutely any occasion!


Set includes: card, placemat, napkin ring and place card

Laura used Teresa Collins' Spring Fling products, but of course you can use your favorite patterned paper collection and matching Bazzill cardstock.

Napkin holder w/ die-cut detail
Using Scor-Tape makes adhering the napkin holder a breeze.  You can also use the same idea to personalize things like water bottles or glass candle holders. Home decorating doesn't have to be expensive or permanent for that matter!

personalized place cards 
Place cards make dinner time fun and they let your guests know they were thought about long before they arrived. What a nice way to warm up the atmosphere!

For Laura's complete 'how-to', click HERE.  Laura even included one of her favorite brunch recipes!  

We love hearing from you - let us know what you think about this project idea and how you think you could use it!
---------------------------------------------------
Suggested Products:


Saturday, March 24, 2012

How To Create Rosettes and Flowers With The Scor - Pal

Learn how to make borders and flowers with this quick and easy how-to with Tami!


What you'll need: your fave paper collection, heat gun and the Scor-Pal


Directions:  Each rosette is created by scoring a strip of paper or card stock at equal distances then simply accordion fold, connect the ends, press down in the center and secure. The height of the rosette is controlled by the distance of the scores. 1/4" scores will make a rosette 1/4" tall, 1/2" scores will create a rosette that is 1/2" tall etc. The diameter of the rosette is controlled by the width of the paper strip. The wider the paper the larger the rosette.
 
I have found that the rosettes are best held together with hot glue. To do this simply hold down the center, fill with glue and let cool. (A non-stick surface works best)
   
Then it is simply a matter of create, layer and decorate!


Add the finished rosette or flower to your project:

scor pal

scor pal

Spring has sprung and we'd love to see your rosettes!  Post your project ideas to our ACherryOnTop.com Gallery!