Showing posts with label graphic 45. Show all posts

Thursday, February 22, 2018

New Fancy Pants Designs Collections Now Available!


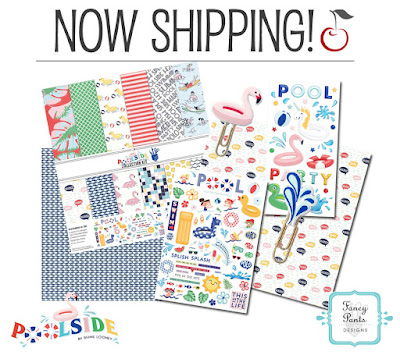
 New Fancy Pants Designs collections now shipping

We love this time of year! So many amazing, new paper crafting collections are arriving every single day. Just this week, we've received more Prima, Graphic 45 and Authentique Paper products! 

We're working hard to stock the items on our shelves so we can process all of the orders as quickly as possible - most within 24 hours after the collections are received.

We're so happy to offer the wonderful products from Fancy Pants Designs! They're such an amazing company. We think you'll absolutely love their new "The Bright Side" and "Poolside" lines!


 a cherry on top crafts


Thursday, August 18, 2016

Video Preview: St. Nicholas Paper Crafting Collection by Graphic 45

Watch this video preview featuring Graphic 45's new, richly colored Christmas paper crafting and scrapbooking collection: St. Nicholas


Traditional and timeless; the new St. Nicholas paper collection by Graphic 45 is sure to bring warmth to any of your holiday craft projects. Products now available at ACherryOnTop.com Crafts.

 st nicholas a cherry on top


 st nicholas graphic 45 a cherry on top

 st nicholas g45 a cherry on top


 connect with a cherry on top crafts


Tuesday, February 7, 2012

How To Add Stitching To Your Paper Crafting Project

Posted by megamay (Megan):


This month I decided to show you some tips on adding stitching to your paper crafted projects. I seem to add sewing to just about every layout and card that I make. Most of the time I use machine stitching because it's fast, easy and I like the texture that it adds. 


There are other options though - hand and faux. If you are interested in hand sewing, Rachel wrote two articles on using the 'Sew Easy' tool to help with hand sewing. 


Below is an example that I created for hand sewing without using the sew easy tool. This technique is best for odd shapes, like the sun I created on this card:


I drew the sun in the corner of this card with pencil. Then I used my paper piercer to make the holes, before erasing the pencil lines. Then I hand stitched using the holes I just created.


I also used some faux stitching on this card. I just used a brown pen to draw the 'stitches' around the border of the card and of the sand dune. There is another We R Memory keepers product that can help with faux stitching - the sew stamper


 It is a rolling stamp pad, just like the sew easy, but with ink instead of piercing. Be sure to check that out if you prefer faux stitching for a super quick easy way to add another layer to your projects.


Like I mentioned before though, my preferred method is machine sewing. Here is a card that I created with machine sewing.


sewing on cards


I know a lot of people are intimidated my machine sewing, so I created this video tutorial to show you some tips to make it more effective. As I mention in the video, in my opinion, the hardest part is threading the machine. So, don't get discouraged if you are having trouble right up front. 


Look in your manual or if you dont have a manual look around online for instructions for threading your machine. It's important to do it correctly so the thread doesn't get all bunched up. After you have done that - machine sewing on paper is easy as pie!


Products used in this reveal:

Wednesday, July 27, 2011

How To Make An Altered Birdhouse


Posted by ChrissyTina (Christina):


The latest trend in altered items has caught me by surprise!  Birdhouses!  I remember when I first saw these, I honestly wasn't that interested in them.  And then I gave them a second look.  All of the sudden I just had to do one!  And then one turned into two and two into three until I had four of them done- one for each of my kids.


Now when it comes to altering objects, I tend to use a lot of paints, stains, and other such items because I have THE HARDEST time covering things in paper.  The paper always ends up too big or to small or crooked.  Absolute madness!  


It's enough to drive anyone wonky!  And then the idea occurred to me.  STAIN!  I love wood grain and how with stains you can see the beautiful patterns in the wood.  Why not just use that as an embellishment in itself?  So I did.


This first house is my "Steampunk'd" house.  I used Tattered Angels Glimmer Glaze in "Cowboy" and "Chianti".  The main body of the house is done using "Cowboy".  The trims and between the slats of the roof is stained with "Chianti".


I chose these two stains knowing that I had planned on using Graphic 45's "Steampunk Debutante".  The deep rich Chianti and the rustic Cowboy complimented these papers perfectly without being too harsh. 


I wanted to soften the typical steampunk look so I chose embellishments that were feminine and full of detail.  I used gears as more of a background theme.


The easiest way to tackle one of these types of projects is to work in layers.  Knowing what you want your end result to be is also very helpful.  My first layer was the stain.  While that was drying, I picked out the images from the papers that I wanted to use and fussy cut them.  I usually always pop dot things from the surface because it breathes a kind of life and interest into the piece.


So my second layer were the border strips I punched for the trim of the roof, the ball chains, and any images that were not being pop dotted up.  On the third layer were my final touches- things that were pop dotted. 
If you look closely at some of the images and the trim on the front of the house, you will see crackling.  I used Ranger's Crackle Accents to age these pieces and give them a more industrial yet vintage look.


In keeping with the soften steampunked theme, I added a Tim Holtz game spinner to the butterfly.  As a final touch, I lightly sprayed the whole house with Tattered Angels Glimmer Mist in "Iridescent Gold".  Nothing beats a subtle sparkle!


Anyone who knows me knows that I tend to be a bit detail oriented.  So naturally, I did the back of the house too.  Because it is the back, I kept it pretty simple and not very indepth.  I cut out an image that just captivated me and stuck on there...with pop dots of course!


If you keep in mind to take things one layer at a time and apply this approach, then any altered item will be easy to do.  In each of the following pieces, I worked in layers and the end result is always kept in focus.


On my second birdhouse, I used Graphic 45's "Once Upon A Springtime" and embellishments from Tim Holtz and Bo Bunny.  The paint is just white gesso and Adirondack's "Lettuce Green" paint dabber.


Click for more views
 
 
The next birdhouse is made using Graphic 45's "Magic of Oz".  This one used A LOT more fussy cutting and more layers.  I wanted to convey the scene where Dorothy and friends are crossing the poppy field to the Emerald City.  Each side of the house shows a particular scene.  I used Making Memories acrylic paint in "Pine" and Glitter Paint in "Seafoam".  Embellishments are Tim Holtz


Click for detailed view


The final birdhouse uses Graphic 45's "Le Cirque" collection.  I wanted this house to feel and look like the Big Top!


I hope you enjoyed looking at these birdhouses and feel inspired to do some of your own.  Just remember-  think in terms of layers and keep your end result in focus.  You won't believe me when I tell you that it took me about 2 to 2.5 hours to do each house.  That's it!  Have fun!  Get messy!  And stay creative!
 
Thanks to ACOT for letting play with these products!

Thursday, April 28, 2011

Scrapbooking With Le Cirque and Curtain Call By Graphic 45

Posted by JanetM (Janet):

Graphic 45's Le Cirque and Curtain Call lines are just fantastic to work with; and it helps that we have made numerous trips to the Ringling Museum, so I knew I had a lot a photos to work with. What surprised me the most was the variety of photos that the lines work with and how well they go with so many things.  

The colors are so rich and beautiful in the lines that I just kept creating more and more layouts with them. This should give you a glance into my fun family, also.
This is my grandson, Justin, at the Ringling Museum- I was so glad to get him to sit still for a photo. In fact, he was having a good picture day the whole day- which sure makes it more fun for me.

 
Here's my daughter-in-law being a great sport along with the kids - posing (or attempting) to all look like the mannequins at the museum.

 
The minute I ordered this line in the 8 x 8 paper pack I knew I had a picture from that day that was going to be perfect to use with this piece. I love the way the colors and the design match the sign they were in front of.

 
While all of those pictures were a perfect fit from being at the Ringling Museum, the line also works with so many other things that I had photos for.
 
I think Jeff missed his calling for being a comedian, but that's OK, because he keeps everyone in the family laughing all the time. This was a photo from a trip to Disney last year- and we all know that there are always family Disney trips to record, family amusement park days, or just family fun.

 
Nathan is always ready to get his picture taken, and even was a willing subject when he was down and out after a slip getting out of the swimming pool. He was the cutest patient that I have seen in along time.  The colors and patterns in this line keep working with so many things.

 
Troy was having a great day at the playground, and I can tell when it's a good day if he lets me take his picture.  I love the colors in this line with the outdoor pictures.


Not only does this line work wonderful with the fun pictures from outdoors, Disney, and the museum- but it was a good one to use with a old (only 6 years old) photo I had from a trip that my daughter, Rebecca, and I were on in Las Vegas.

 
Not wanting to be left out of the photo reveal is the cat - who was keeping a good eye on the dog that was waiting below for her to get out of the tree.  It's quite a great way to be assured that the cat is going to pose really well for a picture.

I figure that even cats must have a dream of being much greater, and wanting to grow up to be a lion someday- so the tag was great to use with the picture.

 
Curtain Call has some wonderful patterns to work with along with the  tags, trims and ribbons.
This is my granddaughter, Cynthia, in the process of being serious while she's getting her face painted at Disney.

 
What better way to wrap up my reveal than a picture with Jules while we were out doing one of our favorite things - trying to find a hat that looks good on us. I think that we are still searching for it.

Curtain Call, with it's vintage look, worked great with our vintage store shopping that day. While we didn't find the perfect hat, we did manage to find some fun vintage scrapbook buttons and laces.


Thanks for looking at the reveal, and without a doubt both of these lines are a favorite of mine. 

Products Used In This Reveal: