Showing posts with label how to make cards. Show all posts

Tuesday, February 21, 2012

How To Heat Emboss With Embossing Powders And Heat Gun


Posted by SarahA


I've put together a short video on the basics of heat embossing. Heat embossing can be fun to make your own custom embellishments or for adding some extra oomph to your stamping projects. And as a disclaimer, I do not claim to be a videographer by any means! LOL! I just thought it would be easier to show you how to do the basics by video rather than by a bunch of photos.
In the video, I show how to add emossing powder to chipboard butterflies. You can use this same idea to change up the color of chipboard alphas or any other shapes you have. You can stamp on transparencies with the Perfect Medium and emboss that as well for a one-of-a-kind embellishment. 


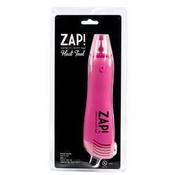
If you need a heat tool (and can't borrow your husband's!), you can get one here in the ACOT shoppe, too.


Here is a scrapbooking layout where I used the UTEE and Perfect Pearls in Biscotti to more of the butterflies.


Products used:
Biscotti Perfect Pearls Pigment Powder  Sunflower Perfect Pearls Pigment Powder  Clear Ultra Thick Embossing Enamel Melt Art UTEE  Pink Glitter Finish Embossing Powder By American Crafts Red Metallic Embossing Powder By American Crafts  Perfect Medium Clear Stamp Pad  Butterfly Chipboard Shapes Classic Calico By Studio Calicozap heat gun

Tuesday, November 15, 2011

How To Make An Accordion Card Holder Purse


Posted by carrie123

If you are like me, there comes times when I am in a bind for a quick gift.  This handy little project will be just the thing you need. It is quick and easy to make.

Once you get the hang of it, you can be whipping these out in about an hour. I actually have 3 of them I have made already for teacher's gifts for the holidays. So, if you are ready let's get started!

how to make an accordian purse

First, you are going to need the following supplies:


  • CARDSTOCK: One 6"x11" - One 6"x7" - Two 4"x10" - Four 4"x5 3/4" - One 1 1/2' x 11"
  • PATTERNED PAPER: Two 3 1/2" x 10" - One 5 1/2" x 9 1/2" - One 3 1/2" x 51/2" - One 1" x 11"
  • ROUND CORNER PUNCH
  • GLUE or DOUBLE STICK TAPE
  • VELCRO
  • SCORER
  • ADDITIONAL EMBELLISHMENTS

Alright, here is your first step...


Now, attatch the strip you just made to the non adhered part of the 5 1/2 x 9 1/2 paper to make the handle and then finish adhering the rest of the paper down:


Apply glue or  tape  to the left  and  right outer  panels of  the  folded  4 x 10”card stock.


Adhere one side of the 4 x 10 cardstock to back 4" panel of the main piece and do the same for the front of the main piece. Repeat for the second 4" panel.


 You can then decorate the fron any way you like.


I also made coordinating cards to fill the purse.  I now have a cute and quick little gift for someone!


Products used:
Friday, October 28, 2011

Birthday Celebration Ideas Featuring Crate Paper's Random Collection


Posted by SarahA (Sarah):


Around this time of year, there are several birthdays in my family and I wanted to come up with some fun, personalized ideas.  Keep reading to see some fun, easy  projects that come together quickly. There's even a layout idea for easy event scrapping!


Happy Birthday Card

I made this fun card using the Random line from Crate Paper. Lots of layering was the key to this card. I used several of the papers and a lot of the die cuts from the sheet included in the collection pack. These die cuts are the same as the chipboard pieces, so you could use either to make the card. 


I outlined the letters with my black Zig pen for a little more dimension, used foam adhesive under some pieces, then sewed on some buttons. It's fun to take all of those little pieces and layer them up until you like what you see.  Lots of detail make for a fun card! When you have a card with a lot of dimension, they don't always fit in envelopes well. 


To remedy this, I put it in a glassine bag. I used a border punched strip, a few more pieces from the die cut sheet and then folded the top down and sewed it shut with my sewing machine. 


Birthday Pin

Five years old is an important birthday, so I wanted to be able to show it off! I started by cutting a 2.5" scalloped circle with my Slice. I then cut ribbons to my desired length and then hot glued the ends to the middle of that scalloped circle. I really loved these bright new ribbons from Martha Stewart for this project- so many colors in one package! 


Different widths of ribbon add a fun factor, so I added some wider ribbon from Fancy Pants. Next I cut a 2" circle and a 2" scalloped circle and adhered them together. I then added foam adhesive to that and layered it on top of the ribbon. Next I adhered a 1.5" circle to the center of that and added my number. 


I added Diamond Stickles around the edge of the smaller scalloped circle for a little bling. My last step was to hot-glue a pin back on the back. If you don't have a new pin back handy, just go looking around in your junk jewelry to pull one off something you don't wear anymore!


Birthday Crown


Who doesn't want to be a prince or princess on their birthday?! I downloaded a crown template here, then printed it out on the backside of my paper from the Pink Paislee Vintage Vogue line. I used my Slice and the Applique Basics design card to cut varying sizes of butterflies, then adhered them with foam adhesive. 


I also cut the shadow piece for the large butterfly and adhered that laying flat to the crown. A small circle with the age in the center was added to the middle of the main butterfly. I added some KaiserCraft pearls to the tips of the crown, then sprayed the whole crown with Silver Plated Maya Mist for some sparkle. Pearl Glimmer Mist is another one for lots of sparkle and shine!


Five Years Old


I struggle with "event scrapping" (birthdays, holidays, etc) sometimes because it always seems there are so many photos and so much you want to include to really capture the day. To remedy this, I printed one large photo that I felt represented the day. Then, I chose several smaller photos that helped tell my story and included those, too.


I think four photos can pretty much sum up most events and that way I still had plenty of room left for journaling and a few embellishments. I really liked the little bit of grey on the paper at the bottom where I used the Jillibean date sticker, so I misted some of the Fancy Pants filter paper embellishments with Charcoal Maya Mist for another pop of that color.


Some products used:


Random Collection Kit By Crate Paper

Birthday Pin:
Watermelon Paper - Watermelon Gazpacho By Jillibean SoupYellow Bell Pepper Paper - Watermelon Gazpacho By Jillibean SoupModern Festive Duet Ribbon By Martha Stewart CraftsAbout A Girl Ribbons by Fancy Pants

Tuesday, October 18, 2011

Fall Paper Crafting Crop Wrap-Up!

Wow!  What am amazing weekend of inspiration, fun and prizes!  Thanks to our Creative Team, Hostesses, and the great participants, the crop was a complete success!


Special thank you to Jenni Bowlin for stopping by for an online chat!  What a great time!


jenni bowlin project ideas
Halloween project ideas from Jenni Bowlin

If life got a bit in the way and you weren't able to spend a lot of time at the crop, don't worry!  You can check out the October Crop Forum to catch up on some of the challenges and fast scraps.  We'll also be posting the class tutorials within the coming weeks.

Be sure to show us how the crop activities inspired you!  We'd love to see your work.  Please post your projects to our Gallery or email them to service@acherryontop.com!


Happy Crafting!

Tuesday, October 4, 2011

Creating Artist Trading Cards - ATCs


Posted by ChrissyTina (Christina):

A lot of people ask what the point of an ATC is.  An artist trading card is kind of like your “calling card” only without the contact information.  Other artists actually trade and collect them and it’s not hard to find swaps going on involving ATCs.


This is my first time making ATCs, and I’ll be honest with you.  For me, it was a challenge to work on such a small “canvas”.  I’m accustomed to 12x12 or larger altered items. However, these are great to try out new techniques, experiment, and just go wild! 


I chose to do six of these mighty miniatures to try out different styles and techniques that I wouldn’t normally use on a regular scrapbooking page.


My first ATC has a mix of techniques and details.  I sewed, added trim, used gel medium, and stamped.  The flower is fussy cut from paper from the Basic Grey's Indie Bloom 6x6 paper pad.  The victorian image is from my stash.  


I turned it into an acrylic embellishment by using Diamond Glaze or Glossy Accents and gluing a Tim Holtz acrylic "Fragment" on top of it.  My blingage and gold beads are from the orange and gold multi-media kit by Art-C Studios.  The background paper is by Prima from their "Alla Prima" 6x6 pad.


My next several cards are a bit more straight forward and simplistic.  I used a flowers and 7 Gypsies overlay from my stash.  The patterned paper is by Prima as well.  


The bling is from the red and purple mixed media kit by Art-C Studios.  To add visual interest and a bit of subtle color, I colored the overlay using Copic markers.  I finished of the card by trimming the edges with Kaiser Craft's Natural Lace pack.


For the next card, I cut the papers into fine strips and adhered them to the ATC using Mod Podge.  Collaging is an amazing way to add unique visual interst and depth.  The purple bead trim and overlay are from my stash.


The banner used on this card is from my stash, as are the beads.  The patterned paper is from Indie Bloom by Basic Grey.


artist trading cards atc


This next card is more whimsical and fun.  I wanted to play with paints and twine.  I wanted to keep the illusion of a canvas so I didn't add any trim around the edges and I roughed up the acrylic pant using a sanding block.  Twine was used to add accenting and highlighting.


artist trading cards atc


The final ATC I made uses more layering and some framing.  The frame, gray flower, and circus tent die cut are from my stash.  The flower is from Basic Grey.  The beads, mah jong die cut, and elephant are from my Art-C Studios kits.  


I cut the frame out from another ATC and mounted to my foundational piece.  I used a foam pad and dabbed Glimmer Mist  onto the background and hand painted some yellow scroll work, which got covered up.  I accented the flowers on the corner of the frame using regular acrylic paint.  My circus tent is painted and sanded.  I added some green swirls and a bead to keep it interesting.


artist trading cards atc


I find that ATCs are a great tool to explore different art stylings and techniques.  Thank you for taking a look and I hope you picked up some inspiration and an idea or two!


Products used:

lime twist