Showing posts with label how to make a card. Show all posts

Wednesday, February 10, 2016

New Video Preview: PhotoPlay Paper's This Guy Collection!

We're giving you a video preview of the 'This Guy' collection.  It's from a brand new paper crafting company called PhotoPlay Paper.

Be sure to let us know what you think!


You can find more of their newest releases HERE.  PhotoPlay's products focus on the reasons behind scrapbooking and paper crafting - Creativity and Preserving Memories.

We think you're going to like this new company.


guest designer call
Click here to find out how to submit

Wednesday, March 4, 2015

Help Us Welcome This Month's Guest Craft Designer!

March is here which that means two things:

SPRING is almost here AND we have a new Guest Designer!  Please help us welcome Sara as our March 2015 Guest Designer of the month.


Screenname:  Sara M.

My crafty supply must have: I am a scrapbooking diva and must have 2- patterned papers and enamel dots


Guilty pleasures:  Cupcakes and podcasts


BIO:  Married for 16 years with 2 boys and 2 dogs.  In my life the primary hat I wear is that of caregiver.  My eldest son has high functioning autism.  My youngest also has some pretty rough health issues.  A number of years ago we opened our home to my grandparents, who are both in their 80's, and I am their primary caregiver. 


And my job?  I work in home healthcare and I am a caregiver there as well.  Caregiving is hard sometimes.  Scrapbooking and cardmaking  are my therapy - period.  It is what keeps a smile on my face when I've had one of "those" days.


Sara worked with products from KaiserCraft, Tim Holtz and Simple Stories.  Here are a some of her projects:

Layout: Wonderful You

 kaiser craft project ideas a cherry on top crafts

products used:


 kaiser craft shine bright projects a cherry on top crafts   kaiser craft shine bright projects a cherry on top crafts
 kaiser craft shine bright project ideas a cherry on top crafts


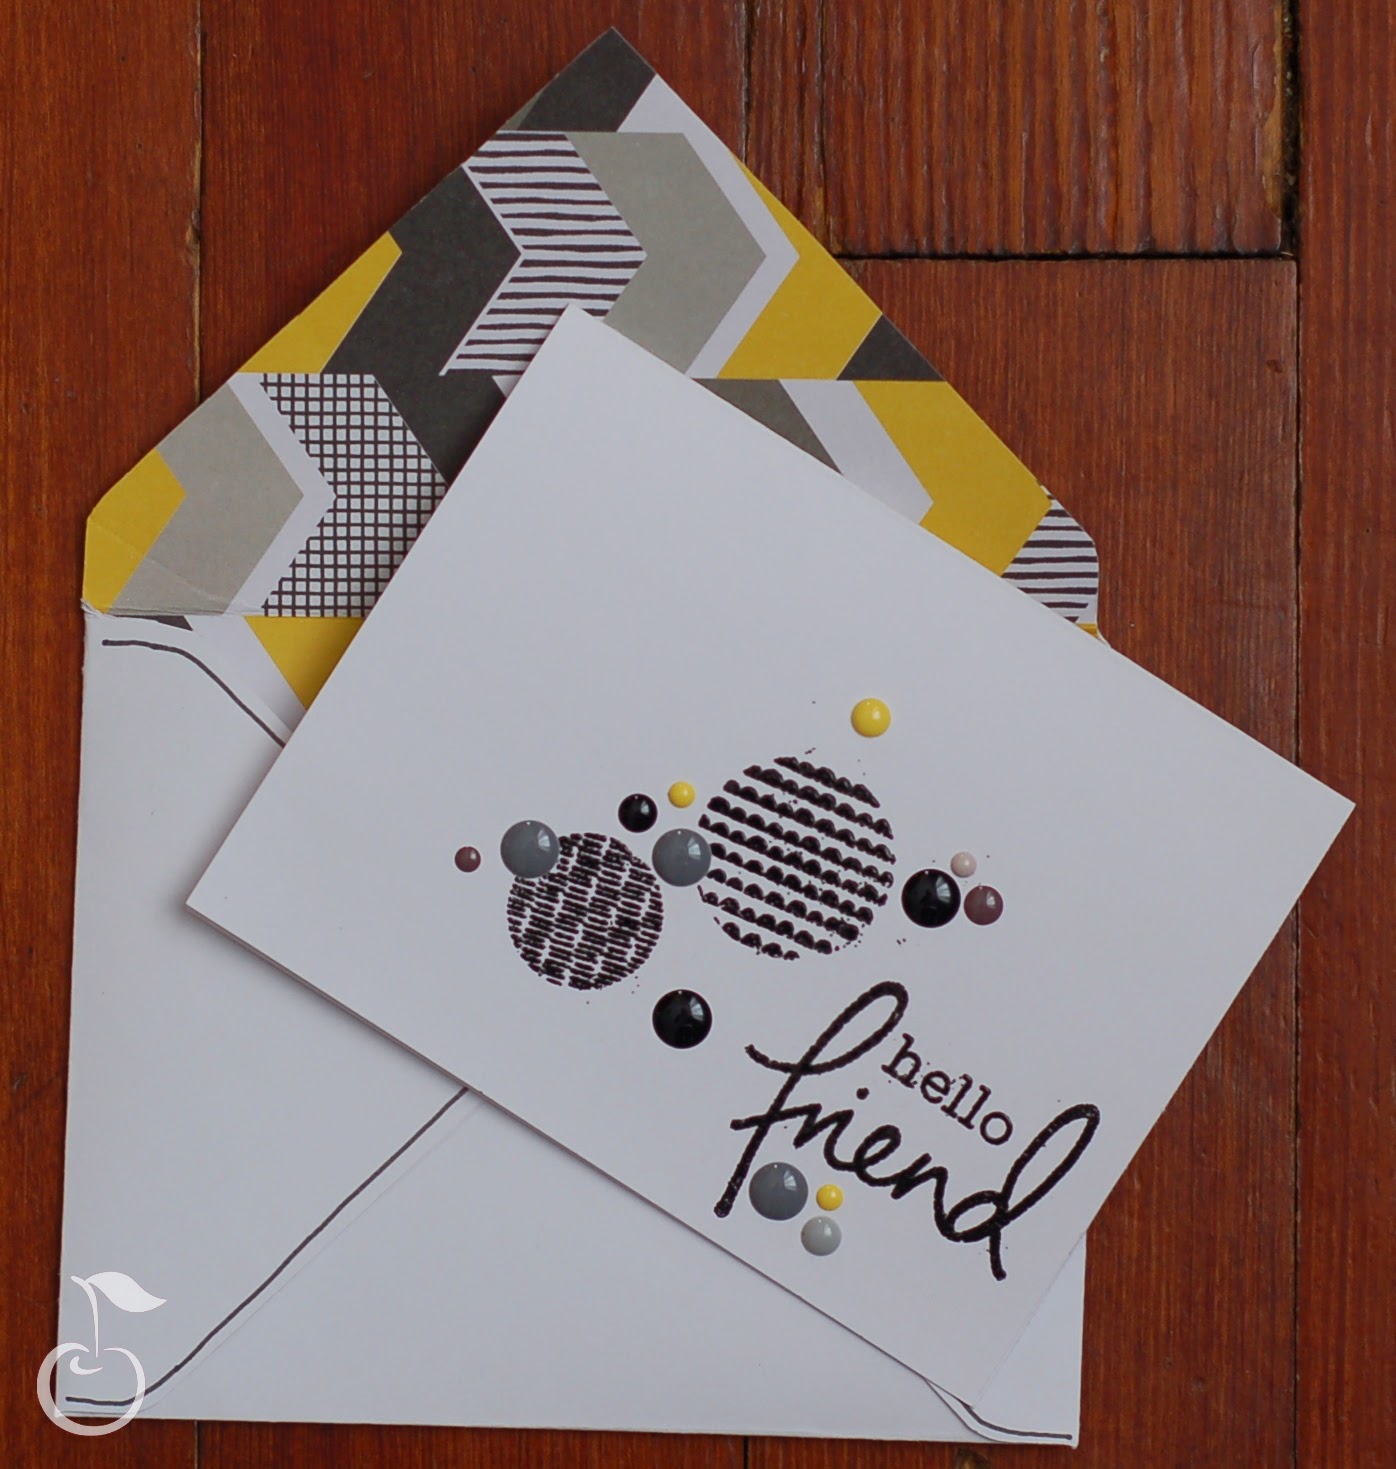
Card: Hello Friend

 kaisercraft project ideas a cherry on top crafts

products used:

 tim holtz embossing ink a cherry on top crafts  simple stories life documented a cherry on top crafts

 kaisercraft shine bright project ideas a cherry on top crafts

Click here to view more projects from Sara and be sure to visit our Message Board for her exciting CHALLENGES during the month of March at ACherryOnTop.com - 


Click here to find out how to submit

Thursday, February 7, 2013

Making A Tri-Fold Card Is Easy!

Tami M
If you're the resident card maker in your group of crafties, it can be a little challenging when you're trying to come up with something new and creative.  

Tired of the traditional half-fold cards?  Why not give this tri-fold, panel card a try!  It's easier than it looks:


tri fold card

Here's What You'll Need:
  • 12"12" cardstock
  • scoring board (like the Scor-pal)
  • favorite patterned papers
  • coordinating embellishments
  • adhesive (of course)
Measure and cut a 12"x5½" piece of plain cardstock (color your choice).  Using the scoring board, put the 12" side at top guide and then score at two inches, four inches, eight inches and ten inches:


Then turn the cardstock and score at the one inch and four and a half inch lines (between the original top and bottom horizontal lines).  It should look like this:


Now it's time to cut!  Start at the top horizontal line and end at the bottom horizontal line:


And fold like this:


That's the hard part!  Now you can start decorating the sides (or panels) any way you'd like.  For this particular card, I cut out pieces of patterned paper to fit each folded section:
  • 2 pcs of ¾" x 3¾"
  • 2 pcs of 1 ¾" x 5¼"
  • 4 pcs of ¾ x 1¾"
Image of closed card:

Now that you have the basics, you can alter the original scoring measurements to create your desired look.  Just have fun with it!


Product suggestions:


guest designer call
Click here to find out how to submit


Friday, August 10, 2012

How To Get The Most From Your Paper Crafting Stamps


Laura shares five different projects focusing on specific how-to techniques and ideas which can be used using just about any stamp, paper pack and, or color scheme out there!


Stamps are an investment.  We buy them because they seem like a long-lasting, worthwhile, crafty purchase. We justify the expense, promising ourselves that we will get tons of use from them and they'll be super practical. And guess what? That is completely true.

Today, I challenge you to bust out one of those stamp sets (and hey, if you realllly want to... go buy a new one, I won't tell) and try some of these simple techniques and ideas to get some use out of those great stamps! 


1.  Layer Your Stamps:
Stamp a background over an outline image.  To create the tag on this card, I stamped the polka-dot background, and then the tag outline and sentiment right over it.  Polka-dots are my FAVORITE; they just make me HAPPY!  Think about what stamped images you can add a pattern to. (a polka-dotted tree, teacup, or cloud? ADORABLE.)    

Lily Bee tag card by Laura Williams
 
2. Trim and overlap stamped images:
To create this candy tube, I stamped and trimmed the background square, and then stamped the flowers on patterned paper and cardstock.  I trimmed them, and layered them on, using foam tape to add some dimension. (Remember how I love polka-dots? Well, I love foam tape almost as much!)

candy tube by Laura Williams, from A Cherry On Top
 
3. KISS! (Keep it simple, silly!)
Grab the one or two stamps you like the best and let them work their magic. Don't get bogged down in the details.  On this card I used two stamps, added a bit of colored pencil, tied a piece of twine, and called it DONE. It took less than 5 minutes.  YOU CAN DO THIS TOO!!!

Lily Bee chickadee card by Laura Williams, for A Cherry On Top.com
 
4.  Repeat, repeat, repeat:
Take a stamp. . .just about any stamp. . .and make a background.  To really add some depth, try "second-generation stamping", where you stamp twice before reinking. Stamp, stamp, ink.  Stamp, stamp, ink. Got it? ;)  Make sure you stamp over the edges to make it look more like an actual piece of patterned paper.  And on this card, I didn't even do the entire background of the card.  A nice stripe at the bottom was enough.  (Add "simple" to my list of favorite things, right after polka-dots and foam tape!)

Lily Bee card by Laura Williams, for A Cherry On Top. com
 
5. Think Outside of the Box:
On this card, I wanted to use the square backgrond stamps in a new way.  So I stamped them on cardstock a few times, and then after I trimmed the squares, I trimmed them each in half.  It made a fun easy design that fills my card. (And lookie there. . .polka-dots, foam tape, simplicity! ahhhh!)

Lily Bee and Bazzill card, created by Laura Williams, for A Cherry On Top

Remember, nothing I've shown you today is groundbreaking or complicated. But sometimes we all need a refresher, and an inspiration to look at our stamps in a new way.  I hope you'll take one (or two, or five) of these ideas, and you'll dive in and CREATE with what you love! 

projects created by Laura Williams, for acherryontop.com


Laura loves bright colors, graphic patterns, clean and simple everything, polka dots (and chocolate!) She is a card-maker and stamper at heart, but also enjoys creating all kinds of paper-crafty goodness! Her work has been published in Paper Crafts, CARDS, CardMaker, Simple Scrapbooks, and Crafts 'n Things. 


Friday, July 13, 2012

How To Use Cardstock Stickers & Tag Embellishments


Posted by Ashley N.


Here is a video on various ways to use cardstock stickers and tags on cards:


Close-up photos of the cards:


This card shows how to adhere the sticker directly on cardstock and tags, but also to chipboard die cuts:


This card shows how you can adhere a sticker onto a die cut, layer it with alpha stickers and other journaling cards to create your own embellishment:


Thanks for looking!

Ashley has a passion for paper crafting, photography, fashion and trying new recipes in the kitchen. She started my first scrapbook in high school long before any industry focused products were available. She started blogging in 2008 after discovering the paper crafting online world. When Ashley is not in the studio, you can find her  photographing a wedding, surfing the Internet, or watching a Lifetime movie. 


Products Used:

Tuesday, July 3, 2012

Welcome Janet - July's Guest Designer At A Cherry On Top


janet lebeau guest designer
Screenname: scrapy1967

Name:  Janet
 

A Bit About Janet:  I am married to a wonderful man and we have a very spoiled boxer named Zoe. I love scrapbooking,making crafts and gardening. I am addicted to traveling and I am going on my dream cruise in September. I will be visiting Spain, Italy, Croatia and Monaco.


Q & A Section:
 
Favorite color: blue
 
I mostly create: 12x12 pages and cards
 
My guilty pleasure is:  chocolate
 

Janet has been an active member of our A Cherry On Top Community for nearly four years!  She selected products from the Beautiful Moments collection by Carta Bella and the Take Note line by Studio Calico to create her projects!  Welcome Janet!


Visit our Contests & Challenges forum for inspirational fun throughout the month of July!


  'Love Grows' card featuring Beautiful Moments by Carta Bella:


beautiful moments card carta bella


Products Used:


cherish paper beautiful momentsbeautiful moments cardstock stickerscarta bella beautiful moments


To learn more about Janet and to view more project ideas, click HERE.
----------------------------------------------------------------------------------------------

guest designer call

Click here to find out how to submit

Friday, June 8, 2012

How To Make A Tag Shaped Card


We hope you enjoy this Fabulous Friday How-To!  Tags seem to always be in style.  Today's project by Ashley steps tags up a notch or two!  Learn how to make a tag shaped greeting card in this A Cherry On Top paper crafting video tutorial:


While Ashley featured the the Pretty Party collection from Crate Paper, you can definitely select your personal patterned paper favorite!  Let us know if you try this project!  Post your finished card to our Cards & Tags Gallery!


Suggested Products:

Pretty Party Chipboard Accent Stickers - Crate PaperCraft Tags By Martha Stewart CraftsPretty Party 6 x 6 Paper Pad - Crate Paper