Wednesday, August 10, 2011

Scrapbooking With Friends Furever By We R Memory Keepers


Posted by bluejeans7(Angela):

On May 27, 2010 we adopted this cute little dog, we named her Gracie.  When the We R Memory Keepers Friends Furever line hit the ACOT shop I knew it was the perfect line to scrap our pictures of Gracie.  This line has awesome pattern papers.  


They are all double sided except the Collars paper and Nine Lives paper, which are both glitter accented.  Besides having awesome papers this line has die cut tags, chipboard tags, clear stamps, cardstock stickers, fabric brads, chipboard words, metal charms, a 4x6 pad, a 6x6 pad, glitter brads, twill ribbon, textured cardstock, and even a Page Kit.  This line has it all!!  A must have for all of you pet lovers out there.
 
I really love the mix of pattern papers in the Friends Furever line and it's always a bonus when the papers are double sided.  My favorite pattern paper is the Treat Jar paper, which I used on this layout.  I also used Dog's Life, both sides of the Lazy Time and a little of the Making Tracks for my heart.  The Friends Furever 4x6 pad is awesome!  I love that you get 18 different designs in the pad.  The design I used here was perfect for my journaling.  A Petaloo Poppy flower, title letters and machine stitched border finish off my first layout.


Another favorite paper (okay, so I have more then one favorite paper.  LOL!) is the My Yard die cut edge paper.  I love everything about this paper- from the colors, to the design, to the cute paw prints in each corner.  I took the My Yard paper and glued it to the Bazzill Red cardstock.  


Then I took my white Sharpie pen and added dots around the border.  This time I used one of the patterned papers out of the Friends Furever 4x6 pad, the spotted paper under the brown paper.  I used the Bad To the Bone die cut tag for my title, but I did cut off the top piece before I inked it.  Like on my first layout I added a Petaloo Poppy flower to accent this layout.


I love to scrap with the color orange and the Bazzill Yam cardstock is one of my favorites.  I started with the Yam cardstock and then added a mix of different pattern papers.  The colors of the Friends Furever line work great with both color and black & white photos.  


For my accents I cut off one of the "flash cards" from the Furry Friends Flash Card Paper, a couple of cardstock stickers that I inked and popped up with Pop Dots, and Cozy Posies flowers from Basic Grey.


These photos were taken within the first month of adopting Gracie.  It was fun to go back and scrap them.  I started with the Bazzill Parakeet cardstock this time, it is one of my favorite Bazzill greens.  Added my pattern papers and then I machine stitched my border.  

Again I used another flash card from the Furry Friends Flash Card Paper, this time for my title.  All of the cardstock stickers are inked and put on with Pop Dots.  The last touches are the red and green Basic Grey Cozy Posies flowers and the date stickers.


Products Used:


Tuesday, August 9, 2011

How To Make A Paper Bag Purse Gift Bag

Great idea for that perfect goodie holder or little girl gift!


Special thanks to Kristin from Lil Sweet Pea's Place for the great video.

Friday, August 5, 2011

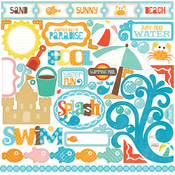
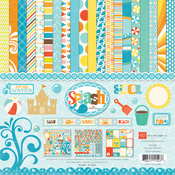
Scrapbooking With The Splash Collection By Echo Park Paper Company


The beach.  Water.  Swimming pools.
*sigh*
Some of us have beaches readily available, some have pools, some have friends with one or both.  There are swimming lessons, sand castles, pails and fish.  It is the one theme paper that I ADORE.
Echo Park Paper took it to the extreme with the Splash Collection.
There is classic, there is cute, there is basic, there is extreme....all in one line.  The colors are PERFECT.  They match their Dots and Stripes line, which I totally LOVE.

When my kids are not in summer school, on a basketball court or a softball field, they are in water.  We are lucky to have water EVERYWHERE here in Lake Country, so photo opportunities are endless.

Here are my layouts:

I have a 13 year old.  Cutesy is so last year.  It is clean cut, colorful and simple.  It is Kendall and Katie :)  The circle paper was PERFECT for cutting out, inking and defining.


Then there is my eleven year old, that watches a little TOO much of "America's Next Top Model".   The upside for me, is that I can add a touch of the girly still to the scrapbooking layout. 


Here is where the fun comes in.  Is there NOTHING more fun than a sprinkler in the summertime?  (Other than the beach and lakes and pools, of course!)  My "littles" were having the best time, and the Echo Park Papers were perfect for them! 


The last layout is of Kiley and one of her friends that we took out to the lake. They are just genuine, kind, wonderful friends- so REAL. It was refreshing to see a friendship like that! 


I cannot tell you how MUCH I LOVE this company, and this line.  It is economical, it is versatile and I will have tons more to show you in the next week or so!!


Wednesday, August 3, 2011

August Paper Crafting & Scrapbooking Challenges!

Posted by ScrapGoo(Jess):

Happy August!  We're winding down, folks.  The last month of summer is here!  Are you all vacationed out yet?  

Have you taken a bazillion pictures of all the fun and festivities? Are you now asking yourself what the heck you're going to do with said photos?!  

Have no fear... the ACOT Creative Team is here with another fabulous set of challenges to inspire you.


Remember:
- only one LO per challenge will enter you into the points drawing
- LOs cannot be entered into more than one challenge category
- *please* only enter LOs that meet the specific challenge instructions 

Tuesday, August 2, 2011

Meet Our August 2011 Guest Paper Creative Team Member!

It's August already!  Can you believe that?  We would like to welcome our August Guest CT'er -- Retiree3!  Donna got to work with the Creative Imaginations Sakura line.  She did an amazing job and created SIX beautiful layouts!!  Check out her layouts and learn more about her!
Name:  Donna Broussard

Favorite television show?   I really don't watch much, but I love any Hallmark movies.

Name 3 musical artists you enjoy.   George Strait, Linda Ronstadt, and Diana Kroll

Name 2 of your favorite colors.   blue and red

Favorite thing to do with your family?   My favorite thing to do is go camping with my family.

What's your favorite scrapping tool to use when scrapbooking?   My Creatopia

Name 3 of your favorite SB companies/lines.   Creative Imaginations, My Mind's Eye, and BoBunny

What are your favorite adhesives?   Xyron and Pro Glue Glider

What's the one thing you must have readily available when you sit down to scrap?   My Fiskars' Cutting Board

What would you like the ACOT members to know about you?   I am a retired teacher. I have been married to a wonderful man for 36 years. We have one son and he is married to a wonderful woman that we adore. We have been blessed with 3 beautiful grandsons who light up our lives. I have 5 siblings that I am very close to and nermerous nieces and nephews that I adore.  I am a scrapaholic and totally forget the time when I am scrapping. I love to crochet, go to garage sales, get together with famly and friends, do crafts, make jewelry, and travel.  I love ACOT because I have learned so much by being a member. Thank you ACOT!
'Delight' by Retiree3
When I saw this Blossom and Butterfly paper, I knew I had to scrap this photo. To make a frame for my photo, I used Lovely Lantern Die-cut Paper and embellished with gold Stickles. I also used the Stickles to accent the purple flowers on the page. My title is from Blooming Paper that I cut out with my Slice machine and heat embossed. I used Sakura Cardstock Stickers for my journaling spot and embellishments. I want to thank ACOT for allowing me to work on this beautiful line of paper.
 'Bloom' by Retiree3  
View Donna's complete article/reveal by visiting our Resources Page!

Thursday, July 28, 2011

Creating With Amy Teets Designs


Posted by Smiley-Scrap8 (Ronny):


This week the Digi CT is very excited to present our designs using the fantastic kits by Amy Teets. 


Amy's designs are like no other, they are so soft and unique. They are perfect for all events, the team shows of family events, the kids and even travel. 


And lets not forget hybrid projects; Amy designs lend themselves perfectly to hybrid scrapping. So sit back and enjoy the show.

Wednesday, July 27, 2011

How To Make An Altered Birdhouse


Posted by ChrissyTina (Christina):


The latest trend in altered items has caught me by surprise!  Birdhouses!  I remember when I first saw these, I honestly wasn't that interested in them.  And then I gave them a second look.  All of the sudden I just had to do one!  And then one turned into two and two into three until I had four of them done- one for each of my kids.


Now when it comes to altering objects, I tend to use a lot of paints, stains, and other such items because I have THE HARDEST time covering things in paper.  The paper always ends up too big or to small or crooked.  Absolute madness!  


It's enough to drive anyone wonky!  And then the idea occurred to me.  STAIN!  I love wood grain and how with stains you can see the beautiful patterns in the wood.  Why not just use that as an embellishment in itself?  So I did.


This first house is my "Steampunk'd" house.  I used Tattered Angels Glimmer Glaze in "Cowboy" and "Chianti".  The main body of the house is done using "Cowboy".  The trims and between the slats of the roof is stained with "Chianti".


I chose these two stains knowing that I had planned on using Graphic 45's "Steampunk Debutante".  The deep rich Chianti and the rustic Cowboy complimented these papers perfectly without being too harsh. 


I wanted to soften the typical steampunk look so I chose embellishments that were feminine and full of detail.  I used gears as more of a background theme.


The easiest way to tackle one of these types of projects is to work in layers.  Knowing what you want your end result to be is also very helpful.  My first layer was the stain.  While that was drying, I picked out the images from the papers that I wanted to use and fussy cut them.  I usually always pop dot things from the surface because it breathes a kind of life and interest into the piece.


So my second layer were the border strips I punched for the trim of the roof, the ball chains, and any images that were not being pop dotted up.  On the third layer were my final touches- things that were pop dotted. 
If you look closely at some of the images and the trim on the front of the house, you will see crackling.  I used Ranger's Crackle Accents to age these pieces and give them a more industrial yet vintage look.


In keeping with the soften steampunked theme, I added a Tim Holtz game spinner to the butterfly.  As a final touch, I lightly sprayed the whole house with Tattered Angels Glimmer Mist in "Iridescent Gold".  Nothing beats a subtle sparkle!


Anyone who knows me knows that I tend to be a bit detail oriented.  So naturally, I did the back of the house too.  Because it is the back, I kept it pretty simple and not very indepth.  I cut out an image that just captivated me and stuck on there...with pop dots of course!


If you keep in mind to take things one layer at a time and apply this approach, then any altered item will be easy to do.  In each of the following pieces, I worked in layers and the end result is always kept in focus.


On my second birdhouse, I used Graphic 45's "Once Upon A Springtime" and embellishments from Tim Holtz and Bo Bunny.  The paint is just white gesso and Adirondack's "Lettuce Green" paint dabber.


Click for more views
 
 
The next birdhouse is made using Graphic 45's "Magic of Oz".  This one used A LOT more fussy cutting and more layers.  I wanted to convey the scene where Dorothy and friends are crossing the poppy field to the Emerald City.  Each side of the house shows a particular scene.  I used Making Memories acrylic paint in "Pine" and Glitter Paint in "Seafoam".  Embellishments are Tim Holtz. 


Click for detailed view


The final birdhouse uses Graphic 45's "Le Cirque" collection.  I wanted this house to feel and look like the Big Top!


I hope you enjoyed looking at these birdhouses and feel inspired to do some of your own.  Just remember-  think in terms of layers and keep your end result in focus.  You won't believe me when I tell you that it took me about 2 to 2.5 hours to do each house.  That's it!  Have fun!  Get messy!  And stay creative!
 
Thanks to ACOT for letting play with these products!

Monday, July 25, 2011

Back From CHA Summer 2011 - Booth Tour With Jared Of Fancy Pants Designs


We had a wonderful time with the Fancy Pants Team!  Thanks Jared for showing us around.  New products will begin arriving in the shoppe soon.  Be sure to check out all things Fancy Pants at ACherryOnTop.com!