Showing posts with label greeting card. Show all posts

Thursday, December 10, 2015

Last Minute Holiday Christmas Card Ideas!


The holidays have certainly crept up on us, but it's not too late to create your own personalized holiday and Christmas cards!  Here are some great ideas from the Echo Park Paper and Carta Bella Designers that are sure to inspire ~


 free holiday e book
'Let It Snow Card' featuring Echo Park's 'The Story Of Christmas' collection


'Believe Card' featuring Echo Park's 'The Story Of Christmas' collection


For even more holiday crafting ideas - including paper crafting projects you can do with your kids or give as teacher gifts, be sure to CLICK HERE!

Guest Designer Call


Wednesday, November 25, 2015

It's The Day Before Thanksgiving!

Here in the US, we're preparing for our Thanksgiving Holiday!  It's a time of family, friends, food, laughs - and of course - FOOTBALL!

We wanted to take just a minute to say THANK YOU to all of you who make what we do so special.


Happy Thanksgiving!


From our Gallery:

Thanksgiving Gift Tags by purpleblurple


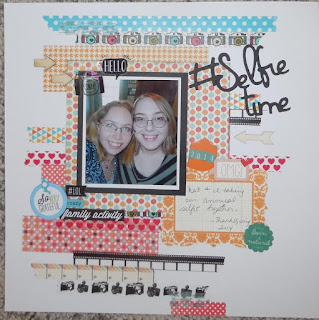
'Selfie Time' layout by blbabe1234


'Apples Have So Much Ap-peel' layout by Lisa S.


 Join us on Facebook See us on YouTube Follow us on Twitter


 craft black friday 2015 deals


Thursday, February 7, 2013

Making A Tri-Fold Card Is Easy!

Tami M
If you're the resident card maker in your group of crafties, it can be a little challenging when you're trying to come up with something new and creative.  

Tired of the traditional half-fold cards?  Why not give this tri-fold, panel card a try!  It's easier than it looks:


tri fold card

Here's What You'll Need:
  • 12"12" cardstock
  • scoring board (like the Scor-pal)
  • favorite patterned papers
  • coordinating embellishments
  • adhesive (of course)
Measure and cut a 12"x5½" piece of plain cardstock (color your choice).  Using the scoring board, put the 12" side at top guide and then score at two inches, four inches, eight inches and ten inches:


Then turn the cardstock and score at the one inch and four and a half inch lines (between the original top and bottom horizontal lines).  It should look like this:


Now it's time to cut!  Start at the top horizontal line and end at the bottom horizontal line:


And fold like this:


That's the hard part!  Now you can start decorating the sides (or panels) any way you'd like.  For this particular card, I cut out pieces of patterned paper to fit each folded section:
  • 2 pcs of ¾" x 3¾"
  • 2 pcs of 1 ¾" x 5¼"
  • 4 pcs of ¾ x 1¾"
Image of closed card:

Now that you have the basics, you can alter the original scoring measurements to create your desired look.  Just have fun with it!


Product suggestions:


guest designer call
Click here to find out how to submit


Friday, June 8, 2012

How To Make A Tag Shaped Card


We hope you enjoy this Fabulous Friday How-To!  Tags seem to always be in style.  Today's project by Ashley steps tags up a notch or two!  Learn how to make a tag shaped greeting card in this A Cherry On Top paper crafting video tutorial:


While Ashley featured the the Pretty Party collection from Crate Paper, you can definitely select your personal patterned paper favorite!  Let us know if you try this project!  Post your finished card to our Cards & Tags Gallery!


Suggested Products:

Pretty Party Chipboard Accent Stickers - Crate PaperCraft Tags By Martha Stewart CraftsPretty Party 6 x 6 Paper Pad - Crate Paper

Saturday, March 24, 2012

How To Create Rosettes and Flowers With The Scor - Pal

Learn how to make borders and flowers with this quick and easy how-to with Tami!


What you'll need: your fave paper collection, heat gun and the Scor-Pal


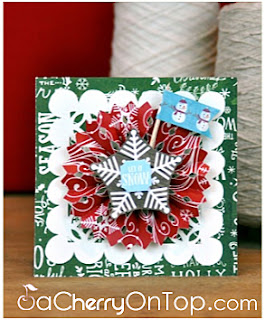
Directions:  Each rosette is created by scoring a strip of paper or card stock at equal distances then simply accordion fold, connect the ends, press down in the center and secure. The height of the rosette is controlled by the distance of the scores. 1/4" scores will make a rosette 1/4" tall, 1/2" scores will create a rosette that is 1/2" tall etc. The diameter of the rosette is controlled by the width of the paper strip. The wider the paper the larger the rosette.
 
I have found that the rosettes are best held together with hot glue. To do this simply hold down the center, fill with glue and let cool. (A non-stick surface works best)
   
Then it is simply a matter of create, layer and decorate!


Add the finished rosette or flower to your project:

scor pal

scor pal

Spring has sprung and we'd love to see your rosettes!  Post your project ideas to our ACherryOnTop.com Gallery!
Thursday, March 22, 2012

Scrapbooking Ideas Using The Scor - Pal


Have a Scor-Pal and want more project ideas?  Tami offers this easy tutorial that will have you designing like a pro in no time!  


Here is a brief peek into this multi-part tutorial:  


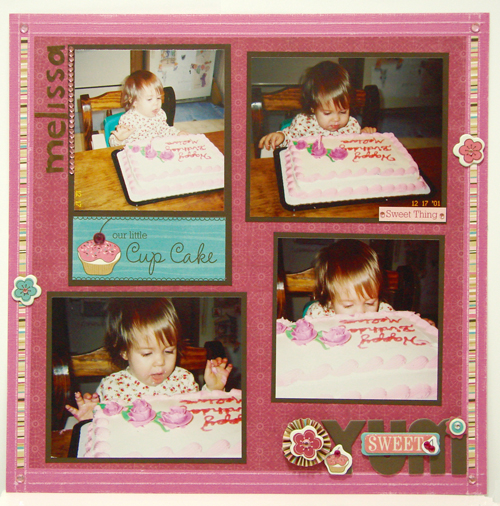
'If you have been scrapbooking for a while you will likely remember that roughly 5-6 years ago one popular technique for scrapbooking was color blocking. At that time there were special templates designed to aid in the process. These plastic templates were traced or placed on the page and then one would precisely cut pieces of paper and photos to be placed in the blocks...'

'Now, fast forward to 2012 and in steps Scor-pal! The Scor-pal scoring board is the perfect tool for easy, and unique color blocked pages. Another bonus, this technique can be used for cards as well!'


scor pal

For the complete color blocking with Scor - Pal scrapbooking tutorial, click HERE.  Stay tuned for Tami's next Scor-Pal tutorial - coming soon!

Thanks for stopping by!