Showing posts with label ho to make cards. Show all posts

Friday, February 10, 2012

Welcome Jenn - Our Feb 2012 Guest Creative Team Member!

Hi Cherries. My name is Jenn and I am so excited to be the GCT for this month. I have so much in my life to be happy about and am thrilled to be able to share a little bit of that with you. I am engaged to the most wonderful and amazing man who has taught me so much about love. Between us we have 3 awesome children, one little angel in heaven, and 3 cats that are just as spoiled as our children are! 


My family keeps me busy and is usually the focus of my scrapbooks. If I am not hanging out with the family, you can usually find me scrapbooking, reading, watching sports, or baking. I started scrapbooking as a young girl. I loved to cut pictures and articles out of magazines and glue them into other books. Thankfully my scrapbooking as evolved greatly since then. I love all styles of scrapbooking, but tend to gravitate towards more simple and clean pages.

When I think of February, I instantly think of love and Valentine’s Day. So for my reveal I wanted to showcase some of the people and things that I love. What better way to do this then with Basic Grey’s Kissing Booth collection? I love the colors of this line and found it to be very versatile. I love how the colors and designs blend and coordinate with each other, making it very easy to work with.


For my first layout, I wanted to share with you the love of my life. I choose the background paper (Oh Darling) because of the outdoor feel to it. The picture was taken while we were camping so I thought it was perfect. I used the back of xoxo, the back of we belong, as well as the back of kiss to help accent the picture. 


To add a little bit of depth I used stickers from the Kissing Booth Elements sheet. I love that the alphabet sheet came with three different fonts in three different colors. I used all 3 alphabets from the alphabet sheet to make the title. In order to help make the stickers and alphabet pop I outlined them with a fine tip marker. 


I also wanted a little bit of contrast between the papers since they blended together so nicely. In order to create that effect, I inked all of the edges using Chestnut Cat Eye pigment ink by Colorbox.


For my second layout I wanted to focus on my love of my children. I am so blessed to have 3 awesome kids. I really wanted the focus to be on the pictures of the kids so I chose to work with more subtle papers and only 1 pattern paper. I used the back of Hugs for the background. I also used the front of We Belong, the back of Kiss as well as the back of XOXO. Once again I used ink to help contrast the papers. 


I used Chianti Cat's Eye ink by color box. The deep red helped to bring some pop of color to the dark subtle papers. In trying to keep the focus on the pictures, I used the lovely mini pink alphabet to add names to the pictures while using the browns for the title. Did I mention how much I love this alphabet sheet? I used the element sticker sheet and the layered banner sticker sheet to create a couple of accents on the page. The flower stickers were a great way for me to hide my adhesive on the vellum!


For my final layout, I wanted to do a snapshot of things that I love. Pink is my favorite color so I wanted to incorporate lots of pink into this layout. The way these papers coordinate are awesome. I used the back of Truly, the back of Kiss, the front of Butterfly Kisses, the back of XOXO, the back of We Belong, and the back of Butterfly Kisses. I inked all of the edges using Chestnut Cat's Eye pigment ink by Colorbox. Using the element sticker sheet, the alphabet sheet, and the layered banner stickers I created a visual triangle to help bring focus to the list of things I love.


When I was finished with my layouts I realized I had some nice sized scraps to work with. I hate to throw anything away so I used the scraps to make a couple of Valentine’s Day cards.


Products Used in this Reveal:

Saturday, October 29, 2011

Hybrid Paper Crafting Featuring Wendy Bird Designs


Posted by nun69


Well if you don't think you can hybrid, think again! All you need is a printer and some adhesive! You don't even need to be a digital scrapper to work with WendyBird Designs


Not only can you use them with your digital scrapping supplies, but she has them in PDF format so you can print them as a template and trace on your paper cardstock/pattern paper or even print the template right on to your paper from your printer! 


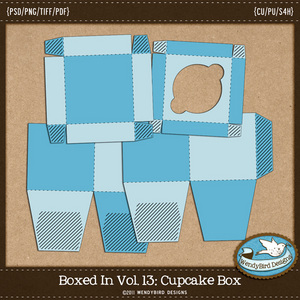
We, the Digi CT, made everything from Halloween Haunted Houses out of her Milk Carton Template to Notepad Holders for Xmas gifts to adorable Cupcake Holder Boxes!  


First, let's show off all those wonderful Cupcake Boxes using her Cupcake Box Template that some of the lovely ladies made for the crop contest!
Wendy Bird Designs Cupcake Box

created by Celticrose

created by nun69

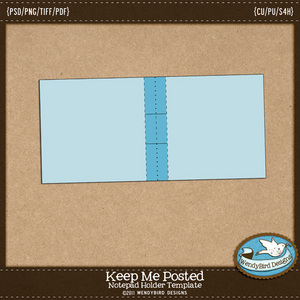
Here is a project featuring Wendy Bird Designs' Notepad Holder Template:
 
Keep Me Posted Template

  note pad holder created by FairyMouseMom

  
Create unique goodie bags using the Treat Tent Template:
 
wendy bird treat tent template

created by janell
finished treat tents

Wendy Bird Designs offers a wide selection of specialized templates.  All of her designs come with easy to read instructions that include a visual counterpart so you can easily understand and follow them! So if you haven't checked out her shoppe, go now and see all the goodies that you can make! 

 ~Visit Wendy Bird Designs' Shoppe at ACherryOnTop.com~

Click here to view more ideas not displayed in this blog.

Wednesday, October 19, 2011

Get A Jump On Holiday Card Making -


Posted by megamay (Megan):

I love making cards! LOL - I have no idea when things changed from me saying that I don't enjoy making them, am not any good at it, and only do it because I 'have' to, but now I really do like it! I love that I can make a card in a short amount of time, which allows me to fit something creative into my day even when I am busy. I also enjoy giving handmade cards. I know that some people don't appreciate them, but I find that most really do!
Since the creative aspect is something that I love, I tend to make every card unique, but with Christmas cards that can be hard because often you need lots. So, I have attempted here to give you some simple 'recipes' so that you can make your cards quickly, but you can also put your own spin on them if you like.

If you don't want to put your own spin on them, you can follow pretty much exactly what I did and have a great set of cards, with stuff leftover to make more (although you will have to vary the chipboard pieces that you use).

The very basic recipe that I used for these cards is - cardstock card, stamped or sticker sentiment, chipboard for dimension, twine for 'softness' and some patterned paper for interest.

Ok, so enough with talking, let's get into it!

First you need to make the cards. I used one sheet each of the Quick Sand, Rain and Hillary Bazzill Cardstock. Kraft would be a good substitute for the Quick Sand, or really you could make them all from kraft if you want. Here is how I cut my cardstock to get both of the 4.25x5.5 cards and have the largest possible scraps. That is one cut at 8.5, to get the large 12inch long scrap. Then cut the other way at 5.5, and 11.

After you fold, you will have this:


Using that large scrap of the Quick Sand, stamp your tree stamp three times, leaving a little room in between each.


Cut them apart and mat them. I used the brown patterned paper and the scrap of blue cardstock. I also inked the edges of EVERYTHING with brown ink. So, here you can see that the edges of the stamped papers are inked, and the edges of the mats. From now on, just assume that everything is inked before being glued down.


Next, I laid out my 3 stamped images on the respective cards, along with a piece of chipboard for each. This is my 'planning'. They are just sitting there.


Starting with the tan card, I cut a piece of patterned paper, and another mat from a second sheet of the tan paper, before gluing as shown. I added some bling to the chipboard just for that extra something.


This next one is a little more complicated. I wanted to use the lovely blue border, but since my card is smaller than the paper, I had to cut it down. I settled on cutting the top and bottom off, and trimming both sides equally to create borders on the side of my card. I don't have dimensions for you, because decide where to cut by laying the paper on the card and marking with a pencil the spot where the cut should be made.


On this one I added some twine. I just wrapped it around the card a few times and tied a bow. Then the sentiment and the chipboard are set with foam tape to keep it above the twine. The twine isn't glued down, that way I can sort of slide the bow into the exact place that I want it. I may have used a glue dot on the bow once I was sure it was perfect, but most of the time I don't bother.


On this next one we will do a little more clever cutting to preserve the border part of the paper. (sorry for the ugly color of green, the color is off in this photo, the actual green colors are much prettier)


I cut the paper about an inch above the bottom of the card. Then I glued the two halves together so that it is just the right size for the card front. See how the scrap on the right side has a crooked cut line? That is because I cut it off with scissors after it was glued together. I put the glue on the bottom of the top piece, glued it to what will be the bottom piece, then trimmed the excess from the back. (the paper is not glued to the card yet)


Now we need to cover up that seam. I cut the longest strip from the sideways blocked paper.


After inking the edges, matting and assembling...  (I wrapped the ends of the paper strip around onto the back. You can cut them off, but I liked them wrapped on this card.) the darker brown cardstock that the green paper is matted on, is bazzill bark.


This next set of cards I decided to use sentiment stickers for something different. If you don't like stamping, these are a perfect solution! Here is my planning stage. For the circle sentiment, I measured the sentiment before using my circle cutter to cut a circle almost the exact same size, from the pale patterned paper.

Then I carefully stuck the sentiment so that it is centered on the circle. If you place the sticker crooked, undu works great! Or sometimes if it's just a little off, I will use my scissors and the line around the edge of the sticker as a guide to trim the excess off. Don't try to cut right on the edge line, instead cut like a tiny bit outside the line, so you have a thin 'white' border.


hehe - see the barcode on the brown card? make sure you cut that off before you start doing the cutting to make your cards. ;)

Here is a little more creative cutting. Remember that strip that we cut out of the paper for the previous card? Couldnt let those two large scraps go to waste. so I pieced them back together like this, but wait, don't glue...


I didn't want the seam to show, and I wanted a plain color to ground the middle of the card for the sentiment, so I added this wide red strip, then I cut the little triangle from where the top paper shows in the bottom left corner.

Make sure your red strip is wide enough though, when I cut that bottom triangle off, I realized that there was a little hole there, because the bottom paper is at an angle. Luckily my strip was just wide enough.


Here is the final card, all inked and assembled:


This one is easy, put the sentiment sticker on a scrap of the tan cardstock and trim. Mat the brown paper on more tan cardstock, using your pencil to mark where to cut.


Ink and assemble - with a touch of blue on the sentiment mat and as a punched border at the bottom.


Last one! (Ew, I got terrible colors in the photo again - sorry) Cut some tan cardstock, and then the red paper to mat each other as shown. Use your corner rounder on all the edges. (This photo shows the brown paper not rounded, but I did end up rounding those edges.)


lign the sentiment sticker centered at the bottom of the red paper.


Cover the top part of the red paper with the white string paper. Then add the chipboard embellishments, a little bling and twine as shown.


Here is the group of cards all together:


Here are the bonus card ideas:


Click on either of those images above to see the gallery entry with all of the cards up close.

Supplies: