Showing posts with label birthday favors. Show all posts

Tuesday, March 12, 2013

How To Make A Cupcake Treat Box

Posted by lauralooloo

Laura W.

Here in Saginaw, Michigan - we have a lot of little specialty bake shops!  We love those little carry containers used to hold things like muffins or cupcakes! 

Laura shows us how we can make our own personalized take out boxes using the Scor-Pal and papers from My Mind's Eye.


Along with some basics like scissors and adhesives, you'll need the following to start this project:

Lime Twist patterned paper by My Mind's Eye
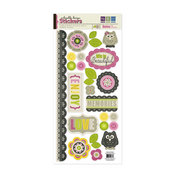
Stickers
Scor-Pal
Baker's Twine


Laura used this cute elongated Chinese take-out 'type' box as inspiration and as a pattern:


Carefully take the box apart and trace the shape onto the back of your patterned paper.  You'll need to then cut out the shape and score and fold where necessary.  Using a scoring board like the Scor-Pal here is incredibly helpful to ensure your folds are crisp and your box ends up looking...well, like a box!

If you don't have a box in hand to use as a pattern, there are tons of free printable box templates available online.  Just use your browser to find the size and shape that's perfect for your project.

You'll end up with something that looks like this:


Laura used some baker's twine along with a punched out circle shape of Kraft Paper and added a cute sticker.  She created a matching card to complete the treat box project.  This is really perfect as a teacher gift, coworker's birthday or a housewarming gift!  You just have to decide how you're going to fill it!


Suggested Products:


my minds eye lime twist  baker's twine
scor pal

guest designer call
Click here to find out how to submit


Tuesday, November 15, 2011

How To Make An Accordion Card Holder Purse


Posted by carrie123

If you are like me, there comes times when I am in a bind for a quick gift.  This handy little project will be just the thing you need. It is quick and easy to make.

Once you get the hang of it, you can be whipping these out in about an hour. I actually have 3 of them I have made already for teacher's gifts for the holidays. So, if you are ready let's get started!

how to make an accordian purse

First, you are going to need the following supplies:


  • CARDSTOCK: One 6"x11" - One 6"x7" - Two 4"x10" - Four 4"x5 3/4" - One 1 1/2' x 11"
  • PATTERNED PAPER: Two 3 1/2" x 10" - One 5 1/2" x 9 1/2" - One 3 1/2" x 51/2" - One 1" x 11"
  • ROUND CORNER PUNCH
  • GLUE or DOUBLE STICK TAPE
  • VELCRO
  • SCORER
  • ADDITIONAL EMBELLISHMENTS

Alright, here is your first step...


Now, attatch the strip you just made to the non adhered part of the 5 1/2 x 9 1/2 paper to make the handle and then finish adhering the rest of the paper down:


Apply glue or  tape  to the left  and  right outer  panels of  the  folded  4 x 10”card stock.


Adhere one side of the 4 x 10 cardstock to back 4" panel of the main piece and do the same for the front of the main piece. Repeat for the second 4" panel.


 You can then decorate the fron any way you like.


I also made coordinating cards to fill the purse.  I now have a cute and quick little gift for someone!


Products used:

Saturday, October 29, 2011

Hybrid Paper Crafting Featuring Wendy Bird Designs


Posted by nun69


Well if you don't think you can hybrid, think again! All you need is a printer and some adhesive! You don't even need to be a digital scrapper to work with WendyBird Designs


Not only can you use them with your digital scrapping supplies, but she has them in PDF format so you can print them as a template and trace on your paper cardstock/pattern paper or even print the template right on to your paper from your printer! 


We, the Digi CT, made everything from Halloween Haunted Houses out of her Milk Carton Template to Notepad Holders for Xmas gifts to adorable Cupcake Holder Boxes!  


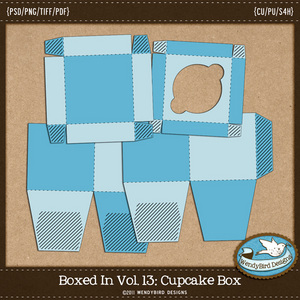
First, let's show off all those wonderful Cupcake Boxes using her Cupcake Box Template that some of the lovely ladies made for the crop contest!
Wendy Bird Designs Cupcake Box

created by Celticrose

created by nun69

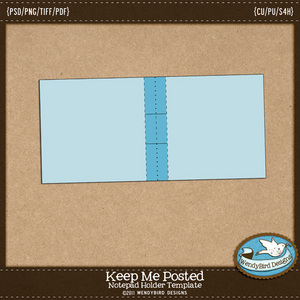
Here is a project featuring Wendy Bird Designs' Notepad Holder Template:
 
Keep Me Posted Template

  note pad holder created by FairyMouseMom

  
Create unique goodie bags using the Treat Tent Template:
 
wendy bird treat tent template

created by janell
finished treat tents

Wendy Bird Designs offers a wide selection of specialized templates.  All of her designs come with easy to read instructions that include a visual counterpart so you can easily understand and follow them! So if you haven't checked out her shoppe, go now and see all the goodies that you can make! 

 ~Visit Wendy Bird Designs' Shoppe at ACherryOnTop.com~

Click here to view more ideas not displayed in this blog.

Friday, October 28, 2011

Birthday Celebration Ideas Featuring Crate Paper's Random Collection


Posted by SarahA (Sarah):


Around this time of year, there are several birthdays in my family and I wanted to come up with some fun, personalized ideas.  Keep reading to see some fun, easy  projects that come together quickly. There's even a layout idea for easy event scrapping!


Happy Birthday Card

I made this fun card using the Random line from Crate Paper. Lots of layering was the key to this card. I used several of the papers and a lot of the die cuts from the sheet included in the collection pack. These die cuts are the same as the chipboard pieces, so you could use either to make the card. 


I outlined the letters with my black Zig pen for a little more dimension, used foam adhesive under some pieces, then sewed on some buttons. It's fun to take all of those little pieces and layer them up until you like what you see.  Lots of detail make for a fun card! When you have a card with a lot of dimension, they don't always fit in envelopes well. 


To remedy this, I put it in a glassine bag. I used a border punched strip, a few more pieces from the die cut sheet and then folded the top down and sewed it shut with my sewing machine. 


Birthday Pin

Five years old is an important birthday, so I wanted to be able to show it off! I started by cutting a 2.5" scalloped circle with my Slice. I then cut ribbons to my desired length and then hot glued the ends to the middle of that scalloped circle. I really loved these bright new ribbons from Martha Stewart for this project- so many colors in one package! 


Different widths of ribbon add a fun factor, so I added some wider ribbon from Fancy Pants. Next I cut a 2" circle and a 2" scalloped circle and adhered them together. I then added foam adhesive to that and layered it on top of the ribbon. Next I adhered a 1.5" circle to the center of that and added my number. 


I added Diamond Stickles around the edge of the smaller scalloped circle for a little bling. My last step was to hot-glue a pin back on the back. If you don't have a new pin back handy, just go looking around in your junk jewelry to pull one off something you don't wear anymore!


Birthday Crown


Who doesn't want to be a prince or princess on their birthday?! I downloaded a crown template here, then printed it out on the backside of my paper from the Pink Paislee Vintage Vogue line. I used my Slice and the Applique Basics design card to cut varying sizes of butterflies, then adhered them with foam adhesive. 


I also cut the shadow piece for the large butterfly and adhered that laying flat to the crown. A small circle with the age in the center was added to the middle of the main butterfly. I added some KaiserCraft pearls to the tips of the crown, then sprayed the whole crown with Silver Plated Maya Mist for some sparkle. Pearl Glimmer Mist is another one for lots of sparkle and shine!


Five Years Old


I struggle with "event scrapping" (birthdays, holidays, etc) sometimes because it always seems there are so many photos and so much you want to include to really capture the day. To remedy this, I printed one large photo that I felt represented the day. Then, I chose several smaller photos that helped tell my story and included those, too.


I think four photos can pretty much sum up most events and that way I still had plenty of room left for journaling and a few embellishments. I really liked the little bit of grey on the paper at the bottom where I used the Jillibean date sticker, so I misted some of the Fancy Pants filter paper embellishments with Charcoal Maya Mist for another pop of that color.


Some products used:


Random Collection Kit By Crate Paper

Birthday Pin:
Watermelon Paper - Watermelon Gazpacho By Jillibean SoupYellow Bell Pepper Paper - Watermelon Gazpacho By Jillibean SoupModern Festive Duet Ribbon By Martha Stewart CraftsAbout A Girl Ribbons by Fancy Pants