Wednesday, February 8, 2012

February 2012 Paper Crafting & Scrapbooking Challenges

Posted by megamay

So how are those new year's resolutions coming? Are you scrapping up a storm to meet your goals? If not, here is some incentive: all the new products from CHA will be arriving in the store soon. So, get scrapping and use up some of your stash to make room for all the fun new products! Here are some inspiring challenges to help you do just that!
Remember:
- only one LO per challenge will enter you into the points drawing
- LOs cannot be entered into more than one challenge category
- *please* only enter LOs that meet the specific challenge instructions  

Ad Inspiration Challenge by MamaK321 (Kristianne)
(paper, digital, or hybrid challenge)


All About Me Challenge by milmomma (Brittney)
(paper, digital, or hybrid challenge)
This months AAM Challenge is all about a typical day. Tell us your favorite part, or tell me what your usually day is, or whatever you want to tell me about your day. I chose to give a photo story of my typical Tuesday with a touch of journaling telling about my favorite part.

Trends and Techniques Challenge by Megamay (Meg)
(paper, digital, or hybrid challenge)
Chevron (or zig zag) is everywhere these days. So this month I challenge you to use some chevron on your layout. You can use paper that has chevron on it, or create your own. Ive seen a couple different tutorials on how to create chevrons. Here is one from Jess Mutty showing you how to make your own chevron pattern using triangles. http://scrapgoo.blogspot.com/2011/12/fresh-air.html
and here is my example. I used some amy tangerine paper that was preprinted with chevrons.


You can view all of the fantastic challenges by checking out the February Challenges post in our Idea Center!

Tuesday, February 7, 2012

How To Add Stitching To Your Paper Crafting Project

Posted by megamay (Megan):


This month I decided to show you some tips on adding stitching to your paper crafted projects. I seem to add sewing to just about every layout and card that I make. Most of the time I use machine stitching because it's fast, easy and I like the texture that it adds. 


There are other options though - hand and faux. If you are interested in hand sewing, Rachel wrote two articles on using the 'Sew Easy' tool to help with hand sewing. 


Below is an example that I created for hand sewing without using the sew easy tool. This technique is best for odd shapes, like the sun I created on this card:


I drew the sun in the corner of this card with pencil. Then I used my paper piercer to make the holes, before erasing the pencil lines. Then I hand stitched using the holes I just created.


I also used some faux stitching on this card. I just used a brown pen to draw the 'stitches' around the border of the card and of the sand dune. There is another We R Memory keepers product that can help with faux stitching - the sew stamper. 


 It is a rolling stamp pad, just like the sew easy, but with ink instead of piercing. Be sure to check that out if you prefer faux stitching for a super quick easy way to add another layer to your projects.


Like I mentioned before though, my preferred method is machine sewing. Here is a card that I created with machine sewing.


sewing on cards


I know a lot of people are intimidated my machine sewing, so I created this video tutorial to show you some tips to make it more effective. As I mention in the video, in my opinion, the hardest part is threading the machine. So, don't get discouraged if you are having trouble right up front. 


Look in your manual or if you dont have a manual look around online for instructions for threading your machine. It's important to do it correctly so the thread doesn't get all bunched up. After you have done that - machine sewing on paper is easy as pie!


Products used in this reveal:

Monday, February 6, 2012

Back From CHA Winter 2012

It's hard to believe a week ago today Kristin and I were browsing the over 200,000 square feet of the Craft and Hobby Association (or CHA) show in Anaheim, California.  CHA is always a fantastic experience!  Seeing the thousands of fellow crafters, hobnobbing with designers and manufacturers and of course getting to actually touch all of the newest products being released throughout the coming season make CHA a must-attend event!

Brian from Epiphany Crafts


Shape Studio Demo

Kristin and I got to spend a lot of time with some of your favorite manufacturers.  

Heidi (ACherryOnTop) & Teresa Collins

We also got to taste some amazing food!

Bananas Foster!  Yummm!
We seriously love doing what we do.  We are very thankful each and every day for being able to work in an industry we enjoy!  We're working to keep the 'Coming Soon' section of ACherryOnTop.com as current as possible!  Be sure to click the 'Notify' button to receive an email as soon as the newest items become available.


Thanks for reading!


Wednesday, January 25, 2012

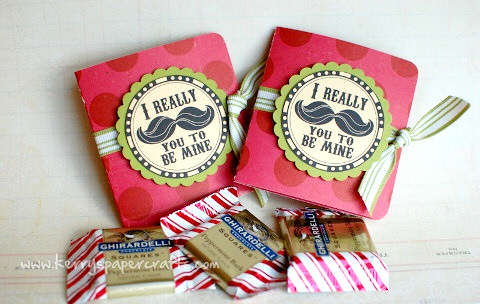
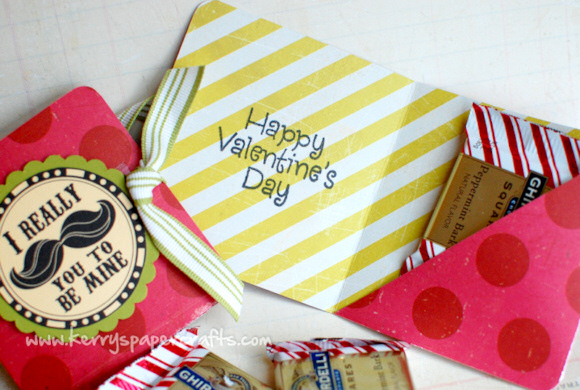
How To Make Valentine Gift Card Treat Holders

Posted by kbuck092207

Step By Step How-To Video:


In this video tutorial, you will learn how to make these Valentine's themed Ghirardelli Treat Holders. 


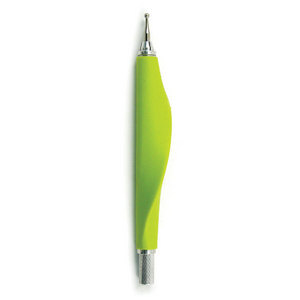
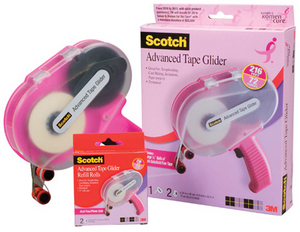
What You'll Need:


Instructions:
  1. Cut scrapbook paper to 9 3/4" x 3 1/2"
  2. Score at 3 1/4" inch on each side & fold.
  3. Cut triangle off one side to create pocket for candy.
  4. Fold triangle in, and use Scor-Tape or Sticky Tape to adhere to inside.
  5. Round outside corners with 1/4" side of Corner Chomper
  6. Print and cut out digital stamp, layer onto scallop circle punch.
  7. Add stamped images and ribbon to embellish, stamp sentiment on inside if desired.


Monday, January 23, 2012

Announcing Weekly Giveaways!

Now through April 7, 2012 we're giving away all kinds of goodies!


Be sure to 'like' our facebook fan page for all of the details and to enter!


This week's giveaway features amazing products from Tim Holtz!


giveaway


Click HERE to view the official sweepstakes rules.


Sweepstakes open to all residents of the US and the District of Columbia.  Void where prohibited.  

Friday, January 20, 2012

Our Digital Creative Team Takes Time To Reflect

Posted by MamaK321

on the years past and what the future holds, is the subject on the minds of our Digital Creative Team this week. You'll find inspirational layouts below reminiscing childhood adventures, preserving a special moment in time and becoming awestruck at how quickly time flies when we're busy living life. 


If you enjoy these layouts, leave our CT ladies a little love. Then head over to the Digital Shoppe for the latest and greatest products!


Take Two by Lindsay,
January Guest Digital CT Member


"A "Now vs. Then" layout of Devlin at the Pumpkin Patch. I was lucky enough to get this shot as he poked his head thru the hole, just like he did back in 2008."


Year One Travels: Indian Ocean by FairyMouseMom

Egle masterfully combines products from 4 different designers to create this beautiful layout featuring a dear friend's lovely daughter.


Natural Beauty by MamaK321

"Our children grow up so very fast!  My daughter wanted to try on this beautiful dress that she said reminded her of Phantom of the Opera. She looked so lovely."


I Love My Furbaby by sarahwhithers

Jen's furbabies are a constant (and shall I add adorable) subject of her layouts and here, she expertly uses an aptly named kit to create a fabulous anniversary page.


Like what you see above? You can find these brilliant new products in the Digital Shoppe.


Wednesday, January 18, 2012

How To Create Four Layouts From One Sketch


Posted by SarahA

Sketches can be a scrapbooker's best tool when it comes to getting layouts done when you're short on time. They can give your creativity a jump start and encourage you to try design ideas you may not have thought of before. 


Sometimes though, searching for just the right sketch that speaks to you can be difficult. Sometimes you may find a sketch you love, but you don't want to use it more than once so you don't have layouts that all look the same in your albums. 


I'd like to show you how you can stretch just one sketch into four very different layouts.


I started with this sketch from PageMaps that I really liked for several reasons. I really liked the 3 patterned paper pieces, the stitching and the little cluster in the bottom corner.


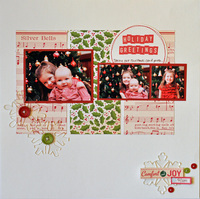
Holiday Greetings
The first layout I did was a pretty close to exact interpretation of the sketch. I kept all the design elements in place. The main difference is changing the presents out for snowflakes on my layout. I even used the same photo dimensions given on the sketch. I really liked the October Afternoon Holiday Style line- it went perfectly with my photos and were bright, happy Christmas colors.


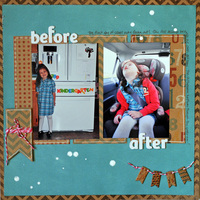
Before & After
 A few weeks ago I was talking with a friend and she mentioned looking for a sketch, but not having the right size photos listed. When using a sketch, there are no rules! On this layout, I followed the sketch pretty closely for the design, but used 2  4x6 photos instead of the 3 smaller photos on the sketch. 


I also placed the title differently and added some journaling around the edges. You can see the basic sketch in my layout, but I've made a few changes to suit the photos I had. The My Mind's Eye Kraft Fun Day line has a lot of great, trendy designs. I especially liked the number paper for this layout about the first day of school. I used my white pen to give the kraft pieces a little dimension.


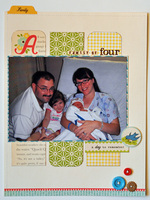
Family of Four
I've really been into doing 8.5x11" pages lately. I am able to easily include them in my D-ring albums amongst my 12x12 layouts. Actually, the first 8.5x11 I tried was earlier this year using a sketch! I would say the majority of sketches are 12x12, but that doesn't mean you can't use them to create a different sized page. 


You can always scale it down if you're doing an 8x8, a mini album, or an 8.5x11 like I did here. I shrunk the size of the paper pieces and used one large photo. I kept the title placement, cluster at the bottom of the page and at the bottom  of the right-hand strip of paper.  


The Sidewalks line from October Afternoon was just perfect for this photo of a newborn baby and happy family! You can't beat October Afternoon's vintage whimisical style when scrapping a baby!


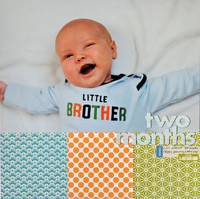
Two Months
This layout deviates the most from the sketch, but you can still see how they are related. The 3 patterned paper pieces were my favorite part of the sketch- I really love the uneven number design principle! I had an 8x12 photo I had been wanting to scrap, and decided now was the time! 


 I cut three 4x4 squares and used zig-zag stitching to adhere them to the bottom of the layout. I placed the photo at the top. The sketch had stitching around the title, so I stitched my title alphas to the layout. A few stickers under the title reflect the "date" clusters from the sketch. 


So, you can see that there were elements of the sketch that I used in this layout, yet the layout doesn't resemble the sketch much at all.


You can see how if you have one sketch you really love, you can make several layouts from it without feeling like you'll have four of the same layout in your album. Just by using different size or number of photos, rotating the sketch, or by just pulling several elements from the sketch that you really like will let you stretch your favorite sketches further!  Even when they're all lined up together, you still see 4 distinct layouts.


Holiday GreetingsBefore & AfterFamily of FourTwo Months

Products used in this reveal:

Silver Bells Paper - Holiday Style By October AfternoonHolly Jolly Paper - Holiday Style By October AfternoonSprinkles Paper - Happy Days - Kraft Funday By My Minds Eye Ziggity Paper - Everyday Fun - Kraft Funday By My Minds EyeHappy Days Chipboard Elements - Kraft Funday By My Minds EyeApron Strings Paper - Country Drive By Echo ParkSidewalk Word Cardstock Stickers By October AfternoonHappy Days Buttons - Kraft Funday By My Minds EyePink Sorbet Bakers Twine, 15 Yards White Broad Uni-Ball Signo Gel Impact by Sanford