Showing posts with label Maya Road. Show all posts

Monday, June 20, 2011

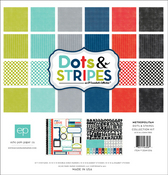
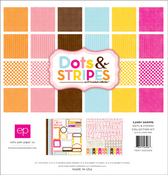
Paper Crafting With Dots And Stripes From Echo Park Paper

Posted by SarahA (Sarah):

When I first saw Echo Park's announcement about the Dots and Stripes lines, I wasn't that excited. It seemed like a boring neutral line that I might pick up a piece or two of. When my reveal time came around for June, though, I gave it another look and I'm so glad I did! 

These lines coordinate perfectly with all of their previous lines, they work well with each other and they're great all on their own! These two lines really are the ultimate in scrapping any type of event!

High Flying Fun
 
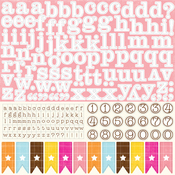
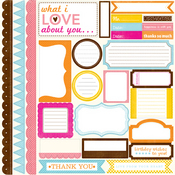
The first layout I did used papers from the Candy Shoppe collection. I found a clip art kite online, resized it in 3 different sizes, then traced them onto 3 of the papers. I used twine for the kite strings and cut ties from the brown paper. The alphas included were the perfect size and font for this layout, and the element stickers had a ton of journaling shapes and labels to choose from for adding a little extra "something". The background paper is from the Life is Good line- see how it perfectly coordinates with the Candy Shoppe papers?


Tigers vs. Yankees
 
The second layout I did mixed the Navy from the Metropolitan line and the Mango from the Candy Shoppe line. I layered them on white cardstock for a base for my photos. The banner flag stickers in the corner were just perfect for this layout! 

I added some stars cut from the paper and an October Afternoon sticker in the middle for a little extra embellishment, and this page was done. Simple enough using only two sheets of patterned paper and minimal embellishment, but still fun and eye-catching! By the way, the Tigers won! ;)


Sew Busy
 
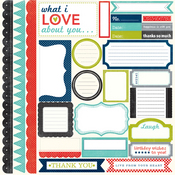
I wanted to do a page with some of my sewing projects from this year, but I didn't need a lot of room to tell a story or for lots of photos, so I decided to do an 8.5 x 11"  page. Again, I mixed the Metropolitan (teal and black) and Candy Shoppe (watermelon) lines for this page. 

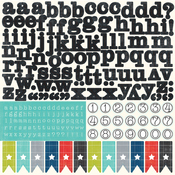
I resized my photos to 2x3" to fit on the shipping tags, then adhered them and stitched the tags on. The Metropolitan alphas were perfect on this layout against the pink  paper, so I adhered, then stiched them on, running back and forth with my sewing machine several times. 

One of the journaling stickers from the Metropolitan element sticker sheet made a nice little embellishment at the bottom paired with some Maya Road chipboard sprayed with Black  Licorice Maya Mist.


Preschool Graduate
 
I again mixed papers from both Dots & Stripes lines- Navy and Ruby Red from Metropolitan and Mango from Candy Shoppe. The green paper from the Life is Good line shows again how these lines coordinate so well with their previous releases. 

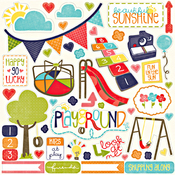
I made a little cluster of embellies using the 1,2,3 stickers from the Playground line, a layered apple from the Ruby Red paper cut with my Slice, and a sticker and tin pin from October Afternoon. If you're in need of some basic, primary colored papers and stickers for some recent end of year school photos (or you're catching up on a year's worth of school stuff), this line is absolutely perfect for that!

 
Products used in this reveal:


Wednesday, June 8, 2011

How To Use Stamps, Stains And Inks In Paper Crafting


Posted by JulesinParadise (Jules):

I make lots and lots of tags.  I send them instead of birthday cards; I give them as book marks and use them on layouts.  I love to get my hands all covered with inks and stains and glitter and glue.  

I recently made these two tags and they will join my stash of tags to send to special people on special occassions. All of these techniques can be used on cards and layouts as well.


First I gather my supplies:  stamps, acrylic stamp pads, inks, the wonderful new Ranger distress stains, cardstock, a piece of transparency that came with my stamps as a cover, ribbons, Stickles and the Liquid Pearls along with a mask.

First, I apply one coat of the Ranger Distress stain.  This is a fantastic product and comes with its own built in applicator.  It goes on just like shoe polish.  I add color layer by layer until I get the tags the color I want.  It is also so easy to add color to various areas but not others by applying the stain in a circular manner. 


For the mask, I first applied one light coat of color to the tag and allowed this to dry.  This stain sets up fast and dries to lovely chalky colors.  I then placed the mask over the tag and apply the stain.  It is much easier to use a mask, even one as detailed as this one, as sponge applicator gets into all the nooks and crannies with ease.  I let the stain dry and removed the mask.  A stencil works just as easily. 

Next I stamped a variety of butterfly images from the three stamp sets in various colors and hues of the colors.  This gradiant stamping is easy with the ink sets and stamping is a snap with the cat's eye shaped inks.  I stamped these on card stock and onto the acrylic square.  The images stamped onto the acrylic need to set up at least over night or they smear.  Heat setting of the chalk inks is risky as the acrylic is prone to distortion from heat.  I sprayed the acrylic stamped images with a clear sealer before I cut them out. 


Once the images were ready to be cut out, I adhered those stamped onto the cardstock first and layered the acrylic ones over them.  I only adhered the acrylic images down the middle and once the glue dried, I gently folded the wings back and creased them.  The overlay and popped up wings resulted in more vivid movement on the tag.


I have always loved beautifully stamped images and words where the colors blend and go from lights to darks.  I used to use a q tip or a blending stick to apply the inks but never could get this technique to turn out the way  I wanted it to.  I did discover a short cut though that produces results almost as well.
I stamp one lighter color over the entire image, the word "laughter" in this case.  Then, using just the outer rim of the cat's eye ink in a darker color, I tap it gently around the top, bottom and two sides of the word. 


The stamped image has the graduated inking but with half the fuss.


I stamped the butterflies directly onto the "Laughter" tag, added Stickles, Liquid Pearls (love these) and some bling.  Can't wait to see what you create with these great stamps, inks, stains and other assorted goodies.


Tuesday, October 19, 2010

Scrapbooking Product Review: Maya Road

Pam
Scrapbooking with Pam (aka: 4peasnourpod)

Pam is our Creative Team Coordinator, but we think she may have missed her calling as a salesmen because she's always finding (and getting ACOT to carry) fabulous new lines that we may have missed!  Maya Road is one of those companies.  

Pam created this absolutely amazing paper crafting project using Maya Mist and Maya's Canvas Pendant Banner Album:

 autumn banner
'Autumn Banner' by Pam

Pam cleverly suggested using the reverse of the banner for a different season or event.  We love multi-purposing!

This next project was inspired by one of our other designers - Jules.  I may even have to take this idea for the upcoming Thanksgiving Holiday.  It would make a terrific tradition and keepsake for years to come.  
 
thanksgiving album
'So Thankful' album by Pam

A peek inside the 'So Thankful' album:

so thankful

View Pam's complete article at ACherryOnTop.com!

Product Preview:
Maya Road Landing