

Posted by ScrapGoo(Jess):
Every year around this time I think about participating in one of the many Christmas scrapbooking "events" that go on all over the internet. But I find the idea of scrapping a page every day of December really overwhelming, to be honest. I already have four million things to do and although scrapping is a great stress reliever it sort of stops being fun if it's just one more thing to add to your to-do list.
So this year I came up with an all-in-one mini album that combines a planner AND a place to put important memories and photos. I like the idea that I can use the organizational section up until the big day and those lists will become a neat record of the past all on their own.
But I can also use the other sections after Christmas when I add highlight photos, reflections on the holidays, and even our family card.
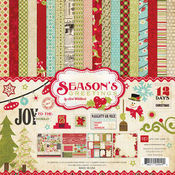
I used the fabulous Echo Park Season's Greetings collection for this, with Cinch book boards and my Bind-It-All.


 Cover
Cover
- Cut two pieces of thick cardboard or book board to 6" x 8"
- Cut two pieces of coordinating cardstock to 8" x 10"
- Adhere the book boards to the center of the cardstock, cut the corners at an angle, and adhere the edges around the book board

For the front cover:
- Cut a 5.5" x 7.75" piece of the green diamond paper and adhere it towards the right side
- Border punch a 2.75" x 7.75" piece of solid red paper and adhere to the left side
- Layer a black border sticker at the left
- Find the large bracket frame sticker, add white cardstock behind it, and trim. Adhere to the center of the page
- Cut the teal tag from the journaling tag page, punch a hole, and tie a red bow at the top. Layer on top of the bracket frame
- Add two tree stickers
- Add "Christmas" and "the most wonderful time of the year" stickers
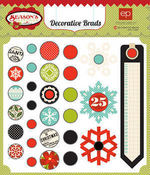
- Insert a snowflake brad in the top of the red tag chipboard and layer onto the teal tag
- Insert a black brad into the hole of the green tag sticker, tie a small twine bow, and add this on top of the red chipboard tag
- Add the "2011" numbers
For the inside cover:
- Cut a 5.5 x slightly less than 8" piece of the plaid paper and adhere to the left
- Add the noel banner sticker to the upper left corner
- Add a ticket sticker to the bottom
Inside Pages:
**A Note About Binding** I chose to use my Bind-It-All to finish this project but you could use another binding machine or simply punched holes and book rings. I "cheated" all of my papers to the outside of the pages to leave a little room for the binding holes. This ensures that you don't have holes straight through your lists and photos. Keep this in mind when completing your layouts!
 -All inner pages are cut to 5.75" x 7.75"
Planning divider: Base paper is red honeycomb. Cut the edges off a ticket sticker and fold it in half over the top of the right edge. Add alphas to spell "planning". Border punch two 5.75" red swirl strips. Adhere them to a 5.75" x 4" piece of the blue ornament paper. Adhere that to the bottom of the page. Add the black tag block. Insert brads in the three chipboard ornaments, tie twine bows, adhere the ornaments, and tuck twine ends up over the top edge of the punched strip.

The order I used was:
- Calendar
- Master to-do list x2

- Gift list x2

- Christmas card worksheet and list

- Shopping list x2

- Notes

The Details and Memories

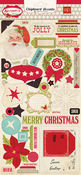
- For the Details divider: Cut the edges off a ticket sticker, fold it in half and adhere it to the center of the right edge. Add alphas stickers to spell out "details". Cut a 2.5" x 7.75" strip of the green patterned paper and adhere to the right side. Add a red border sticker. Layer the "making a list" tag, toys sticker, naughty or nice sticker, and the chipboard Santa. Punch a small circle from the plaid paper and add the circle sticker with pop dots or foam tape. Tie a twine bow.

- For the card page: This page is designed to display your family card that you send out this year. Cut a 5.25" x 7.25" mat from the advertising paper. Adhere the long strip brad to the bottom of the page. Add "2011 card" stickers.
**A Note About Photo Mats** Unless otherwise noted all of the photo mats on the following pages are cut to 3.75" x 5.25". This is a perfect size to just see a small mat around photos printed to 3.5" x 5".
The following pages have room for special photos and small journaling areas to detail what goes on in your family over the holidays. Things like decorations, what you craft or bake, and what your traditions are add to a comprehensive look into how you celebrate!
- For the decorations page: Page base is green holly paper. Adhere a red swirl photo mat to the bottom. Adhere the plaid tag to the top, add three sentiment stickers to the left, and spell out "decorations".

- For the baking page: Page base is striped paper. Adhere a red swirl photo mat to the top and tuck the green tag under it. Adhere the subway art sticker to the right and add "baking" in red alphas.
- For the crafts page: Page base is small green swirl. Adhere a teal photo mat to the bottom and tuck the red tag under it. Adhere the matted "do not open..." sticker to the right. Thread twine though three chipboard buttons, tie a bow, and add below the sticker. Add "crafts" in black alphas.

- For the feasting page: Page base is red poinsettia. Adhere a red honeycomb photo mat to the bottom and the greet diamond tag to the top. Add the chipboard wreath to the right of the tag and "feasting" in red alphas.
- For the Memories divider: Page base is teal diamonds. Cut the edges off a ticket sticker, fold it in half, and adhere it to the bottom of the right edge. Cut a 2.5" x 7.75" strip of red snow flake paper and adhere to the left. Cut a 7.75" punched strip of red honeycomb paper and add to right of the red strip. Adhere the ornament banner sticker to the top. Layer snow flake stickers, the sentiment banner sticker, and the chipboard snow flake.

- For the large photo page: Mat a 4.25" x 6.25" piece of the cream snow flake paper onto green solid paper. Add the "merry christmas" chipboard to the top. This page is for a 4" x 6" photo.
- For the season's greetings page: Page base is red plaid paper. Add a solid dark green photo mat to the bottom. Layer the green flourish sticker and the "season's greetings" label sticker to the top.
 - For the traditions page: Page base is green patterned paper. Add a solid red photo mat to the bottom and tuck the traditions tag under it. Add the "trim the tree", red border, and "happy new year" stickers to the right.
- For the Christmas Eve page: Page base is striped paper. Print an extra "notes" page from the printables I linked earlier and cut it in half. Add a teal photo mat to the top and tuck the lined paper under it. Add the green border sticker to the bottom and the "24 eve" sticker to the side. This is your area to journal about Christmas Eve.

- For the Christmas Day page: Page base is green holly paper. Add a solid light green photo mat to the bottom and tuck the second half of the lined paper under it. Add a red border sticker to the top and the "25 day" sticker above the mat.
- For the inside back cover: Cut a 5.5' x slightly less then 8" piece of red snow flake paper and adhere to the right. Mat a 4.25" x 6.25" piece of cream grid paper on to small green swirl paper. Add six sentiment stickers.
WHEW! And we're done! Punch binding holes with your binder of choice or a Cropadile and secure your pages. I added a large green and white bow to the top of my binding, as well as some strung beads and crystals on a ribbon.
Enjoy planning, celebrating, and remembering your holiday!
I used the following products:
So this year I came up with an all-in-one mini album that combines a planner AND a place to put important memories and photos. I like the idea that I can use the organizational section up until the big day and those lists will become a neat record of the past all on their own.
But I can also use the other sections after Christmas when I add highlight photos, reflections on the holidays, and even our family card.
I used the fabulous Echo Park Season's Greetings collection for this, with Cinch book boards and my Bind-It-All.
- Cut two pieces of thick cardboard or book board to 6" x 8"
- Cut two pieces of coordinating cardstock to 8" x 10"
- Adhere the book boards to the center of the cardstock, cut the corners at an angle, and adhere the edges around the book board
For the front cover:
- Cut a 5.5" x 7.75" piece of the green diamond paper and adhere it towards the right side
- Border punch a 2.75" x 7.75" piece of solid red paper and adhere to the left side
- Layer a black border sticker at the left
- Find the large bracket frame sticker, add white cardstock behind it, and trim. Adhere to the center of the page
- Cut the teal tag from the journaling tag page, punch a hole, and tie a red bow at the top. Layer on top of the bracket frame
- Add two tree stickers
- Add "Christmas" and "the most wonderful time of the year" stickers
- Insert a snowflake brad in the top of the red tag chipboard and layer onto the teal tag
- Insert a black brad into the hole of the green tag sticker, tie a small twine bow, and add this on top of the red chipboard tag
- Add the "2011" numbers
For the inside cover:
- Cut a 5.5 x slightly less than 8" piece of the plaid paper and adhere to the left
- Add the noel banner sticker to the upper left corner
- Add a ticket sticker to the bottom
Inside Pages:
**A Note About Binding** I chose to use my Bind-It-All to finish this project but you could use another binding machine or simply punched holes and book rings. I "cheated" all of my papers to the outside of the pages to leave a little room for the binding holes. This ensures that you don't have holes straight through your lists and photos. Keep this in mind when completing your layouts!
Planning divider: Base paper is red honeycomb. Cut the edges off a ticket sticker and fold it in half over the top of the right edge. Add alphas to spell "planning". Border punch two 5.75" red swirl strips. Adhere them to a 5.75" x 4" piece of the blue ornament paper. Adhere that to the bottom of the page. Add the black tag block. Insert brads in the three chipboard ornaments, tie twine bows, adhere the ornaments, and tuck twine ends up over the top edge of the punched strip.
Pocket page: This page is meant to hold receipts or other important bits of paper. Cut a 6.25" x 5.5" piece of the red holly swirl paper. Fold 1/2" in on the left side and 1/2" in on the bottom. Cut on the diagonal and add the swirl border sticker. Adhere to the bottom of the page. Add three sentiment stickers to the top of the page.
**Planner Pages Note** All the planner pages are downloaded from the Christmas and general sections on this site. You must print them to 5" x 7", which is easy to set on your printer screen before hitting the "print" button.
The order I used was:
- Calendar
- Master to-do list x2
- Gift list x2
- Christmas card worksheet and list
- Shopping list x2
- Notes
The Details and Memories
- For the Details divider: Cut the edges off a ticket sticker, fold it in half and adhere it to the center of the right edge. Add alphas stickers to spell out "details". Cut a 2.5" x 7.75" strip of the green patterned paper and adhere to the right side. Add a red border sticker. Layer the "making a list" tag, toys sticker, naughty or nice sticker, and the chipboard Santa. Punch a small circle from the plaid paper and add the circle sticker with pop dots or foam tape. Tie a twine bow.
**A Note About Photo Mats** Unless otherwise noted all of the photo mats on the following pages are cut to 3.75" x 5.25". This is a perfect size to just see a small mat around photos printed to 3.5" x 5".
The following pages have room for special photos and small journaling areas to detail what goes on in your family over the holidays. Things like decorations, what you craft or bake, and what your traditions are add to a comprehensive look into how you celebrate!
- For the decorations page: Page base is green holly paper. Adhere a red swirl photo mat to the bottom. Adhere the plaid tag to the top, add three sentiment stickers to the left, and spell out "decorations".
- For the crafts page: Page base is small green swirl. Adhere a teal photo mat to the bottom and tuck the red tag under it. Adhere the matted "do not open..." sticker to the right. Thread twine though three chipboard buttons, tie a bow, and add below the sticker. Add "crafts" in black alphas.
- For the Memories divider: Page base is teal diamonds. Cut the edges off a ticket sticker, fold it in half, and adhere it to the bottom of the right edge. Cut a 2.5" x 7.75" strip of red snow flake paper and adhere to the left. Cut a 7.75" punched strip of red honeycomb paper and add to right of the red strip. Adhere the ornament banner sticker to the top. Layer snow flake stickers, the sentiment banner sticker, and the chipboard snow flake.
- For the season's greetings page: Page base is red plaid paper. Add a solid dark green photo mat to the bottom. Layer the green flourish sticker and the "season's greetings" label sticker to the top.
- For the Christmas Eve page: Page base is striped paper. Print an extra "notes" page from the printables I linked earlier and cut it in half. Add a teal photo mat to the top and tuck the lined paper under it. Add the green border sticker to the bottom and the "24 eve" sticker to the side. This is your area to journal about Christmas Eve.
- For the inside back cover: Cut a 5.5' x slightly less then 8" piece of red snow flake paper and adhere to the right. Mat a 4.25" x 6.25" piece of cream grid paper on to small green swirl paper. Add six sentiment stickers.
WHEW! And we're done! Punch binding holes with your binder of choice or a Cropadile and secure your pages. I added a large green and white bow to the top of my binding, as well as some strung beads and crystals on a ribbon.
Enjoy planning, celebrating, and remembering your holiday!
I used the following products:
1 comment:
Great job on this Christmas planner tutorial, so we're showcasing it today at Christmas Planner.
Enjoy!
Cynthia Ewer, Editor
Organized Christmas
Post a Comment