

Posted by ChrissyTina (Christina):
Want an awesome Christmas gift that is unique, pretty, and super easy to make? I make these ornaments every year and give several away as gifts. I have a stash of mica pigment powders and I can never figure out what to do with them or how to use them.

Here's a simple techique that takes minimal time and experience.
Here's a list of what you'll need:

-Glass ornaments
-Mica Powders (like Perfect Pearls or PearlEx)
-Acrylic Medium (I used LuminArte's acrylic medium #2)
-Shot glass or other small cup for draining
-mini scoop or spoon (I cut notches out a straw and it works beautifully)
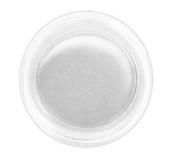
Now onto the fun! These really are super simple to do. Your first step is to remove the metal top and apply the acrylic medium to the INSIDE of the ornament. Make sure you swirl around and that the medium covers the ENTIRE inside of the ornament. Once you've done that, set it so that the opening faces down into your cup and let the excess medium drain out. It is important that you do this step otherwise the mica powders will just puddle and clump in the bottom of your ornament.

You can tell when it is done draining when drips are about 30 seconds apart. I usually let mine sit for 5 minutes or so. While one is draining, you can coat the inside of your second and third ornaments and pick out the color powders you want to use. I usually use 2 but you can use as many as 4. Experiment with color combinations and families and find what you prefer.
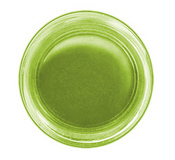
Once your ornament has finished draining, it's time to add the powders. Take your mini spoon and scoop up a small amount of powder. Always start small and build your color. You can always add, but you can never take away. Insert the spoon into the ornament and sprinkle the powder as your turn the ornament. This will help to get color all the way around the ornament. When you are satisfied with the amount of the first color, add your second color.

Now here's where the magic happens. Swirl your ornament around briskly and make sure your powder moves around. If you see "blank areas", feel free to add more powder until you get the desired look you want. After you are done swirling and adding, set your ornament back onto the cup and let it dry. It usually takes a few hours to dry and the powder is fully set in 72 hours.
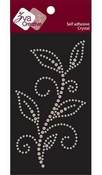
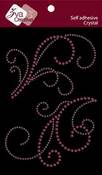
Finally, embellish and decorate your ornament as you prefer. I chose to use ZVA Flourishes, Prima floral stem, and ribbon from my stash.


Products Used:


Here's a simple techique that takes minimal time and experience.
Here's a list of what you'll need:
-Glass ornaments
-Mica Powders (like Perfect Pearls or PearlEx)
-Acrylic Medium (I used LuminArte's acrylic medium #2)
-Shot glass or other small cup for draining
-mini scoop or spoon (I cut notches out a straw and it works beautifully)
Now onto the fun! These really are super simple to do. Your first step is to remove the metal top and apply the acrylic medium to the INSIDE of the ornament. Make sure you swirl around and that the medium covers the ENTIRE inside of the ornament. Once you've done that, set it so that the opening faces down into your cup and let the excess medium drain out. It is important that you do this step otherwise the mica powders will just puddle and clump in the bottom of your ornament.
You can tell when it is done draining when drips are about 30 seconds apart. I usually let mine sit for 5 minutes or so. While one is draining, you can coat the inside of your second and third ornaments and pick out the color powders you want to use. I usually use 2 but you can use as many as 4. Experiment with color combinations and families and find what you prefer.
Once your ornament has finished draining, it's time to add the powders. Take your mini spoon and scoop up a small amount of powder. Always start small and build your color. You can always add, but you can never take away. Insert the spoon into the ornament and sprinkle the powder as your turn the ornament. This will help to get color all the way around the ornament. When you are satisfied with the amount of the first color, add your second color.
Now here's where the magic happens. Swirl your ornament around briskly and make sure your powder moves around. If you see "blank areas", feel free to add more powder until you get the desired look you want. After you are done swirling and adding, set your ornament back onto the cup and let it dry. It usually takes a few hours to dry and the powder is fully set in 72 hours.
Finally, embellish and decorate your ornament as you prefer. I chose to use ZVA Flourishes, Prima floral stem, and ribbon from my stash.
Products Used:
2 comments:
soooooooooooooo lovely!!
thanks so much for the tutorial!!
i've seen these types of ornaments in higher end stores..and they are very costly!
Thanks Ann!
We hope you're able to use some of the ideas!
Post a Comment