Showing posts with label pink paislee. Show all posts

Thursday, August 2, 2012

Welcome Becky - August Guest Designer At ACherryOnTop.com


august 2012 a cherry on top guest designer Screenname: blitz
Name:  Becky
 
A Bit About Becky:  My partner Trevor and I live with our two kiddos; Olivia 9 and Sullivan 1 in Cranbrook BC in the heart of the B-E-A-U-tiful Canadian Rocky Mountains. I am an Elementary School teacher but I am taking some time off to stay home with our son, and while I’m at it I look after two other little boys the same age.  Papercrafting is my passion and I am so excited to be able to share it with you. I am thrilled to be the guest designer this month at A Cherry on Top!! Please stop by and visit my blog at www.scrapcircus.blogspot.com.
 
Q & A Section:
 
Favorite color: turquoise
 
I mostly create: 12x12 layouts (usually single page)
 
My guilty pleasure is:  sour chewy candies


Visit our Contests & Challenges forum for inspirational fun throughout the month of August!


'Hello' card featuring the 9 to 5 Collection by October Afternoon:


hello card october afternoon 9 to 5


Products Used:


  october after 9 to 5  9 to 5 october afternonon

Click HERE to learn more about Becky and to see all of her great projects!


guest designer call
Click here to find out how to submit

Tuesday, May 1, 2012

NSD Special Events!


nsd 2012
May 5th - 10am - 6pm EST


Our National Scrapbook Day (NSD) Celebration is only a few days away!  Like we mentioned in our last post, there will be inspiring challenges, fast scraps, giveaways and terrific mini classes throughout the day.  


We're also going to be getting to know more about a couple of our fave manufacturers during live chats! Pink Paislee and Authentique Paper will be in The Cherry Loft sharing stories and project ideas!


Pink Paislee products never disappoint and always offer fresh, fun designs.


Meet Pink Paislee's Rebecca Cross at Noon EST on Saturday, May 5th in the ACOT Cherry Loft for a live chat, project ideas & giveaways!


Authentique has quickly become known for timeless patterns and high quality products.  We're excited to have them as our guest as we celebrate NSD!

Other NSD Events include Mini Classes, Challenges, Fast Scraps, $5000 in Giveaways and so much more!

Join us beginning at 10am on Saturday, May 5th - You wont want to miss it!

For more ACherryOnTop.com NSD Event info - Click HERE

Friday, April 6, 2012

Congratulations To This Week's Pink Paislee Facebook Winner!

Congratulations

Debbie O.
of
Eagle Mountain, UT


You've just won lots of Pink Paislee goodies!  Check your inbox for a special email from ACherryOnTop.com -

Thanks for liking our facebook fan page!

Don't miss your chance to win! 'Like' us on facebook today!

  Join us on Facebook

See below for list of previous winners


Winner List:

Week 1:  Doris S. of Voorheesville, NY

Week 2:  Tammy T. of Columbia, NJ

Week 3:  Leslie M. of Indianapolis, IN

Week 4:  Sarah C. of Mountain Home, ID

Week 5:  Melissa M. of Newburgh, NY

Week 6:  Lesley G. of Ypsilanti, MI

Week 7:  Lisa M. of Buford, GA

Week 8:  Leah E. of Arkansas City, KS

Week 9:  Lisa L. of Unionville, CT

Week 10: Dina S. of Gilroy, CA

Week 11: Sue B. of Ft. Wayne, IN

Tuesday, March 27, 2012

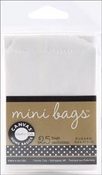
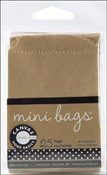
How To Make A Mini Album Using Canvas Corp Mini Bags

Ashley Cannon Newell shows us how to create this Mini Album using Mini Bags from Canvas Corp:

mini bag album

Watch the step-by-step video tutorial:


Other views of finished album:

Products Used:
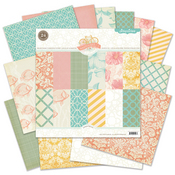
mini bags canvas corpmini bags canvas corpnantucket pink paislee

Wednesday, January 11, 2012

Meet Our January 2012 Guest Paper Creative Team Member!

scrapy1967  Posted by carrie123

As promised...although a little late...I want to introduce our Guest CT for the month of January! Please give it up for Janet..AKA...scrapy1967:

I am married to a wonderful man and we have a very spoiled boxer named Zoe! My husband is very supportive of my hobby! I have been scrapping since I was in high school that is when I made my version of a smash book.

I started scrapping for real in 2002 after I bought my first house and then I stopped for a few years and started back up after I was married in 07.

I don't think I have a particular scrapping style. I try to make all my pages look different.  My favorite scrapbooking companies are Pink Paislee and October Afternoon! I also love making cards and many other crafts.

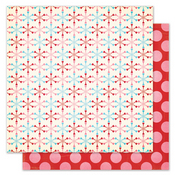
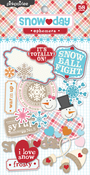
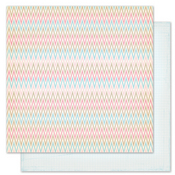
I knew when I saw this collection it was the one for me! For my first layout I started with the back side of Warm Mittens then I cut a piece of Cozy Sweater and layered it with the front side of Warm Mittens and the back side of the Hot Cocoa paper. I used several pieces of the Ephemera pack and the Bundle Up was from the dimensional sticker pack.


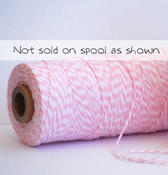
For my second page I started with snowball fight and I used a piece of Bazzill Bling. I took Blossom Pink Bakers Twine to make my banners then I used the Snow Day Ephemera pack and one of the stacked stickers to hang on my banners.


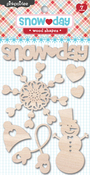
For my 3rd layout I used Hot Cocoa for the start of my page then I used a piece of Snowball Fight. My title came from the Pink Paislee Wood Shapes and I used October Afternoon Strawberry Creme sprinkler to color it. I used lots of the Ephemera pack on this page. I used bakers twine in Blossom light pink for my stitching.


Be sure to visit the Message Board for Janet's January Challenges!


Products used:
warm mittens pink paisleesnowball fight by pink paisleesnow day epemerawarm mittens pink paisleecozy sweaterblossom pink bakers twinewood shapes snow day snow day dimensional stickers

Saturday, October 22, 2011

How To Make A Shadow Box


Posted by ScrapGoo

This tutorial will show you how I created this shadow box frame from the Pink Paislee Mistables frame and the Farmhouse collection from Crate Paper.


You will need:
- The Pink Paislee Wood Shadow Box frame
- Pink Paislee Mistables scallop trim
- A piece of each "Sunday Dinner" and "Cupboard" papers from the Crate Paper Farmhouse collection
- Farmhouse chipboard stickers
- Farmhouse border stickers
- Farmhouse phrase stickers
- A coordinating mist or paint (I used Heirloom Blue Mister Huey from Studio Calico)
- White acrylic paint
- Foam tape or pop dots
- buttons and twine

To begin you need to mist or paint your frame.  I misted mine but I wanted the inside to stay light so I used a piece of scrap paper as a mask along the inner edge. After you've misted a side use a paper towel to blot up the excess and rub the color in.


I wanted my frame to have some added depth so I watered down some white acrylic paint and brushed it along the edges.  Again I used a paper towel to soften the look after painting it on.

Cut a piece of the orange paper slightly smaller than 7" x 9".  Stich a white border.  Adhere it to the bottom of the frame.


Cut a 1.5" strip of the green leaf paper.  Stitch a white border.  Adhere it to the right edge.  Then add a strip of the teal border sticker and then a strip of the red border sticker.


Cut two strip of wide scallop Mistables trim and layer them so they are offset to show off the scallops like so:


Cut a 4.75" x 5.5" piece of the teal dot paper and adhere as shown:


Print and cut a photo to 3.75" x 4.5".  Add the chipboard frame on top and add three photo corners as shown:


Use 2-3 layers of foam tape or pop dots to elevate the photo frame on top of the teal photo mat. You want the photo to be raised enough to give the frame nice layered depth and for there to be enough space to tuck embellishments under.

Next we are going to add those embellishments.  To the right side add: the rectangular scalloped sticker, the "thankful" sticker, the clock chipboard, and the "3" chipboard.  If you do not have three people in your photo you can choose a different piece of the chipboard or you can cover the number with a button.  Use foam tape to raise the edges of elements where needed to support the added depth and layering.  Finally, add the teal chipboard flower on top of the photo frame.


To the top add: another flower, the "delightful" sticker, and a small round piece of chipboard.


Form a flower with the small scallop Mistables trim and an adhesive circle.  I used a Gluber but you can use whatever adhesive you have as long as it is strong.  Start at the outside edge and ruffle the trim around towards the center until you have filled the circle.


Add two chipboard buttons tied with twine.

Adhere this flower to the lower left corner of the frame with the large red chipboard flower layered under it.  Add the "Sweet" chipboard title to the right of the trim flower.


Cut a 6" x 1.25" strip of the green leaf paper and accordion fold it.  Use a very strong adhesive such as Zip Dry to create a half circle tucked behind the trim flower.  You will need to hold the edges down until they are dry to make sure they remain stuck! Add a small piece of chipboard in front of the half circle.


Tie two small bows to the ends of the chipboard banner.  Add a small coordinating button to each scallop on the banner.  Adhere the banner to the upper right corner of the frame.


And that's it!  This project has tons of fun details but really takes very little time to complete.  I hope you've enjoyed it!

I used the following products on this project: