Wednesday, April 27, 2011

Scrapbooking With Daily Junque By Pink Paislee

Posted by SarahA (Sarah):

The Daily Junque line from Pink Paislee was my absolute favorite release at CHA this winter. I loved the fact that it had lots of different colors, patterns and wasn't "themey" at all. The embellishments that go along with this line are fun and unique, too. 

This line is perfect for any photo at all! As it's name says, it's perfect for scrapping the day-to-day moments of your life, it would be great for spring or summer photos, babies, kids, ladies, men, friends - you get the idea! 

The collection pack has 4 (yes, FOUR!) sheets of each paper, so if you're a hoarder like me when you find a favorite paper (check out the pink ledger paper, girls!), this is right up your alley!

Love Note
I had been saving this photo just for this line to hit the shoppe here! The Tickets paper was pretty much already embellished for me, so I started with that and added a few pieces cut from several other sheets of paper and pieces from the Mini Notes & Labels pack. The metal flag was a fun addition to this layout. 

I painted over the entire flag with acrylic paint, then wiped it off with a paper towel. The pink paint that was left in the debossed design really makes the flag stand out and is a great way to make your own unique embellishment. I also made a pocket out of kraft cardstock behind the photo to put the actual note in when I take it off my frame some day.


The Day I Turned 32
I wanted to document the fun things I did on my birthday this year, and this line made it simple! I have a love for pink and ledger papers, so I knew the B side of the Map paper had to be used! All of the little embellies were cut from the News and Tickets papers. 

The numbers were cut from the Tabs paper.  Since this was my birthday layout after all, I made sure to add little bits of things I love- buttons, those little Sass alphas, the Maya Road calendar card and lots of pink stitching, too!


23 Weeks
Once I saw the number cards, I knew exactly what I wanted to use them for. Then I saw a layout with a big banner by Piradee Talvanna, so I put my own spin on it with this layout.  I cut the large banners, then stitched them on the grey polka dot side of the News paper. 

I layered a string of embellies on top using the twine, pieces cut from the tabs and Junque papers and the No. 23 card from the Mini Notes and Labels pack. I added my picture, a few mist splatters and my journaling and this layout was done pretty quickly! I like that while the banner is a cute design, it still allows the journaling to be the center of attention on this layout.


Birthday Card
I knew I had to use the printed tissue paper in this line to make something fun. I had recently made large tissue paper flowers to hang in my daughter's room, so I decided to make one on a much smaller scale for a birthday card. I used half a sheet of the tissue, cut the paper on the folds and stacked them on top of each other, folded it accordian style, then rounded each of the short edges. 

I tied it with twine in the middle, then pulled out each layer and came out with this big beauty! I really liked the colored twine that came with this line and used a lot of it on the card, too! A button, some stitching and a little Happy Birthday paper crafting banner I quickly made with my word processor put the finishing touches on my Grandma's 70th birthday card!
 
    http://www.acherryontop.com/gallery_viewer/,37374045,cid,,2,,144803
 
Products used in this reveal:
              

Tuesday, April 26, 2011

Scraplifting Great Ideas From Our Gallery!

Posted by Keling (Sara):

They say, "Immitation is the highest form of flattery."

I know I can say for myself, as well as for the rest of the Creative Team, we are all thankful for our position on the team. We know there is so much talent and inspiration around, especially on our very own boards. So we thought it would so much fun to pick out some awesome layouts from the gallery that we could scraplift.

You'll see that some picked paper layouts and even layouts in different orientations, as well. Sometimes you might find that you want to copy it almost exactly, while other times its just small bits that stick out to you. But no matter what, you can always find inspiration in the gallery!

Brittney (milmomma), Jenn (SarahWhithers) and Sara (Keling) each selected three different layouts to lift, while Cassandra (mommybruno) and Laura (Art_Teacher) also decided to join in the fun.

Laura (Art_Teacher) lifted this adorable page by scrapperatheart. She shared: "For this reveal we were to scraplift someone from the GP. I chose this gorgeous layout by scrapperatheart: Recipe for Success. I think it is amazing and I hope I did it even half as well as she did!"


 I've Been Good, by Art_Teacher


Recipe For Success, by scrapperatheart  

Sara's layout is a lift of fong33's layout, "Family." She said: "The photo in this page is what totally captures you, in Fong33's page. In my page, the photo may not be so hot - it was actually taken by my 8 year old - but it is a great glimpse of my funny furbaby, Abby, who loves to cuddle under the covers!"


 Kitty Kuddles, by Keling    


Family, by Fong33                                                                

Jenn (sarahwhithers) also did three different scraplifts. Her first is a lift of a layout by GRACEpunches5. Jenn shared: "For the digi CT reveal this week we're scraplifting you talented ladies out there! Where else can we get such awesome inspiration other than the ACOT gallery?! For my first page I've scraplifted GRACEpunches5 and her page called Childhood Memories (which you can also see above). I loved her use of whitespace and 3 small pics, so I did it too!"


You Make Me Smile, by sarahwhithers


Childhood Memories, by GRACEpunches 5

You can view more 'Kopy-Kat Kreative' ideas by checking out the entire article on our Resources Page.

Great job, team!

Monday, April 25, 2011

You're Invited To Our Online NSD Crop!


Join us for fun, games, challenges, classes and prizes, all weekend long!
May 6 • May 7 • May 8

The weekend will be full of challenges, fast scraps, BINGO, classes and games. There will be plenty of action, both for the paper ladies and for the digital crowd. 
Make sure you clear your calendar and check back here as we update this article with information as it becomes available. We will add classes, challenge and fast scrap times, as well as links to BINGO games. Can't wait to see you there!

Crop Schedule 
coming soon


Online Crop FAQ

What is an Online Crop? An online crop is a huge event hosted by our Creative Team members incorporating scrapbooking, classes, games, challenges, classes, PRIZES, chatting with other members and all around FUN!  For more information read this article.
 
When is ACOT's Online Crop?
Our crop begins Friday, February 25th and ends at Sunday, February 27, 2010. Specific times to be announced soon. 
 
Where is ACOT's Online Crop?
It's right here in a special Crop Forum on our Message Board created just for this event. All activities, schedules, classes and events will be taking place in this Forum. Sign Up.
 
How do I sign up for ACOT's Crop?
That's easy! Simply post to this Message Board thread stating that you'll be participating in our crop.


How can I participate in ACOT's Online Crop?
Simply show up in our February Crop Forum (coming soon) during our crop and join the many other croppers at one of our events. You may come and go throughout the weekend, participating in one or more crop events of our choosing. We suggest you review our crop schedule before our crop starts so that you won't miss a thing! Our schedule of events will be posted prior to the crop in our Crop Forum.


What types of events will be going on at the ACOT Online Crop?
Challenges. Bingo. Contest. Sales. Classes. Chats. Games. Prizes. Special Give-Aways. Fun. 


What should I do to get ready for the Crop?
Read what these tried and true ACOT croppers have to say about our online crops, they have some real life experiences.

What if I sign up but can't actually make it to the Crop?
That's ok. We understand. Be sure to check in after the Crop to browse the Gallery; hundreds of new layouts will be posted there. Also, be sure to check out our Resources section to view all the new Class Instruction articles.

Why should I join ACOT's Online Crop?
Because you will have so much fun, meet other croppers, perhaps win a few prizes, get motivated and inspired to get some scrapping done!! Just ask the hundreds of croppers who have attended our Online crops in the past.

How can I be notified of updates to the Online Crop as well as other interesting happenings and events at ACOT?
Susbcribe to our FREE weekly Newsletter for weekly information in your email box from ACOT.

Thursday, April 21, 2011

Scrapbooking With Hometown Summer By Pink Paislee

Posted by Kimandasmo (Cindy):

Do you ever wonder what happens when two great things collide? You get unbelievable and awesome! That is what has happened here. Pink Paislee and Collage Press have joined forces..and the result is an amazing line called Hometown Summer.  

This line just shines with happiness and warmth. I was immediately drawn to the colors and the designs in these papers. The embellishments are not too shabby either!

My first layout with this line is about how lucky I am to live where I do. I am blessed to be just miles from both the ocean and the gulf and to have many days of beautiful sunshine. This photo was taken a few weeks ago on a recent trip to Flagler Beach on the East Coast of Florida. 

I layered Summer Fun on top of Heat Wave with pop dots to give it some dimension. I placed my photo on top the summertime die-cut bingo card. The word Paradise in my title is done with the Alpha stickers  that I then covered with Tattered Angels Sugar Cane Glimmer Glaze. The summer days banner I cut into 2 pieces to fit the top of my page. The star that was on either end of the banner I placed under the edge pf the photo as well, to not waste any little bit of this line.


My 2nd layout is based on a (sort of) local event held in my area.  For an embellishment on this layout I used the word Summer from the edge strip of the papers that most people throw away. I also loved the little watermelon buttons chip art and the watermelon banner...even though my daughter was eating her first strawberry shoprtcake in this pic.


This next layout was a play off the numbers paper... on our block we often meet in the street on spring and summer evenings for chit chat and games. On this particular night we were playing Hopscotch and even the adults got in on the fun.


This next layout showcases some sights from one of our favorite little towns to go play tourist... the Sponge Docks of Tarpon Springs. If you ever come to Florida you have to get to this little Greek town. It is amazing..so much fun to walk the little shoppes and experience all of the great restaurants. I choose to turn the borders end to end to "frame" my photos.
 

We have a new family that has moved onto our street. Since we have such a great relationship with everyone on our street I decided to make them a card to welcome them. We are hoping that they enjoy being a part of our street as much as we do.


Thank you to A Cherry On Top for allowing me to play with this awesome line.

Sampling Of Products Featured In This Review:
             

Wednesday, April 20, 2011

Scrapbooking With Hello Luscious By Basic Grey -

Posted by bluejeans7 (Angela):

Hello Luscious!  That is the name of one of the new Basic Grey lines and I have to say that the name fits the line!  LOL!  I love it when I get lucky enough to work with a new Basic Grey line for my CT reveal.  I do admit that once I got my BG goodies in the mail, they sat on my desk for over a week untouched. 

I was just in a hole and feeling uninspired.  I knew my deadline was coming up so I sat down, looked through my Hello Luscious goodies and picked out my photos to scrap.  Once I started I couldn't stop.  I finished all five of my layouts in two days, that is awesome for a slow scrapper like me!  This line is really beautiful and I love the colors and patterns.  Working with it helped me get my mojo back and I'm ready to scrap some more!

I Love You:  My beautiful children are my favorite subjects to scrapbook, so I started out my reveal with a photo of the two of them together.  I used a mix of five different pattern papers (Scrumptious, Blissful, Sparkling, Succulent & Honeyed) and layered them on a piece of Pinecone Bazzill cardstock.  I used the Hello Luscious Woolies stickers for my only embellishments on this layout.  Lastly all I had to add was my title and date.


This Girl:  My daughter means the world to me even if she thinks I'm mean at times.  LOL!  I started with the Raspberry Syrup paper and cut out my shape, then glued it to a piece of Blossom Bazzill cardstock.  Then I doodled around the border and added some Hello Luscious Glazed brads.  Next I cut pieces from the Dazzling and Scrumptious papers and arranged them with my two photos.  Then I added my title, some Prima flowers and my journaling..... which is spelled out with lots of different mini letter stickers from My Little Shoebox.


Finally!:  This layout is all about the journaling (the story behind Erik losing his first baby teeth), the photos, and lots of pattern papers!  I used the Inviting paper for my background and then layers of the Thrive, Yumberry and Zesty papers.  I then cut a 5" circle from the Honeyed for my journaling.  Added my title, date and some of the tiniest Hello Luscious Buttons on the scallop border.


Blessed:  Here's another layout with my two babies!  LOL!  I think the Hello Luscious line goes great with color photos but also with black & white photos, so this layout I scrapped some black & white photos.  I started with the Wine Bazzill cardstock.  Then I used pieces from the Honeyed, Zesty and Simply Grand papers.  Next I cut a scalloped border from Raddish paper and added some Hello Luscious Buttons.  To embellish I used the Hello Luscious Bloomers stickers.


Easter 2010:  I don't know why but I have the hardest time with scrapbooking Easter.  I have the last four or five years of Easter photos that still need to be scrapped.  So I pulled out some of last year's Easter for my last layout.  I used the Lemonade Bazzill cardstock for a softer colored background.  Then I cut a 11"x11" piece of the Jalapeno Jelly paper, I used the backside.  Next I cut two strips from the Yumberry paper.  Then I made two scalloped borders with the Sparkling and Blissful papers.  To finish this layout I cut a piece from the Simply Grand paper for my title and then added some Stitched Brads and Bloomers.


Sample Of Products Used In This Review:


Tuesday, April 19, 2011

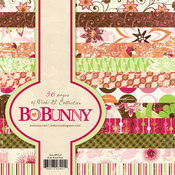
Scrapbooking With Bo Bunny's Vicki B Collection -

Posted by carrie123 (Carrie):

Just in case you didn't know, I have this certain love affair with Bo Bunny. I think I have just about every line they make, so when I saw the Vicki B line there was no doubt that it would become part of my scrappy inventory! 

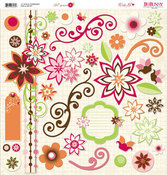
This line is so full of rich and vibrant colors along with bold and subtle prints making any kind of topic easy to scrap. Besides the papers being fun to work with, the embellishments are so much fun and add that special detail to your page.

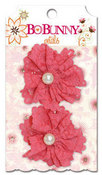
For this first page you can see just what I mean about the embellishments.  I used the very subtle but rich in color Bazzillion paper and added  Vicki B Petals...just enough umph to highlight my page.


What little girl doesn' t love ice-cream...and sharing it with daddy makes it even better. The colors on the Vicki B Die Cut Paper  totally reminded me of neopolitan ice-cream. This paper pretty much can speak for itself, but with a few added "extras" it speaks even louder.


Who says you have to use pink and make it a girly page? Not me! This layout shows the versitility of using pink and flowers for boys and girls. I used the Perky Paper along with the 6x6 pad  (which I might add is great when you don't want to cut up that wonderful 12x12 paper) and some fun chipboard stickers.


The back side of the Bubbly paper was just so perfect, bold and bright to showcase yes, some more of my garden. (I told you I love to take pictures of flowers). Just a few added touches and my page was complete.


This mini album I created with a single sheet of cardstock and lots of left over goodies from the wonderful Vicki B line.


Also with some left over scraps that I could not let go to waste I was able to create this fun altered frame...


Products used in these layouts: