Wednesday, January 11, 2012

Meet Our January 2012 Guest Paper Creative Team Member!

scrapy1967  Posted by carrie123

As promised...although a little late...I want to introduce our Guest CT for the month of January! Please give it up for Janet..AKA...scrapy1967:

I am married to a wonderful man and we have a very spoiled boxer named Zoe! My husband is very supportive of my hobby! I have been scrapping since I was in high school that is when I made my version of a smash book.

I started scrapping for real in 2002 after I bought my first house and then I stopped for a few years and started back up after I was married in 07.

I don't think I have a particular scrapping style. I try to make all my pages look different.  My favorite scrapbooking companies are Pink Paislee and October Afternoon! I also love making cards and many other crafts.

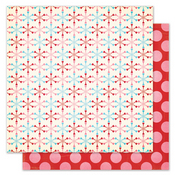
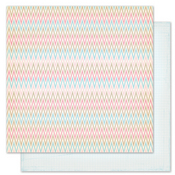
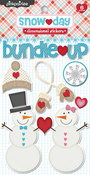
I knew when I saw this collection it was the one for me! For my first layout I started with the back side of Warm Mittens then I cut a piece of Cozy Sweater and layered it with the front side of Warm Mittens and the back side of the Hot Cocoa paper. I used several pieces of the Ephemera pack and the Bundle Up was from the dimensional sticker pack.


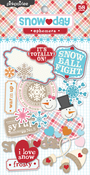
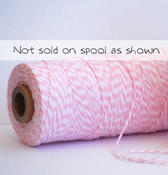
For my second page I started with snowball fight and I used a piece of Bazzill Bling. I took Blossom Pink Bakers Twine to make my banners then I used the Snow Day Ephemera pack and one of the stacked stickers to hang on my banners.


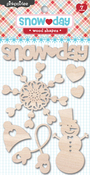
For my 3rd layout I used Hot Cocoa for the start of my page then I used a piece of Snowball Fight. My title came from the Pink Paislee Wood Shapes and I used October Afternoon Strawberry Creme sprinkler to color it. I used lots of the Ephemera pack on this page. I used bakers twine in Blossom light pink for my stitching.


Be sure to visit the Message Board for Janet's January Challenges!


Products used:
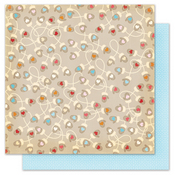
warm mittens pink paisleesnowball fight by pink paisleesnow day epemerawarm mittens pink paisleecozy sweaterblossom pink bakers twinewood shapes snow day snow day dimensional stickers

Tuesday, January 10, 2012

New In Digital Scrapbooking -

Posted by sarahwhithers


What's new and exciting in the digital world? Well all you need to do is take a peek at what's in the A Cherry On Top Digi Shoppe! There are tons of new kits and we decided to showcase a few of them for you! So check out what we've created in hopes you'll be inspired!
_____________________________________________________

Kr
isti (MamaK321) worked with the new gorgeous kit Christmas Punch by Sweet Digi Scraps.


You can also check out what she did with the Holiday Bake Shop kit by Bella Gypsy on her page HERE!

Jen (sarahwhithers) used the new kit Electric Angst by Bella Gypsy.


Jen says, "My fav colour combo is blue and orange, so I had to use this kit! The colours are bright and the elements are fun, giving this kits name, Electric Angst, to work perfectly!"

You can also see what Jen did with the kit Happy New Year by Hot Flash Designs HERE.


And Egle (FairyMouseMom) used the new kit Sweater Weather by Hot Flash Designs.


You can also check out her page using the kit Live Love Grow by Bella Gypsy HERE!

So check out these kits and more in the shoppe!
___________________________________________


Kits featured in this article:


Friday, January 6, 2012

January 2012 Paper Crafting & Scrapbooking Challenges

Can you believe we're already almost a week into the New Year!  We hope Be sure to check out this month's Creative Challenges featuring traditional paper crafting, digi and hybrid projects!
  
Remember:

- only one LO per challenge will enter you into the points drawing
LOs cannot be entered into more than one challenge category
- *please* only enter LOs that meet the specific challenge instructions


Friday, December 30, 2011

New In Digital Scrapbooking -

Posted by nun69

 
The Digi CT is bringing you some awesome inspirtaion to close out 2011 with style and ring in 2012 with a BANG!


For this double-pager Laura made a layout for her sister-in-law, she wanted a winter/Christmas kit with pink in it, because of her sweatshirt.She thought Theresa Hernandez's kit "Frolic and Play" went so well. 


Even though the pinks aren't exactly the same, she says it is a beautiful kit, full of so many fun, whimsical elements! Laura also used SAS Designs' P365 Templates and one of Bella Gypsys awesome Sketchology Templates:


Check out Laura's {Art_Teacher} gallery for more fabulous LO's


Angie also did a double pager featuring Bella Gypsy Designs: Country Christmas kit that was just right for her Dec Daily Pages 2011. Check out all the other Christmas kits that are in the digital shoppe for more inspiration!


Check out Angie's {nun69} gallery for more Christmas inspiration


Ronny was so excited to see this new Hanukkah kit by Amy Teets in the shop. Hanukkah is half of her family's  winter celebrations each year and she is usually left to scrap those photos with a snow kit or any kit that is mostly blue. Ronny says "It was a nice treat to get to scrap this special photo using the perfect papers and elements for the occasion":


Ronny also did her Christmas card this year with kits from Bella Bypsy Designs. Ronny says "Seeing as we send cards to family and friends that celebrate a range of holidays I chose to focus on spending time with family, regardless of what is being celebrated. Here is our fun, festive card featuring Holly Jolly by Bella Gypsy Designs":


Check out Ronny's {Smiley-Scrap8} gallery for more fun and inspiring projects/layouts

Wednesday, December 28, 2011

K & Company Smash Book Ideas


Posted by megamay (Megan):
Have you seen the new Smash Book product? 


People have been talking about it, and it sold out with lightening speed when it first came out. If you are like me, though, you looked at it and thought - "cute, cool, but what would I really DO with it?"

The video was cool - showing how you could use it for an idea book - tearing things from magazines and gluing them in on the fly. That's pretty cool, and I LOVE the idea, but I know myself. That's not something I would do. 


Sure, I run into neat ideas, but I wouldn't carry a big book like that around with me just to collect ideas. I have a busy life, and I have enough stuff to carry already. If I am going to tote something around with me all the time, it needs to either be REALLY small, or have a major purpose in my life. 


Plus, I don't tend to be the messy artsy type of person. I like lists and grids and orderly things. When I look at a blank page where I am supposed to put my ideas, I get intimidated.


I heard about some people using these books as mini scrapbooks - taking them on vacation. That's an awesome idea and that's one that I would use, but I didn't have any vacations planned where I would want something like that. 


I do however have this almost obsession with all types of journaling books. I make lists ON PAPER. I keep buying books to keep my lists in, but they never seem to work out. Most recently, I bought the tiniest notebook I could find, so I could carry it around and write down my scrapbook ideas. But I lost it because it was so tiny - lol! AND it was hard to write in. 


So, I kept looking at and coveting the Smash books stuff - not only for the book, but for the awesome adorable extras. Finally I noticed the calendar inserts. Now THAT is something I could use! I keep a calendar online but, call me old school, I still like to have a visual in front of me, with the basics on it. 
I also keep making lists, and I love crossing stuff off, but I kept having to re-write most of it from day to day, week to week, because I was using post-it notes. Soooooo, I came up with the idea to use a smash book as a planner/list keeper/idea book. ONE thing that I can keep all my stuff in! 

Here's how I did it:

I used the fabulous Fabric Smash tabs, to separate sections of my book. When I saw these, I just knew they were perfect for me. Fabric is so much more durable than paper. And tabs stick out! I knew this book was going to go through a LOT with me. 


Here are the tabs that I created. Calendars: I left 2 facing pages per month. You only get 4 calendar pockets in the pack, but I expect this book to last me at least longer than that. So I left enough pages for 12 months. Then put the next tab on - the 'Scrap lists' tab. 


I keep lists of ideas for tutorials, challenges, altered items, things I want, things I need - etc. But those lists don't change a whole lot, so I only left about 4 pages for that. Next is non-scrap lists - i.e. projects around the house that I want to do. 


These are not to-do lists! That will go with the calendar pages. So I only left a couple of pages for that too. My next tab is blog and recipe ideas. Kind of a weird combo, but I don't do a lot of cooking even though sometimes I collect recipe ideas. So I combined those things and only left a few pages. 


The final tab - inspiration/quotes - is the biggest section. This is where I will do things like the smash book video showed - pasting ideas, drawing things, etc. There is plenty of room there for another tab or two also. I just didn't know what else I would need yet. 


Always time to evolve!  


One thing I thought of that I might add is a workout/diet tracking section. It IS new years - with resolutions and all!


Calendar section

This is what my calendar section looked like when I first created it. I had these lists on a piece of paper, so I just copied them over. I was worried  that there might not be enough room on these two pages for all my to-do lists for a whole month, so I planned to use papers tucked into the calendar pocket, and postit notes to expand the space. 


FYI- I found that the glue in the pen wasn't as strong as I wanted for my calendars, so I added some of my ATG glue, and some of the blue tape on the corners. I don't know if that was necessary, but I didn't want to take any chances.


This is what my calendar page looks like now at the end of the month:
You see that I didn't quite run out of space! I have some papers in the pocket with 'daily' to-dos. (Sometimes while Im at work I make lists of little chores that I want to get done that day - 'laundry' didn't make it to the more permanent smash book page because COME ON - there is ALWAYS laundry to do! right?! I could take up a whole page with just writing laundry and crossing it off!


FYI - that pen is FABULOUS! it is just thick enough - love it! and I .... lost it! The next time I place an order I am totally ordering a new one. I was so bummed when I lost that pen!


Scrap lists

Here is the start of the scrap lists page:


and here's what it looks like now


Non-scrap lists

Here is the non-scrap lists page. This one didn't change much this month because it was the holidays and I didn't have much time to think about stuff around the house. Also, I think I need to do something about this page, it's kinda hard to read the writing. I might put a layer of gesso or something on it. I don't know yet.


Blog/recipe ideas

Here is the start of the blog and recipe ideas page. Pretty lame huh?


It got a little more interesting though. One of the things I wanted to do on vacation was revamp my blog. I didn't get around to that because I didn't feel like sitting on the computer, but I DID make some plans for blog features that I can post each month. 


Inspiration and Quotes

Here is the 'after' inspiration and quotes page. I guess I didn't take a 'before' picture because there wasnt really anything to see. But now there is! One day at work I did a little drawing. I also wrote down a couple of card sentiment ideas. Then made a list of ideas for the new Paper Crafts card call for summer themed shaped cards. and there's a little magazine clipping too! 


And finally, here is the back pocket where I stuck all the little extras so that I would have them when I need them. (the only thing that didn't fit in there was the roll of tape.)


Here is my 'after' picture of the front of the book. not much interesting there. but it is darn cute right? I keep looking at the flower embossed design and thinking about coloring it in and glittering it up or something, but I can't bring myself to mar all that gorgeous kraft - ness.


So, I guess this reveal/tutorial is sort of a review and a pep talk. This book is great quality and oh so cute! The 'extras' are amazing and there is just so much that you can do with it! You probably aren't going to use it the same way I did, and if you do make a planner - you might have different sections or more pages in the recipe section. 


The point is that you can really make it into anything you want, and you don't have to be all 'artsy' and just paste magazine photos of inspirations in it. (not that that isn't a great idea!) 


The designs on the pages make it less intimidating to doodle. After all, there are already some designs on there, it isn't just a blank page looking you in the face. All the pocket and paper slip add-ons are perfect for adding stuff in after the fact, in case you don't leave enough pages for one section. I have totally done that before with similar projects. With this one I planned ahead to stick in papers and post-it notes, so it wasnt really any pressure deciding how many pages to use for stuff. 


I didn't even use the plain pocket add-ons yet. I figure that they will definitely find a home in my inspiration section, and maybe in the list areas if I need expansion, but right now, I didn't really need them - I have the calendar pockets and so much space!


I used a couple of the stickers for a similar purpose - to draw attention to something and to add space. I used one of them to cover up something that I didn't need anymore with a comment that I wanted to draw attention to. 

Products used in this reveal:


guest designer call

Click here to find out how to submit

Join us on FacebookSee us on YouTube Follow us on Twitter