Wednesday, August 31, 2011

Paper Crafting Simple Stories ' Happy Day Collection

Posted by carrie123


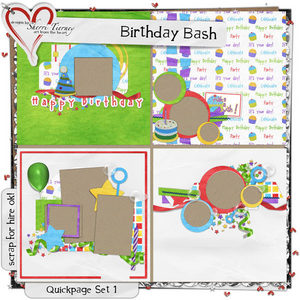
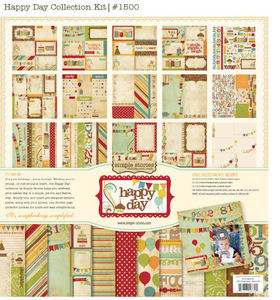
Birthdays...we all have them, we all celebrate them...but I very rarely do layouts of them. I usually don't like many of the birthday lines. They are either too theme orientated or they are too busy or most importantly in my case...to age restricting. My whole outlook on birthday pages changed when I was at CHA and I saw the Simple Stories "Happy Day" line. 


I don't have many birthday pictures but I did know that I HAD to have this line. This line was AMAZING! They were perfect in every way.  Perfect colors, perfect designs and the perfect amount of "birthday" without going overboard. Everything in this line just flowed together so effortlessly making them ideal for any of those birthday photos...even those hard to use and not so great shots.


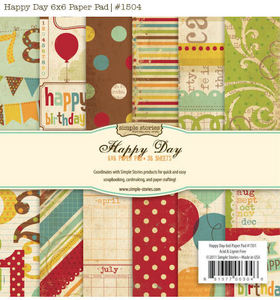
My first layout I had a couple of photos that were kinda dark and not that great. I cropped out all of the unwanted space on them and used several patterned papers from the Happy Day 6x6 pad. I inked the edges to help make them pop off the Celebrate background paper, matted a few things and added a few extra touches from the Happy Day Fundamental Cardstock Stickers and I had the perfect page!


For my second layout I didn't really do much different. The Happy Day line has so many fun elements that can be fussy cut or just used as is. I myself like to give my scissors a work out and do the fussy cutting!


My last layout I wanted to show versatile this line was. Not only can it be used for birthday layouts, it can also be used for those everyday photos. I use the back side of the Make a Wish paper, some more matting and fussy cutting using the Fundamental Cardstock Stickers and a 4x6 Jouranling Card Element


I stepped outside my comfort zone with this layout a little bit. I embellished the rest of this layout with some canvas, pleated ribbon and some wire mesh.


So for those of you who have those "hard" to scrap birthday photos or just those everyday ones...head on over to the shoppe and pick up some Happy Day by Simple Stories.
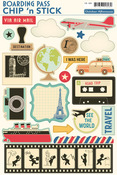
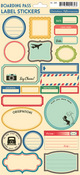
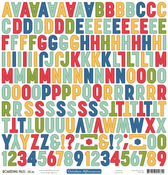
Products used:


Friday, August 26, 2011

Paper Crafting With October Afternoon's Boarding Pass


Posted by 4peasinourpod (Pam):

I have been traveling a lot lately, so when I saw Boarding Pass by October Afternoon, I was excited to use it for my reveal.  (If you look closely, however, you will see that only one of these layouts is about a recent trip.  Apparently you need to actually PRINT the pictures from those).  


The line is in true October Afternoon style.  There are a few travel related papers, and then they compliment the rest of the line with versatile and complimentary papers.  As always, the embellishments from October Afternoon are incredible. 


I bought almost everything that they carried, and used almost all of it in my layouts. (Well, except the things that said PARIS, as I have never been there.)


My first layout is of a trip that I took in January.  I met up with three AMAZING women and we stayed right on the shores of the Gulf of Mexico on Captiva Island.  Even though the trip was in January, we set up a Christmas tree in our cottage, and one morning exchanged gifts.  


Jules gave us all stockings with different "toppers" .  Mine had a reindeer, Janet got a sock monkey and Clare's had a COW.  (Which I think I should have gotten, because I am from Wisconsin, but apparently she loves Clare the best.)  The "Palm Beach Girl" from Florida was perfect for this layout. 


This next layout is from last year's family vacation to South Dakota.  I LOVED the car chipboard, except it reminded me of the 16 hours in the car each way.  Then I didn't like it so much.  (Actually, I still did love it!)  I also loved the little touristy guy with the mountains.  I loved ALL of those chipboard guys, as you will see.


This layout describes a trip to visit Jules and Gene a couple years ago.  When I looked at the variety of stickers, rubons, and other embellishments, I got the idea to do a fun and different kind of layout - telling a story through embellishments.  Here is the story:  I went to the airport. (airplane).  I got stopped in security, and got frisked because I was bringing a gift of spices to them for letting me stay at their home.  


Security thought I was a drug dealer, and searched me, my bag, and wiped all the spice containers with a special wipe to see if I was traveling with illegal drugs.  Me.  The mom of 4 who doesn't even have time to breathe, much less deal drugs.  So...I got to go.  I had to run to the gate; got on the plane, and arrived in Paradise (see the palm tree?)...and was picked up by my friends.  See how much fun a layout of mostly embellishments can be?


This next layout is about a girl that is near and dear to my heart.  She has drive and ambition, and strives hard to achieve every goal that she sets for herself.  She is an inspiration to me and to all of my children.  She set out to get her motorcycle license and then bought a motorcycle with money that she earned.  I used the world map paper to signify that she's able to go anywhere with her determination.   


October Afternoon has kept their usual quality and diversity in this line.  I highly recommend it for any traveling layouts that you are going to be scrapbooking soon.  Just remember to print out those pictures.


Thursday, August 25, 2011

Digi & Hybrid Scrapbooking With Designs by Sherri Tierney

This week the A Cherry On Top digi Creative Team decided to feature some of Sherri Tierney's fabulous kits & designs. She has some really fun and whimiscal kits that can meet any of your needs. If you happen to be new to digi scrapping, check out her fabulous quick pages where all you have to do is drop in your picture, add some journaling and VIOLA.... instant digi pages! So go check out Sherri's shoppe and grab some new goodies~


First off we have 3 adorable LO's featuring Janell's absolutely adorable kiddos... by Janell~


Next up we have these fab LO's highlighting Laura's recent trip to Germany~ Laura/Art-Teacher~


Here is a cute LO featuring Angie's son helping make cupcakes~by Angie/nun69~


~Along with some cute little hybrid milk cartons~


Jenn shows us a cute LO with her adorable nieces and nephews ~by jjenni08/Jenn Kellams


An adorable layout of her newest addition to the family from Ronny/Smiley-Scrap8~


And I have to leave you with these AMAZING hybrid luggage tags Ronny made for her kid's backpacks and sports bags:


And here are just a few of the products used for this week's reveal: you can check out Sherri's Shoppe right here :)


Monday, August 22, 2011

How To Design Layouts Using Grids

Posted by Kimandasmo (Cindy):


I am sure you have heard it talked about or read about it...the grid or a grid layout. They are very hot right now.  I am seeing them in magazines, on blogs and in our awesome gallery.  
But what exactly is a grid layout? Well, by definition a grid  is a series of horizontal and vertical lines that meet at 90 degree angles. 
What exactly does that mean and how can you use that in your scrapbooking to make great layouts? Well, I am going to show a few great ways to use grids on your projects. And you may just be surprised how easy they can be to use and what exactly falls under the concept of a grid layout.

TIC TOE BOARD GRID:


For starters we are going to make a layout with a grid that is similar to a tic tac toe board...only using hearts.


For this layout I started with a solid color base and layered on a piece of Bird Cage from Fancy Pants and 100% Perfect from Simple Stories.


Added a row of solid cardstock, that I edged top and bottom with a punched border from Totally Adorable.


Next I matted my photo and adhered it to my layout. 

 
Then, I punched 12 hearts from from 100% Perfect. Next, I placed them in 3 rows of four. I used Pop Dots under some of them to give my layout some dimension.


To finalize my grid a little more, I cute small strips from Totally Adorable and placed them in a tic tac toe style grid around my hearts. I finished off my layout by adding some layered embellishments from Baby Steps Fundamentals and Expressions.


And here is my completed layout.....


QUILT GRID:


The next grid style I am going to show you is more of a quilt like grid. For this layout I utilized the entire space to from my grid.


I started this layout by layering two solid cardstocks. Then I cut 23 2x2 squares from Blossoms and both sides of Dream.


I laid out the squares in a grid on my layered background.


Then before I adhered them I distressed all of the edges.


I finished of the layout with some rolled roses from the same papers, a Fancy Pants It's the Little Things journaling card, and some of the new Mistables scallop ribbon from Pink Paislee.


Here is the finished layout:


DOUBLE GRID:


The next layout I did is using a double grid style layout.


I started by layering my background using Celebrate and Adventure paper from MME. I then cut a quadrillion 1X1 squares( actually it was only 36) and laid them out in three rows, all touching. 


Then, using floss I created a second grid offset on the top of this grid. I did this by going from the middle of one square to the middle of the next.


I matted my photo and placed it on top of my grid. I added a row of Pink Paislee Mistables scalloped ribbon and some embellishments from Everything Layered stickers and Ordinary brads from MME.


Here is my completed layout:


CIRCLE GRID:


My last layout is using a grid of circles.


I started by punching 40 circles from Totally Adorable, Sweet Dreams, So Precious, and Baby Steps.


I lined them all in straight lines, with their sides touching.


To finish off the layout I added embellishments from Fundamentals and Expressions.


Here is the finished layout:


Now that you have seen a variety of ways to utilize grids in your layouts, look around and see what other ways you can make grids work in your scrappy
projects. I bet you will be surprised. Stay tuned next month for the second half of this reveal...Making the Grid...with pictures.